If you’ve ever browsed property listings, you’ve likely come across unfamiliar abbreviations. One of the most common—and often misunderstood—is what MOL means in real estate. This small term can carry big implications for buyers, sellers, and investors.
In simple terms, MOL in real estate stands for “more or less.” However, the real meaning goes deeper than those words alone. It reflects uncertainty in property size and serves as a practical tool in listings where exact measurements are not confirmed.
Understanding the meaning of real estate helps you avoid confusion, make smarter decisions, and protect your investment. Whether you’re buying land, selling a home, or investing in property, knowing how mol acres work can save you time and money.
What Does MOL Mean in Real Estate?
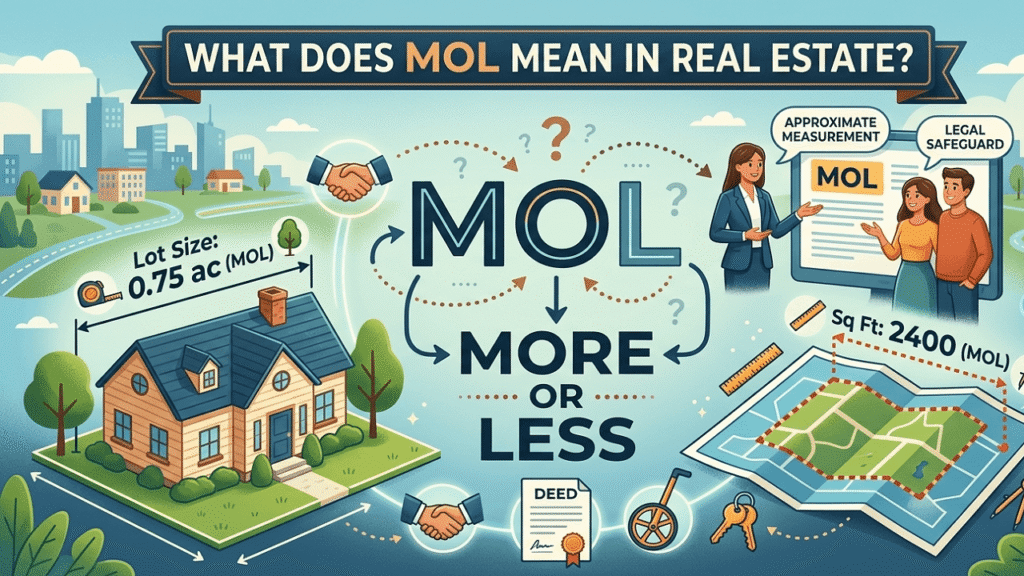
The phrase what does mol mean in real estate refers to the abbreviation “MOL,” which stands for “more or less.” It indicates that the size, dimensions, or quantity of a property is approximate rather than exact.
For example:
“10 acres MOL” means the property is approximately 10 acres.
The actual size could be slightly more or slightly less.
Real estate professionals use MOL when:
Exact measurements are unavailable.
A survey has not been completed.
The listing is based on older or estimated data.
This flexible wording protects sellers while signaling to buyers that they should verify details independently.
What Does MOL Stand for in Real Estate Listings?
When you see what ” mol ” stands for in real estate, the answer is straightforward: More or Less.
However, in practice, it serves several purposes:
It communicates approximation
It reduces legal liability for exact figures.
It gives agents flexibility during early listings.
You’ll often find MOL used in:
Acreage descriptions
Lot sizes
Land parcels
This makes it especially common in rural and undeveloped property listings.
Understanding MOL Acres: A Simple Explanation
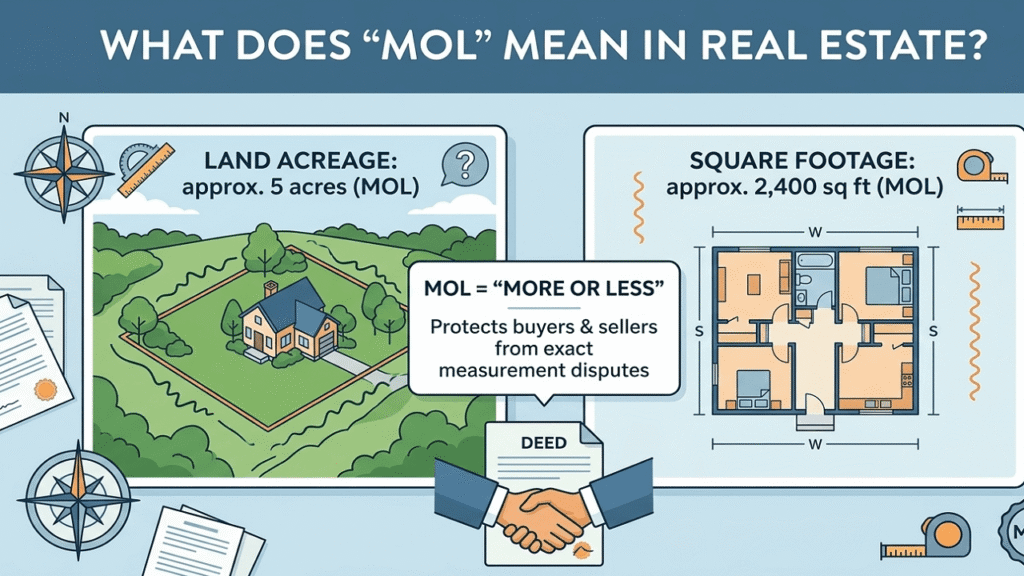
The term mol acres refers to land measurements that are not exact.
For instance:
“5 acres MOL” could mean 4.8 acres or 5.3 acres.
The difference depends on survey accuracy.
This approximation exists because:
Land boundaries may not be clearly defined.
Older records may be outdated.
Natural features can affect measurements.
In short, mol acres provide a general idea, not a guaranteed figure.
Why Do Agents Use MOL in Real Estate?
There are several reasons why professionals rely on mol in real estate:
1. Flexibility in Listings
Agents can list properties quickly without waiting for precise surveys.
2. Legal Protection
Using MOL reduces the risk of disputes over minor discrepancies.
3. Practical Marketing
It allows sellers to present a property without committing to exact numbers too early.
Because of these advantages, the term ” mol meaning real estate has become standard practice in many markets.
How Accurate Are MOL Measurements?
When dealing with what ‘mol’ means in real estate, accuracy is a key concern.
MOL measurements typically:
Are close to actual size
It can vary slightly depending on the source
Should not be considered final
The margin of error can range from:
A few square meters in residential lots
Several acres in large rural properties
To get exact figures, a professional survey is always recommended.
MOL in Real Estate vs Exact Acreage
Understanding the difference between mol acres and exact acreage is critical.
Feature
MOL Acreage
Exact Acreage
Precision
Approximate
Exact
Legal reliability
Limited
High
Use case
Early listings
Final transactions
Exact acreage is usually required for:
Legal contracts
Financing approvals
Property valuation
Meanwhile, mol in real estate is more about convenience and flexibility.
Common Scenarios Where MOL is Used
You will most often encounter mol meaning real estate in these situations:
Rural land sales
Agricultural properties
Large estates
Undeveloped land
In urban areas, MOL is less common because properties are typically surveyed with greater precision.
Benefits of Using MOL in Real Estate Listings
Using what does mol mean in real estate offers several benefits:
Faster Listings
Properties can be marketed quickly without waiting for surveys.
Reduced Liability
Sellers avoid disputes over small measurement differences.
Flexibility
Listings remain adaptable during negotiations.
These advantages make MOL a practical tool in real estate marketing.
Drawbacks and Risks of MOL in Real Estate
Despite its usefulness, mol in real estate has downsides:
Potential Confusion
Buyers may assume the size is exact.
Financial Risks
Small differences can impact property value.
Legal Disputes
Misunderstandings can lead to conflicts.
Because of these risks, buyers must approach MOL listings carefully.
How Buyers Should Interpret MOL Listings
If you’re dealing with mol acres, follow these steps:
Always request a survey
Verify property boundaries
Ask for official documentation
Do not rely solely on listing descriptions
Understanding what mol means in real estate helps you avoid costly mistakes.
How Sellers Should Use MOL Correctly
Sellers should use the term real estate responsibly:
Be transparent about approximations
Encourage buyers to verify details
Avoid misleading descriptions
Clear communication builds trust and reduces disputes.
MOL in Land vs Residential Properties
MOL in real estate appears more often in land transactions than residential sales.
Why?
Land boundaries are harder to define
Surveys may not exist
Larger areas increase uncertainty
Residential properties usually have precise measurements, making MOL less necessary.
Legal Considerations of MOL in Real Estate
Legally, what does “mol” mean in real estate, and how does it affect contracts?
While surveys cost money, they provide peace of mind and prevent disputes.
Tips for Verifying MOL Acreage Before Buying
To safely handle mol in real estate, follow this checklist:
Hire a licensed surveyor
Review land records
Check zoning documents
Confirm boundaries physically
These steps ensure you know exactly what you’re buying.
Real-Life Examples of MOL in Property Listings
Example:
“20 acres MOL with lake access”
Actual size after survey: 19.6 acres
Lesson: Even small differences can affect:
Price
Usage
Investment value
Understanding the meaning of ” mol ” in real estate helps interpret such listings correctly.
Common Misunderstandings About MOL Meaning in Real Estate
Myth 1: MOL means exact size
Reality: It is only an estimate
Myth 2: Differences are always small
Reality: Variations can be significant
Myth 3: Surveys are optional
Reality: They are essential for accuracy
Clearing these misconceptions is key to making informed decisions.
Expert Tips for Buyers and Investors
Never skip due diligence
Use MOL as a guideline, not a fact
Negotiate based on verified data
Work with experienced agents
Smart investors treat what does mol mean in real estate as a starting point, not a final answer.
Personal Insight: Is MOL Good or Bad in Real Estate?
From a practical perspective, mol in real estate is neither good nor bad—it depends on how you use it.
For sellers, it offers flexibility and speed. For buyers, it introduces uncertainty that must be managed carefully.
In my experience, MOL works best when:
Both parties understand its meaning
A survey follows before closing
Problems arise only when assumptions replace verification. So, the real issue is not MOL itself, but how people interpret it.
FAQ Section
What does MOL mean in real estate listings?
MOL in real estate stands for “more or less.” It indicates that the property size or dimensions listed are approximate rather than exact. This term is commonly used when a property has not been recently surveyed or when exact measurements are unavailable. Buyers should treat MOL as a general estimate and not a guaranteed figure. It serves as a disclaimer to protect sellers and agents from liability related to minor discrepancies in size. However, buyers should always verify the actual dimensions through official documents or a professional survey before making a purchase decision.
How much difference is allowed in MOL acres?
There is no fixed rule for the amount of variation allowed in MOL acres. The difference can vary depending on the property type, location, and available records. In smaller residential lots, the variation is usually minimal. However, in large rural or agricultural properties, the difference can be more noticeable. This is why buyers should not rely solely on MOL figures. A land survey is the most reliable way to determine the exact acreage and avoid surprises.
Is MOL legally binding in real estate contracts?
MOL is not legally binding regarding the exact property size. Instead, it acts as a disclaimer indicating approximation. Most real estate contracts include clauses that emphasize the importance of buyer verification. While MOL protects sellers from minor discrepancies, it does not replace the need for accurate documentation. Buyers are responsible for conducting due diligence before finalizing a transaction.
Should I trust MOL acreage when buying land?
You can use MOL acreage as a starting point, but you should not rely on it entirely. It provides a general idea of the property size but does not guarantee accuracy. Before purchasing land, it is essential to verify the acreage through a professional survey and review official records. This ensures that you understand exactly what you are buying and helps prevent disputes or financial loss.
Does MOL affect property value?
Yes, MOL can impact property value, especially if the actual size differs significantly from the estimate. Even small variations in acreage can influence pricing, particularly in high-value or large land transactions. Buyers and investors should base their decisions on verified measurements rather than approximate figures to ensure fair pricing and accurate valuation.
Final Verdict
Understanding what mol means in real estate is essential for anyone involved in property transactions. MOL, which stands for “more or less,” provides a practical way to describe approximate property sizes when exact measurements are unavailable. While it offers flexibility and convenience for sellers and agents, it also introduces a level of uncertainty that buyers must handle carefully.
The key takeaway is simple: MOL should never replace proper verification. It serves as a guideline, not a guarantee. Buyers who rely solely on MOL listings risk misunderstandings, financial discrepancies, and even legal issues. On the other hand, those who take the time to confirm details through surveys and official documents can confidently move forward with their investment.
For sellers, using MOL responsibly means being transparent and encouraging due diligence. This builds trust and helps avoid disputes later in the process.
In today’s real estate market, knowledge is power. By fully understanding mol acres and mol meaning real estate, you position yourself to make smarter, safer, and more informed decisions.
Knotless braids have taken the world of hairstyling by storm, becoming a favorite for those seeking a protective yet stylish look. These braids are a modern twist on classic box braids, offering a sleeker, more natural appearance. Unlike traditional braids, which involve tying a knot at the root of the hair, knotless braids start with your natural hair and gradually incorporate extensions. This technique results in a more seamless and comfortable braid that puts less tension on the scalp, making it a healthier option for your hair.
When it comes to beautiful knotless braid ideas, the possibilities are truly endless. From sleek, elegant styles to bold, creative looks, there’s a knotless braid style for everyone. Whether you’re looking for a professional hairstyle, a festival-ready look, or something in between, knotless braids offer versatility, longevity, and beauty.
This article explores 20 stunning knotless braid ideas that inspire your next hair transformation. These styles not only protect your hair but also allow you to express your style in various ways. Let’s dive into the world of knotless braids and discover the best options for your next look.
What are Knotless Braids?
Knotless braids are a variation of traditional box braids that have gained immense popularity due to their sleek, natural appearance and reduced tension on the scalp. Unlike traditional braids, which begin with a knot at the root of the hair, knotless braids are created using a feed-in technique. This method starts with the person’s natural hair, gradually adding extensions in small sections as the braiding progresses, resulting in a smoother, more seamless finish.
The absence of the knot at the base makes knotless braids gentler on the scalp, minimizing the chances of hair breakage, tension headaches, and scalp discomfort that are sometimes associated with traditional braiding methods. This style is particularly beneficial for individuals with sensitive scalps or fine hair.
Key Features of Knotless Braids:
Natural Look: Without the visible knot at the root, knotless braids blend naturally into the scalp, giving the appearance of hair growing directly from the roots.
Less Tension: The feed-in method places significantly less stress on the scalp, reducing the risk of traction alopecia (hair loss due to constant pulling).
Long-lasting: With proper care, knotless braids can last 4-6 weeks, making them a low-maintenance, long-term styling option.
Versatile: Knotless braids come in various sizes and lengths, from small, intricate braids to jumbo, bold styles. They can also be styled in multiple ways, allowing for creativity in appearance.
Overall, knotless braids are an excellent option for anyone looking for a protective hairstyle that combines beauty, comfort, and versatility. They are ideal for busy individuals who need a long-lasting, low-maintenance hairstyle while still looking polished and stylish.
Benefits of Knotless Braids
Knotless braids have quickly become a go-to hairstyle due to their numerous advantages over traditional braiding methods. They are visually appealing and offer practical benefits, particularly for those seeking a protective hairstyle that promotes hair health. Below are some of the key benefits of opting for knotless braids:
1. Reduced Tension and Scalp Protection
One of the standout benefits of knotless braids is the reduced tension on the scalp. Since they do not start with a knot at the root, these braids are gentler and cause less pulling on the hair. This minimizes the risk of traction alopecia, where constant pulling at the roots can lead to hair loss. The feed-in technique distributes the weight of the hair extensions more evenly, resulting in a more comfortable experience, especially during the initial days of wearing the style.
2. Natural and Seamless Appearance
Knotless braids provide a more natural look compared to traditional box braids. Without the bulky knot at the base, the braids appear to grow directly from the scalp, creating a smooth and seamless finish. This makes knotless braids more versatile, as they blend effortlessly with your natural hair and are ideal for any occasion, casual or formal.
3. Less Breakage and Hair Damage
Traditional braids can cause significant hair damage due to the tension at the roots. With knotless braids, the feed-in technique reduces stress on your natural hair, preventing breakage and split ends. This is especially important for individuals with delicate or fragile hair prone to damage from tight styles.
4. Long-lasting and Low Maintenance
Knotless braids are a long-lasting hairstyle, typically lasting anywhere from 4 to 6 weeks with proper care. They are relatively low-maintenance, as you won’t need time to style your hair daily. Simple care routines, such as keeping your scalp moisturized and wrapping your braids at night, will help maintain the freshness and longevity of the style.
5. Versatility in Styling
One of the most attractive benefits of knotless braids is their versatility. These braids come in various sizes, from small and intricate to large and bold. You can also choose from different lengths, colors, and patterns, allowing you to express your creativity. Knotless braids are easily styled into updos, buns, ponytails, or even left loose for a more relaxed look.
6. Less Pain and Discomfort
Many people who wear traditional braids report discomfort or even headaches, especially in the first few days, due to the tight knots at the scalp. With knotless braids, this issue is significantly reduced. The gradual feeding in of extensions eliminates the tightness, making knotless braids more comfortable to wear right from the start.
7. Scalp Access and Health
Knotless braids offer better access to your scalp compared to traditional braids. This makes it easier to keep your scalp clean and moisturized, reducing the risk of itchiness, flakiness, and buildup. Regularly cleaning and moisturizing your scalp is essential for maintaining overall hair health while wearing a protective style.
8. Suitable for All Hair Types
Knotless braids can be customized to suit any hair type, whether you have natural, relaxed, or chemically treated hair. The feed-in method works well on thick and fine hair, making it a flexible option for various textures and densities.
9. Reduced Frizz
Knotless braids tend to frizz less over time compared to traditional braids. Since the braids begin with natural hair, they have a more cohesive look, which helps minimize frizz, allowing the style to remain neat and polished for longer.
10. Perfect for Sensitive Scalps
For individuals with sensitive scalps, knotless braids are an ideal option. The gentler technique means less irritation, discomfort, or inflammation, making it a safer protective style for those prone to scalp sensitivity.
Different Types of Knotless Braids
Knotless braids come in various styles, sizes, and designs, offering endless possibilities for those seeking a versatile and protective hairstyle. Whether you’re aiming for a classic look or something more daring, there’s a knotless braid type for every occasion. Below are some of the most popular and beautiful types of knotless braids to inspire your next hairstyle:
1. Small Knotless Braids
Small knotless braids are intricate and take longer to install, but the results are stunning. They are perfect for those who prefer a more detailed and refined look. Small knotless braids are versatile, allowing for multiple styling options, such as buns, ponytails, and half-up styles. They’re also lightweight, making them comfortable for an extended period.
2. Medium Knotless Braids
Medium knotless braids balance the intricate small braids and the bold look of large braids. They are quicker to install than smaller braids but provide enough detail for a polished and stylish appearance. Medium knotless braids are an excellent option for those who want a stylish yet practical hairstyle that isn’t too heavy or time-consuming.
3. Large Knotless Braids
Large knotless braids are the way to go for a bolder, more dramatic look. These braids are quicker to install because they are larger and give a more statement-making appearance. Large knotless braids are perfect for individuals who prefer a more minimal look that can be easily styled in various ways, such as high ponytails or oversized buns.
4. Blonde Knotless Braids
Blonde knotless braids are popular for those looking to add a pop of color and brightness to their style. Whether opting for an all-over blonde look or incorporating blonde highlights, these braids contrast sharply against darker hair. Blonde knotless braids are perfect for summer and can make your overall appearance stand out in the crowd.
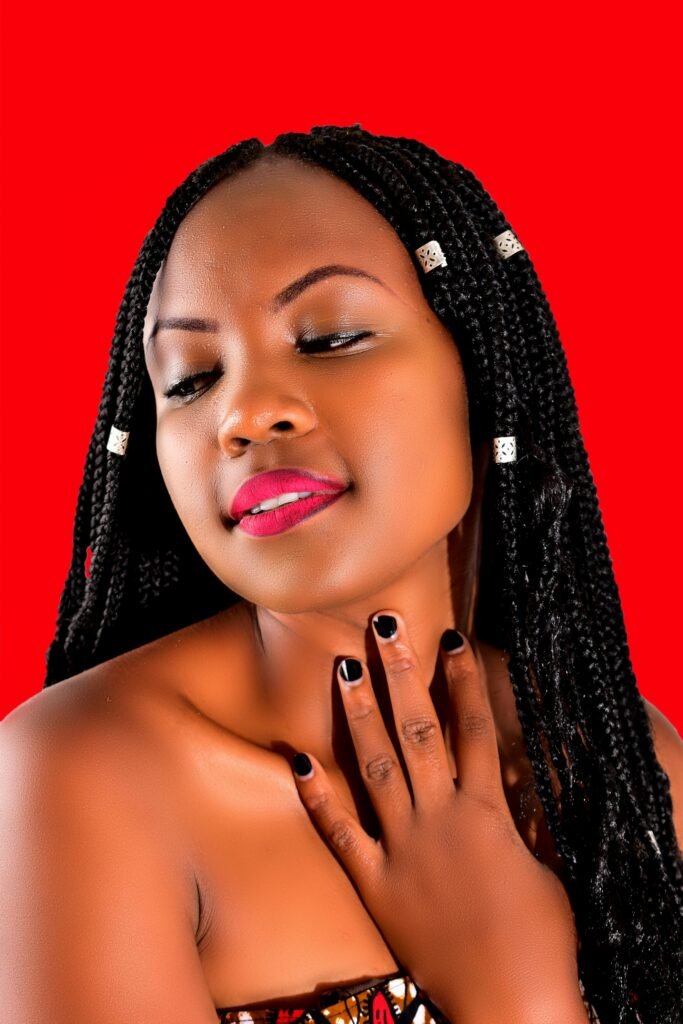
5. Knotless Braids with Beads
Beads are a fun and creative way to accessorize knotless braids. Adding beads to the ends of your braids can elevate your style, giving it a bohemian or tribal-inspired flair. You can choose from wooden, metallic, or colorful beads depending on your taste and the look you want to achieve.
6. Ombre Knotless Braids
Ombre knotless braids transition from one color to another, creating a beautiful gradient effect. This style adds depth and dimension to your braids, making them more visually attractive. Ombre knotless braids are available in various color combinations, from subtle dark-to-light shades to bold and vibrant hues like pink, blue, or purple.
7. Bohemian Knotless Braids
Bohemian knotless braids blend the traditional braid look with a more carefree, relaxed vibe. These braids incorporate loose, curly hair into the style, giving them a soft and whimsical appearance. Bohemian braids are perfect for those who want a more natural, undone look while enjoying a protective style’s benefits.
8. Knotless Braids with Curly Ends
Adding curls to the ends of your knotless braids is a great way to give them a softer and more feminine look. The curls can be created using perm rods, flexi rods, or braiding hair that comes pre-curled. Knotless braids with curly ends are versatile and can be styled up or down, giving your overall look a playful yet elegant touch.
9. Goddess Knotless Braids
Goddess knotless braids are known for their luxurious and voluminous appearance. These braids typically incorporate curly or wavy hair extensions, giving them a regal, goddess-like aesthetic. This style is perfect for those looking to make a bold statement with their hairstyle, offering a mix of texture and dimension.
10. Triangle Part Knotless Braids
For a unique twist on traditional square parts, triangle-part knotless braids offer a geometric and modern look. This parting technique creates triangular sections instead of the usual squares or rectangles, giving the braids a more artistic and edgy appearance. Triangle-part knotless braids are significant for those looking to add an element of creativity to their style.
11. Jumbo Knotless Braids
Jumbo knotless braids are thick, bold, and perfect for those who want a standout hairstyle with minimal installation time. These braids are more significant, making them quicker to install while providing a striking visual impact. Jumbo knotless braids are ideal for individuals who want a bold and dramatic look without spending hours in the stylist’s chair.
12. Knotless Braids with Highlights
Incorporating highlights into knotless braids is a fantastic way to add dimension and contrast to your hairstyle. Whether you opt for subtle caramel highlights or bold, bright hues, this style gives a layered look that enhances your braids’ texture and overall appeal.
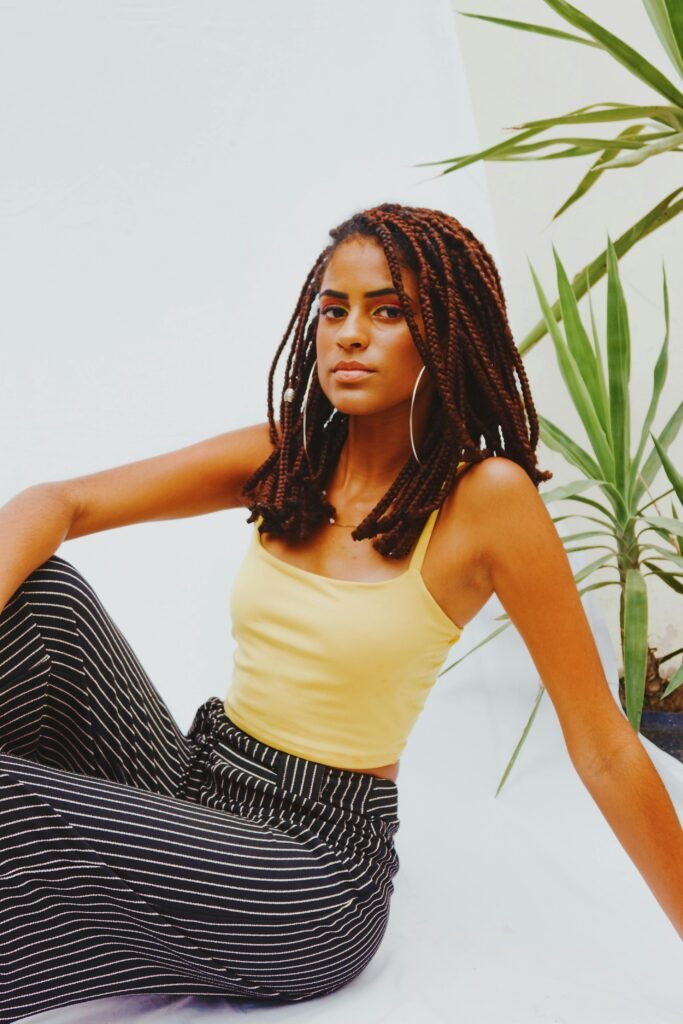
13. Burgundy Knotless Braids
Burgundy is a rich and bold color choice that works well with knotless braids. This deep red hue adds a touch of sophistication and flair, making it perfect for fall or winter hairstyles. Burgundy knotless braids are a great way to stand out while keeping your look elegant and stylish.
14. Knotless Braids into a Bun
One of the best things about knotless braids is their flexibility in styling. Knotless braids can be gathered into a high or low bun for a clean, chic look. This style is perfect for professional settings or when you need a neat, polished appearance without sacrificing style.
15. Knotless Braids Bob Style
A knotless braid bob is a trendy and fresh option for those looking for a shorter hairstyle. The bob style is chic, low-maintenance, and ideal for hot weather or anyone who prefers a shorter look. Knotless braid bobs are easy to manage while still offering versatility in styling.
16. Knotless Braids with Zigzag Parts
Zigzag parts add a fun and creative element to knotless braids. Instead of the usual straight parts, zigzag sections offer a dynamic and eye-catching look that adds texture and depth to the overall style. This is an excellent choice for individuals experimenting with their parting patterns.
17. Knotless Braids Ponytail
A knotless braid ponytail is a sleek and sophisticated style that can be dressed up or down. Pulling your knotless braids into a high or low ponytail gives a clean, elegant appearance perfect for casual and formal occasions.
18. Waist-Length Knotless Braids
Waist-length knotless braids are the perfect option for those who love long, flowing braids. These extra-long braids create a stunning and dramatic look, ideal for individuals who want to make a statement. Despite their length, the knotless technique ensures they remain lightweight and comfortable.
19. Knotless Braids with Colorful Extensions
Adding colorful extensions to knotless braids is a bold and fun way to express your personality. Whether you opt for vibrant neon colors or subtle pastel shades, colorful knotless braids can make a striking impact and are perfect for festivals, summer looks, or just adding a pop of color to your everyday style.
20. Half-Up, Half-Down Knotless Braids
A half-up, half-down style is popular for those who want the best of both worlds. This style lets you show off the length of your braids while keeping them out of your face. It’s a versatile option that works well for both casual outings and special occasions.
20 Beautiful Knotless Braids Ideas
Knotless braids have rapidly gained popularity due to their natural look, flexibility, and comfortable feel. Unlike traditional braids, knotless braids do not begin with a bulky knot at the base, making them less painful and less likely to cause scalp tension. Whether going for a casual look or preparing for a formal event, knotless braids offer versatility in styling, length, and color. Below are 20 beautiful knotless braid ideas to inspire your next hairstyle:
1. Classic Black Knotless Braids
This timeless style features sleek, shiny black braids that exude elegance. Classic black knotless braids can be styled in various ways, from flowing loose to intricate updos, making them ideal for any occasion.
2. Knotless Braids with Curls
Add a twist to your look by incorporating loose curls at the ends of your braids. Combining braids and curls adds volume and a playful texture, perfect for a more feminine and romantic look.
3. Blonde Knotless Braids
Blonde knotless braids are a standout style that can bring brightness and warmth to your appearance. Whether you choose a platinum blonde or a honey-toned shade, these braids will turn heads.
4. Ombre Knotless Braids
For a modern and chic vibe, opt for ombre knotless braids. The gradual fade from dark roots to lighter ends adds depth and dimension, making your braids look dynamic and visually engaging.
5. Knotless Braids with Beads
Accessorizing knotless braids with beads is a great way to elevate your hairstyle. You can add beads of various sizes and colors at the ends or throughout the braids, giving your look a personalized and stylish touch.
6. Burgundy Knotless Braids
Burgundy braids offer a bold, rich color choice that complements all skin tones. These deep red braids make a statement while maintaining a sophisticated and elegant appearance.
7. Jumbo Knotless Braids
For those who prefer larger braids, jumbo knotless braids are perfect. These thick, chunky braids are quicker to install and provide a bold, eye-catching, practical, and fashionable look.
8. Bohemian Knotless Braids
Bohemian knotless braids combine braids with loose, wavy hair to create a relaxed and carefree style. This boho-inspired look is ideal for festival-goers or anyone looking for a laid-back yet stylish vibe.
9. Triangle Part Knotless Braids
Try triangle part knotless braids instead of the standard square or rectangular partings. This geometric pattern adds an edgy and unique flair to your overall look, making your braids stand out even more.
10. Knotless Braids with Colored Tips
For a fun pop of color, consider adding colorful tips to your knotless braids. Whether you choose vibrant pinks, blues, or purples, colored tips add an element of surprise and creativity to your hairstyle.
11. Knotless Braids Bob
The knotless braid bob is a trendy option for those who prefer shorter hair. This shoulder-length or chin-length style is chic, lightweight, and easy to maintain, offering a fresh and modern look.
12. Waist-Length Knotless Braids
For those who love long braids, waist-length knotless braids are the ultimate choice. These long, flowing braids create a dramatic, glamorous look that will grab attention.
13. Knotless Braids with Zigzag Parts
Zigzag partings add a playful and unique design element to your knotless braids. This unconventional parting style can make your braids look more intricate and creative, giving your hairstyle an artistic touch.
14. Knotless Braids in a High Bun
Gather your knotless braids into a high bun for a sleek and professional look. This style keeps your braids off your face and neck while maintaining a polished and stylish appearance, perfect for work or formal events.
15. Knotless Braids with Highlights
Add dimension to your braids by incorporating subtle highlights. Whether you opt for caramel, honey, or ash-blonde highlights, this technique adds depth and contrast, enhancing the beauty of your knotless braids.
16. Knotless Braids with Accessories
Adorn your braids with hair cuffs, shells, and string wraps to give them a more personalized and stylish appearance. Hair accessories add flair and individuality to your knotless braids, allowing you to customize your look.
17. Knotless Braids with a Side Part
Try a side part with your knotless braids for a chic and polished look. This simple adjustment can give your face a different shape and highlight your best features, creating a flattering and elegant style.
18. Half-Up, Half-Down Knotless Braids
A half-up, half-down style allows you to enjoy the length of your braids while keeping some of them out of your face. This versatile look is perfect for casual days and more formal events, offering the best of both worlds.
19. Knotless Braids with a Scarf
Incorporating a scarf into your knotless braids is a fashionable way to add color and pattern to your hairstyle. You can wrap the scarf around the base of a ponytail or use it as a headband to accessorize your look.
20. Blonde Ombre Knotless Braids
For a combination of two trendy looks, go for blonde ombre knotless braids. The gradual transition from darker roots to blonde ends offers a sun-kissed effect that is both bold and beautiful.
How to Maintain Knotless Braids for Longevity
Knotless braids are a stylish and low-maintenance protective hairstyle, but proper care is essential to ensure they last longer while keeping your natural hair healthy. Here are vital tips on how to maintain knotless braids for maximum longevity:
1. Keep Your Scalp Clean
Cleanliness is crucial to preventing buildup and irritation. It would be best to cleanse your scalp weekly or biweekly, depending on your activity level. Use a diluted sulfate-free shampoo or a dry shampoo made explicitly for braids. Be gentle while washing, focusing on the scalp rather than the length of the braids. Use a nozzle or applicator bottle to target the roots and massage the scalp gently.
Tip: After cleansing, use a lightweight leave-in conditioner or braid spray to moisturize the hair and scalp.
2. Moisturize Regularly
Keep your scalp and braids moisturized to maintain healthy hair underneath the braids. Dryness can lead to breakage, so regularly apply a lightweight oil (such as jojoba or argan oil) to the scalp and braid length. A braid spray with added moisture and nutrients can also help maintain softness and shine.
Tip: Focus on hydration without over-saturating your braids to prevent buildup and mold growth.
3. Protect Your Braids at Night
Sleep plays a crucial role in braid maintenance. To protect your knotless braids from friction and frizz, always cover them with a silk or satin bonnet, scarf, or pillowcase at night. This reduces moisture loss and prevents braids from becoming rough or tangled.
Tip: Use a loose-fitting bonnet or scarf that won’t compress your braids, helping them maintain their shape and volume.
4. Avoid Heavy Products
Avoid using heavy creams, gels, or thick oils on your braids, as these can lead to buildup, cause stiffness, and make your braids look dull. Lightweight, water-based products are preferable for keeping your braids and scalp fresh without unnecessary product residue.
Tip: If you notice a buildup, gently wipe your braids with a damp cloth and a clarifying braid spray between washes.
5. Touch Up Your Edges
Over time, your edges may loosen, and new hair growth will become visible. To maintain a neat appearance, you can touch up the roots of your braids along the hairline. Use an edge control gel or a light pomade to smooth down any flyaways and keep your edges looking sleek.
Tip: Avoid pulling the edges too tight to prevent damage to the hairline.
6. Minimize Manipulation
The less you manipulate your braids, the longer they’ll last. While knoManipulation is versatile and can be styled in various ways, frequent styling or tight updos can strain the roots and shorten their lifespan. Try to minimize tugging or pulling on the braids.
Tip: When styling, choose looser options like low buns or ponytails to reduce tension on your scalp.
7. Manage Frizz and Flyaways
Frizz is natural over time, especially if your hair is prone to it. You can tame frizz by applying a small amount of lightweight oil or mousse to smooth the surface of your braids. Wrapping your hair a few minutes after using the product can also help flatten and control flyaways.
Tip: If frizz becomes excessive, consider redoing a few braids at the front or around the edges.
8. Avoid Overwearing
While knotless braids can last up to 8 weeks with proper care, it’s essential not to overwear them. Keeping braids in too long can lead to matting, buildup, and hair breakage. Aim to keep your knotless braids for 6-8 weeks, but always listen to your hair and remove them earlier if needed.
Tip: After removing your braids, give your hair a break before reinstalling to avoid stress on your scalp.
9. Be Gentle When Removing
When removing your knotless braids, be patient and gentle to avoid damaging your natural hair. Detangle the braids slowly, applying a detangling spray or conditioner to ease the process. Once all the braids are removed, wash and deep condition your hair to restore moisture and strength.
Tip: After removing the braids, use a wide-tooth comb to gently detangle your hair, starting from the ends and working your way up to the roots.
By following these maintenance tips, you can keep your knotless braids looking fresh, shiny, and well-preserved for their wear. Proper care ensures the longevity of the style and the health and strength of your natural hair.
Personal Opinion on Knotless Braids
Knotless braids have revolutionized how we approach protective hairstyles, blending beauty and practicality. One of the standout qualities of knotless braids is the comfort they provide compared to traditional braids. In my experience, the absence of a bulky knot at the base of each braid makes the style much gentler on the scalp, which is a massive advantage for anyone prone to tension headaches or sensitive scalps. The braids’ natural flow and lightweight feel make them a joy to wear for extended periods.
Additionally, I believe knotless braids offer unparalleled versatility in terms of styling. Because they start with your natural hair, they lay flat and look more seamless, making them perfect for those who enjoy experimenting with various updos, ponytails, or even leaving the braids down for a more casual look. This adaptability stands out, especially for individuals with busy lifestyles who want a hairstyle that transitions smoothly from professional to relaxed settings.
However, while knotless braids have many benefits, it’s important to note that they require more time during installation than traditional braids. This trade-off is worthwhile, given the extended wear and reduced tension, but it’s a consideration for anyone with limited time for styling sessions. Despite the longer installation time, I see knotless braids as an excellent investment for long-term wear and hair protection.
In conclusion, knotless braids are more than just a fashion trend—they represent a shift towards healthier and more sustainable hair care practices. They balance aesthetics with hair health, offering a protective and stunning style. Knotless braids are undoubtedly worth considering for anyone seeking a low-maintenance yet stylish protective hairstyle.
FAQs About Knotless Braids
1. What are knotless braids, and how are they different from traditional braids?
Knotless braids are a variation of traditional box braids where the stylist starts braiding your natural hair first, gradually adding extensions as they braid. Unlike traditional braids, there is no knot at the base, resulting in less scalp tension and a more natural look. This technique also makes them more comfortable to wear and reduces the risk of breakage.
2. How long do knotless braids last?
With proper care, knotless braids can last between 6 to 8 weeks. The duration depends on the quality of installation, hair type, and maintenance routine. Regular moisturizing, cleaning the scalp, and protecting the braids at night can help prolong their lifespan.
3. Do knotless braids hurt?
No, one key benefit of knotless braids is that they are much gentler on the scalp compared to traditional braids. The absence of a knot at the base reduces tension and makes the braiding process less painful. If you have a sensitive scalp, knotless braids are a great option.
4. Can I wash my knotless braids?
Yes, you can wash your knotless braids. It’s essential to cleanse your scalp to avoid buildup and keep it healthy. Use a diluted, sulfate-free shampoo and focus on cleaning your scalp without roughing up the braids too much. Always follow up with a leave-in conditioner or braid spray to maintain moisture.
5. How long does it take to install knotless braids?
The installation process for knotless braids can take anywhere from 4 to 8 hours, depending on the size and length of the braids and the stylist’s speed. While they take longer to install than traditional braids, many believe the benefits—like less tension and a more natural look—are worth the extra time.
6. Are knotless braids suitable for all hair types?
Yes, knotless braids, from fine to coarse textures, can work for all hair types. However, the technique and products used may vary depending on the hair type to ensure the best results and longevity. Consult with a professional stylist who is experienced with different hair types for the best outcome.
7. Can I swim with knotless braids?
Yes, you can swim with knotless braids, but you must take a few precautions. Before swimming, apply a leave-in conditioner or oil to your braids to create a protective barrier. After swimming, rinse the braids thoroughly with clean water to remove chlorine or salt and follow up with a moisturizing braid spray.
8. Do knotless braids cause hair breakage?
Knotless braids are considered less damaging than traditional braids because they put less tension on the scalp and hair. However, leaving braids too lengthy or improperly moisturizing and caring for your scalp can still lead to breakage. Removing the braids gently and on time also helps prevent damage.
9. How can I prevent frizz with knotless braids?
To prevent frizz, moisturize your braids using a light braid spray or oil. Protect your braids at night by wearing a silk or satin bonnet or scarf. Avoid frequent manipulation, and if frizz becomes noticeable, you can apply mousse or a frizz contrManipulationo to smooth the surface of your braids.
10. What is the cost of knotless braids?
The cost of knotless braids can vary depending on factors like location, stylist experience, braid size, and length. On average, knotless braids can range from $150 to $400 or more. While they may be more expensive than traditional braids, the benefits often justify the higher price.
Dutch braids have become a timeless choice for wedding hairstyles, offering a blend of elegance, versatility, and modern appeal. Characterized by their distinctive reverse-braid technique, Dutch braids sit on top of the hair, creating a bold, textured look that adds depth and sophistication to any style. For brides seeking a practical and stunning hairstyle, Dutch braids provide the perfect balance, ensuring you look flawless from the ceremony to the reception.
Their growing popularity stems from their adaptability—they suit a variety of wedding themes, from classic to bohemian, and can be styled in numerous ways to complement different bridal aesthetics. Whether worn as an intricate updo, a romantic half-up, half-down style, or adorned with accessories for a personalized touch, Dutch braids offer endless options for customization.
In this article, we will explore why Dutch braids are an ideal choice for brides, provide styling inspiration for various wedding themes, and offer expert advice on achieving the perfect look for your special day.
Why Choose Dutch Braids for Your Wedding?
When planning your bridal look, your hairstyle should reflect your style and complement your wedding theme. Dutch braids have emerged as a favored choice for brides, not only because of their aesthetic appeal but also because of their practicality and versatility.
1. Timeless Elegance
Dutch braids exude a sense of classic beauty that transcends trends. Their structured, three-dimensional appearance offers a more defined and polished version of traditional braids. This makes Dutch braids a perfect fit for brides seeking a timeless that won’t feel dated in photographs years later. Dutch braids can elevate any bridal ensemble, whether paired with a chic updo or woven into cascading curls.
2. Versatility in Styling
One of the most compelling reasons to choose Dutch braids is their flexibility in design. Dutch braids can be styled in various ways, making them suitable for almost any wedding theme:
Updos: Perfect for brides seeking a sleek, elegant style, Dutch braids can be twisted into beautiful updos that keep hair neatly in place throughout the day.
Half-Up, Half-you’reIf you’re aiming for a more relaxed and romantic look, Dutch braids can form the base of a half-up, half-down hairstyle, adding texture and volume.
Bohemian Styles: For boho brides, loose Dutch braids woven with flowers or accessories add a carefree yet stylish vibe, ideal for rustic or outdoor weddings.
3. Works with All Hair Textures and Lengths
Another advantage of Dutch braids is their adaptability to different hair types and lengths. Dutch braids work seamlessly with any texture, whether straight, wavy, or curly hair. Even brides with shorter hair can achieve stunning Dutch braid styles by incorporating hair extensions for added length, and fullnbraids’e braids’ intricate nature allows for creativity, regardless of your hair’s size or thickness.
4. Long-lasting and Secure
On your wedding day, the last thing you want to worry about is your hair falling out of place. Dutch braids are not only beautiful but also incredibly secure. Their tight, underhand weaving technique ensures that the style stays intact for hours, withstanding the dancing, photoshoots, and the hustle of a wedding day. This makes Dutch braids a practical choice for brides who want a low-maintenance hairstyle that remains flawless from start to finish.
5. Perfect for Accessories
Dutch braids offer the perfect canvas for bridal hair accessories. Dutch braids can be enhanced with various adornments that suit your bridal theme. The structure of the braids allows for accessories to be easily woven in, adding a personalized touch that enhances your overall look.
In summary, Dutch braids provide a versatile, elegant, practical hairstyle option for brides. Whether you’re looking for a timeless updo, a boho-inspired look, or a style that can carry beautiful accessories, Dutch braids are a perfect match for your wedding day.
Step-by-Step Guide to Dutch Braids
Creating the perfect Dutch Braid for your wedding day requires careful planning and technique. While Dutch braids may look intricate, with some practice and preparation, you can achieve a stunning bridal look that will stay intact throughout your special day. Below is a step-by-step guide to help you or your stylist create flawless Dutch braids.
1. Prepping Your Hair
Preparation ensures your braids are smooth, neat, and long-lasting. Follow these steps to prep your hair for the perfect Dutch braids:
Clean and Condition: Start with freshly washed and conditioned hair. Avoid overly moisturizing products that make your hair slippery and more challenging to Braid.
Blow-Dry and Detangle: Blow-dry your hair until it is scorched. This will help your braids look sleek and prevent any frizz. Make sure to detangle your hair with a brush or wide-tooth comb thoroughly.
Add Texture: Dutch braids hold better with some texture. Apply a texturizing spray or mousse to your hair for added grip, especially if you have delicate or silky hair. For thicker hair, using a lightweight serum can help tame flyaways.
2. Creating the Dutch Braid
Now that your hair is ready, it’s time to start braiding. The Dutch braid technique involves underhand braiding hair, creating a raised, 3DHere’st. Here’s how to achieve the look:
Part Your Hair: Decide where you want your braids to start. For a symmetrical look, part your hair down the middle. For a side braid, create a deep side part.
Section the Hair: Starting at your part, take a small section of hair from the front of your head. Divide it into three equal strands. Hold the left strand in your left hand, the right strand in your right hand, and the middle strand in between.
Braid Underhand: Unlike traditional braids where you braid overhand, in a Dutch braid, you will cross each strand under the middle section:
Cross the Right Strand Under Cross Cross the right strand under the middle strand.
Cross the Left Strand Under: Next, take the left strand and cross it under the new middle strand.
Add Hair: After the first cross, begin adding small sections of hair from each side as you continue braiding. As you cross the right strand under the middle, add a small section of hair from the right side of your head. Do the same on the left side.
Repeat: Continue this process, crossing strands under and adding more hair with each step until you reach the nape of your neck.
3. Finishing the Bryou’ve
Once you’ve braided down to the nape of your neck and included all of your hair, you have a few styling options depending on the look you want:
For a Full-Length Braid, Continue braiding the remaining hair until you reach the ends. Secure with a clear elastic band.
For an Updo, Twist the remaining Braid into a low bun or tuck it under itself to create an elegant updo. Secure it with bobby pins.
Half-Up, Half-Down: If you prefer a half-up style, stop braiding when you reach the middle of your head. Tie off the braids and leave the remaining hair loose and wavy.
4. Ensuring Long-Lasting Braids
Wedding days are long, so ensuring your Dutch braids last through the entire event is essential. Here are a few pro tips to keep your braids looking fresh:
Use a Holding Spray: Lightly spritz your braids with a flexible-hold hairspray. This will keep flyaways in check without stiffening your hair.
Secure with Pins: Use bobby pins to tuck in loose sections and secure the braids at the back of your head for extra security.
Avoid Touching: While adjusting your hair throughout the day is tempting, avoid touching or fidgeting with your braids to prevent them from loosening.
Following this step-by-step guide, you can achieve the perfect Dutch Braid that is stylish, secure, and ready to shine on your wedding day. Whether you opt for a full braid, an elegant updo, or a romantic half-up style, Dutch braids offer endless versatility for a bride looking for an iconic and long-lasting hairstyle.
Dutch Braid Styles for Different Wedding Themes
One of the best aspects of Dutch braids is their adaptability to various wedding themes. Whether your special day is steeped in classic elegance, laid-back bohemian charm, or contemporary chic, Dutch braids can complement the aesthetic and enhance your bridal look. Below, we explore some popular Dutch braid styles that align perfectly with wedding themes.
1. Classic and Traditional Wedding
For brides who opt for a more formal or traditional wedding, Dutch braids can add a sophisticated twist to an otherwise classic look. Here are some ideas:
Low Braided Bun: A low bun created from Dutch braids is an elegant, polished option. After braiding your hair, twist the Braid into a bun at the nape of your neck. This timeless look pairs beautifully with a cathedral veil and formal wedding gowns with clean lines or lace detailing.
Crown Dutch Braid: The crown braid, where the Dutch Braid encircles your head like a halo, is another classic style. It gives a regal, queen-like appearance, especially when adorned with pearl pins or delicate jeweled combs. This style works well with high-neck gowns or dresses with intricate back details.
2. Bohemian and Outdoor Wedding
Boho weddings are about effortless beauty, natural elements, and a carefree vibe. Dutch braids fit perfectly into this theme, offering a chic yet relaxed style that complements the laid-back atmosphere of an outdoor wedding.
Loose Dutch Braids with Flowers: For a romantic boho look, consider wearing loose Dutch braids that cascade down your back or fall to one side. Weave small flowers, like dababy’sor baby’s breath, into the Braid for a whimsical, nature-inspired touch. This style pairs perfectly with flowing, ethereal dresses made from lightweight fabrics.
Half-Up, Half-Down Dutch Braid: If you want a style that embraces both the casual and sophisticated sides of a boho wedding, try a half-up, half-down Dutch Braid. The Braid keeps your hair from your face while allowing loose waves to flow freely down your back. Add a floral crown or leafy headpiece to enhance the bohemian vibe.
3. Rustic and Barn Wedding
Rustic weddings often occur in barns, farms, or other rural settings, and the Dutch Braid is an excellent choice for this relaxed, earthy theme. These weddings focus on simplicity, charm, and a natural look; your hair should reflect that.
Double Dutch Braids into a Messy Bun: This casual yet chic style features two Dutch braids that meet in the back, where the remaining hair is twisted into a messy bun. The look is low-maintenance and perfect for a day filled with outdoor activities, like dancing and mingling with guests. Rustic brides can add twine or small blooms for a charming, country-inspired touch.
Side Dutch Braid with Curls: Another great option is a side Dutch braid that flows into loose, voluminous curls. This combination of braid and curls is effortlessly romantic and perfect for rustic settings. The soft curls add volume and dimension to the overall look, while the side braid keeps the style grounded.
4. Modern and Contemporary Wedding
For the modern bride, Dutch braids can be styled in sleek, chic ways that align with minimalistic and contemporary wedding themes. These styles often feature clean lines, high fashion, and a sophisticated look.
Sleek Dutch Braid Ponytail: A high ponytail featuring a Dutch braid is a bold, fashion-forward option for modern brides. The Braid adds texture and interest to the sleek ponytail, while the pulled-back style keeps your look minimal and elegant. This works exceptionally well with contemporary bridal gowns that feature clean lines and unique cuts.
Double Dutch Braids into a High Bun: Try two Dutch braids fed into a high, twisted bun for a more edgy look. This modern style is practical and trendy, perfect for brides who want to balance sophistication with a touch of urbaItIt’sr. It’s a stunning look for brides wearing modern gowns with architectural silhouettes or statement accessories.
5. Vintage or Retro Wedding
Drawing inspiration from specific decades can create a charming, nostalgic look for brides planning a vintage-themed wedding. Dutch braids can be styled in ways that evoke the glamour and romance of eras gone by.
1920s-Inspired Dutch Braid Updo: For a vintage look reminiscent of the 1920s, consider a Dutch braid updo with finger-wave curls at the front. This combination of structured braids and soft, sculpted waves creates a look of old Hollywood glamour. Perfect for a Gatsby-inspired wedding, this hairstyle complements beaded gowns and art-deco accessories.
1940s Victory Roll with Dutch Braids: Another retro style involves pairing Dutch braids with vintage victory rolls. The victory rolls are a staple of 1940s fashion, and combined with braids, they create a unique and authentic throwback style. This look is ideal for brides seeking a retro vibe with a modern twist.
6. Beach Wedding
For a seaside or destination wedding, Dutch braids offer a practical yet beautiful solution to keep your hair in place in breezy, humid environments. Here are a couple of beachy braid styles:
Dutch Braid with Tousled Waves: This style pulls back the front of your hair in a Dutch braid while leaving the rest in loose, beachIt’svesreIt’sda reIt’sd, effortless look that matches the laid-back vibe of a beach wedding. ThBraidid helps control hair in windy conditions, while the waves keep the style soft and romantic.
Fishtail-Dutch Braid Combo: Combining a Dutch braid with a fishtail braid gives you a unique, textured look perfect for a beach setting. Start with a Dutch braid at the top, then transition into a fishtail braid for a mermaid-inspired style. This braided combination looks stunning with flowy, bohemian-style dresses and can be accented with seashells or beach-themed accessories.
Conclusion
Dutch braids are a highly versatile option that can be tailored to fit any wedding theme. Whether your big day is about traditional elegance, bohemian charm, or mode, there’s an athere’sbraidre’sbraid style to match. With the right accessories and the perfect balance of structure and softness, Dutch braids offer endless opportunities to create a hairstyle that complemewedding’swedding’sestheticsesthetic, making you feel confident and radiant on your special day.
Accessorizing Dutch Braids for a Bridal Look
Accessorizing Dutch braids is one of the best ways to elevate your wedding hairstyle from beautiful to breathtaking. From delicate hairpins to floral crowns, the right accessories can transform your braided look to fit the specific vibe of your wedding while adding a touch of personal flair. Explore the top accessory ideas to enhance your Dutch braids and create a show-stopping bridal look.
1. Floral Crowns
Nothing says romance and whimsy quite like a floral if you plan a boho or outdoor wedding, incorporating fresh or faux flowers into your Dutch braids cayou’reerealu’reereal, nature-inspired look.
Fresh Flowers: Weave fresh flowers into your Dutch bra braid and wear a full floral crown for an ultra-romantic look. Blooms like roses, peonies, or daisies add a soft, feminine touch, while greenery such as eucalyptus or ivy brings an earthy, bohemian vibe. Just be sure to choose sturdy flowers that can withstand the day.
Faux Floral Headpieces: Faux flowers are a great alternative to fresh blooms, offering more durability and no risk of wilting. Plus, they come in every color and size imaginable, giving you more control over your bridal palette.
2. Jeweled Hairpins and Combs
Jeweled hairpins and combs are perfect for brides seeking a touch of glamour. These accessories work exceptionally well with updo styles, such as braided buns or crown braids, as they draw attention to the intricacy of your hairstyle.
Crystal Hairpins: To give your Dutch bra braid a subtle sparkle, scatter crystal or rhinestone hairpins throughout. This works beautifully for brides who want an understated yet elegant accessory that complements the shimmer of their gown.
Vintage-Inspired Combs: Tuck a vintage-style jeweled comb into your braBraidr a more dramatic statement. This accessory adds a hint of old-world charm and pairs well with vintage or classic wedding gowns.
3. Pearls
Pearls epitomize bridal elegance and can easily be incorporated into Dutch braids for a timeless look. Whether you opt for pearl-studded hairpins or a pearl-encrusted headband, this accessory offers a delicate and sophisticated touch.
Pearl Pins: Pearl hairpins can be placed intermittently along your bra brandddtoto tod to add texture and dimension. This subtle accessory works well for brides who want to keep their look classic but not overly embellished.
Pearl Headband: A pearl-encrusted headband worn with a Dutch braid creates a sleek, refined style. Whether the braBraid pulled into a low bun or left in a half-up style, the pearls add a bridal-worthy shine and sophistication.
4. Ribbons and Silk Scarves
Consider incorporating ribbons or silk scarves into your Dutch braids for a playful and whimsical touch. This is a unique and unexpected way to accessorize, perfect for brides looking to add a pop of color or personality to their hairstyle.
Soft Silk Ribbons: A soft ribbon-tied braid has a sweet, romantic feel. You can match the ribbon to your wedding colors or choose a neutral tone for a more subtle effect. This accessory is particularly charming for garden or rustic-themed weddings.
Silk Scarf Wrap: Wrapping a silk scarf around your Dutch braid can add a boBraidn or retro flair. Choose a scarf with delicate patterns or soft colors to match the overall theme of your wedding.
5. Gold or Silver Hair Cuffs
Hair cuffs are an edgy, modern way to accessorize Dutch braids. These tiny metallic rings can be slipped onto sections of your braid for a sleek, Contemporary look.
Gold Hair Cuffs: Add gold hair cuffs to your Dutch braid for a minimaBraid chic touch. This accessory especially suits modern weddings, which focus on clean lines and elegance.
Silver Hair Rings: If your wedding has a more fantastic color palette or features silver jewelry, opt for silver hair rings instead. These small but impactful accessories bring a touch of metallic shine to your braided hairstyle.
6. Tiaras and Crowns
Consider wearing a tiara or crown with your Dutch braid for the ultiBraidbridal statement. This is perfect for brides who want to embrace a regal, princess-like look on their wedding day.
Classic Tiara: A delicate tiara paired with a crown Dutch braid creates an elegant, royal-inspired look. This accessory works well with formal, traditional gowns and adds a sense of grandeur to your wedding day style.
Boho Crown: Consider a bohemian-style crown made from crystals or natural elements for a less traditional approach. This adds a unique, earthy touch while still feeling luxe and bridal.
7. Veils
Veils are the quintessential bridal accessory and pair beautifully with Dutch braids. Whether you choose a long cathedral veil or a short birdcage veil, the combination of veil and braid adds dimensiBraidd drama to your look.
Long Cathedral Veil: A long cathedral veil paired with a Dutch braid is a show-stopper for brides seeking a dramatic entrance. Depending on the style of your updo or downdo, secure the veil under or over the braid, ensuring it is in place for the ceremony.
Short BirdcaIf you’re going for a vintage vibe, a birdcage veil adds just the right amount of retro charm. Wear this with a Dutch braid updo to balance the wedding look with modern and vintage elements.
8. Hair Vines
Hair vines are versatile accessories woven into Dutch braids for a stunning, intricate look. These delicate accessories are typically adorned with crystals, pearls, or flowers and can be shaped to fit any style.
Crystal Hair Vine: A crystal-encrusted hair vine woven into a Dutch braid adds sparkle and elegance without overpowering your h It’ssyle. It is an excellent choice for brides who want something more than pins but less structured than a tiara.
Floral Hair Vine: Opt for a floral hair vine for a more organic feel. This accessory works well for boho or garden-themed weddings, creating a seamless flow between your hairstyle and the natural elements of your wedding.
Conclusion
Accessorizing your Dutch braids is about personalizing and enhancing your overall bridal look. Whether you prefer a minimalist aesthetic or are all about there, there’s an accessoryeverybride’ssybride’ss style and theme; by carefully selecting the right pieces—from floral crowns and pearl pins to metallic hair cuffs and veils—you can take your Dutch braid from beautiBraidraid to a stunning, unforgettable bridal masterpiece.
Dutch Braids for Bridesmaids and Flower Girbraidsaren’tt
Dutch braids aren’t just for the bride—they also make an excellent choice for bridesmaids and flower girls. This versatile hairstyle can tie togebriparty’sty’srty’sty’s look, offering a cohesive and elegant appearance that complements the weddinWhetyou’reu’reou’reu’re aiming for uniform styles or a mix of different braided looks, Dutch braids provide a timeless and charming solution for the whole bridal entourage.
1. Dutch Braids for Bridesmaids: A Stylish and Practical Choice
Bridesmaids often face the challenge of finding stylish and functional hairstyles for a long day of celebrations. Dutch braids are ideal for this purpose, offering a blend of bepracticaliHere’sre’sere’sre’s why Dutch braids are perfect for your bridesmaids:
Long-Lasting Style: Weddings are all-day events, and the last thing you want is for your bridesmaids’ hair to fall flat halfway through the reception. Dutch braids provide a secure, long-lasting hairstyle that can withstand hours of dancing, photos, and outdoor ceremonies.
Works for All Hair Types: One of the best things about Dutch braids is that they can be adapted to suit different hair textures and lengths. Whether your bridesmaids have fine, thick, curly, or straight hair, Dutch braids can be tailored to look flawless on each of them.
Versatile Updo and Down-do Options: Dutch braids can be styled in numerous ways, from classic updos to more relaxed, bohemian half-up, half-down styles. This allows for flexibility depending on the formality of your wedding and individual preferences.
Elegant Braided Bun: Bridesmaids can wear their Dutch braids in a sophisticated bun for a formal or classic wedding. This keeps the hair off their shoulders and creates a refined look.
SiBraidyou’reou’reu’reou’s going for a more relaxed or outdoor vibe; side Dutch braids cascading over one shoulder are softer, romantic options that add movement and charm.
Crown Braid: For a whimsical or bohemian wedding, consider having your bridesmaids wear Dutch crown braids. This ethereal style is perfect for outdoor or rustic weddings, offering a fathat’shat’sat’shat’s effortlessly chic.
Customization with Accessories: You can complement bridesmaids’ aids’ids’aids’ Dutch braids with subtle accessories like floral pins, delicate pearls, or even matching ribbon that ties into the wedding color scheme. This ensures that their hairstyles complement the bridal look rather than compete.
2. Dutch Braids for Flower Girls: Cute and Age-Appropriate
When it comes to flower girls, you want an adorable, comfortable, and durable hairstyle to last through the ceremony and reception. Dutch braids are an ideal option because they keep hair neat and add a touch of elegance without being overly complicated. Here are some ideas for styling Dutch braids for flower girls:
Simple Double Dutch Braids: Double Dutch braids are a cute, practical option for flower girls. These two braids keep their hair neatly in place, preventing flyaways and ensuring they look put-together throughout the event. You can leave the ends loose or tie them into small, soft ponytails for a more playful look.
Dutch Braided Crown: A crown-style Dutch braid can make any little flower girl feel like a princess. This hairstyle wraps around the head, keeping their hair off the face, which is especially helpful for younger girls who may not sit still for touch-ups.
Dutch Braid with Bow or Flowers: Add a sweet touch by securing the end of a single Dutch braid with a satin bow or small floral accessories. This little detail adds charm and keeps the hairstyle youthful and fun, perfect for a girl’s wedding party.
3. Matching thParty’slParty’slesarty’sles
Coordinating the bride, bridesmaids, and angirls’ehgirls’lesgirls’les can enhance the party’s aesthetic. Dutch braids offer versatility, allowing you to achieve a unified look without everyone wearing the same style.
Cohesive but Unique: While the bride can have an intricate and elevated version of Dutch braids, such as a braided updo with accessories, the bridesmaids and flower girls can opt for more straightforward variations. This keeps the focus on the bride while ensuring the entire bridal party looks cohesive.
Complementary Accessories: Using similar hair accessories, like matching floral pins or jeweled combs, you can tie together different braided styles for bridesmaids and flower girls. For instance, bridesmaids could wear subtle crystal pins, while flower girls wear smaller, child-friendly floral crowns.
4. Practical Tips for Dutch Braids on Bridesmaids and Flower Girls
When styling Dutch braids for your bridal party, consider a few practical tips to ensure the best results.
Prep the Hair: Clean, dry hair with some texture holds braids better, so consider using a volumizing mousse or texturizing spray before styling. This will help the braids last throughout the day, especially for bridesmaids and flower girls running around or dancing.
Schedule Trials: For bridesmaids, schedule a trial run with the hairstylist to ensure everyone is comfortable with their look. This helps avoid any last-minute changes or surprises on the wedding day.
Keep Flower Girls Comfortable: Flower girls may have sensitive scalps, so ensure that their Dutcaren’tdtaren’thttaren’tht. A looser, more comfortable braid will prevent discomfort and meltdowns during the ceremony.
Timing: Dutch braids are relatively quick to create, making them an efficient choice for a large bridal party. However, with multiple people needing their hair done, ensure you allocate enough time in the wedding day schedule for styling.
Conclusion
Dutch braids are a fantastic choice for bridesmaids and flower girls, offering versatility, beauty, and practicality for all bridal party members. From sophisticated updos for bridesmaids to adorable and comfortable styles for flower girls, Dutch braids can be adapted to everyone’s tastes. Whether aiming for a cohesive look or embracing individual styles, this timeless braid can bring unity and charm to your wedding party, ensuring everyone looks their best on your big day.
Hair Maintenance Tips Leading to the Wedding
To achieve flawless Dutch braids on your weddit’sdessit’salessit’sal, prepare your hair well in advance. Healthy, well-nourished hair holds braids better and looks shinier, smoother, and more polished. By following these hair maintenance tips in the months leading up to your wedding, you can ensure that your locks are in prime condition for styling.
1. Start Early: Healthy Hair Takes Time
Your wedding hair routine should begin at least 3-6 months before the big day. This allows enough time to address hair concerns like dryness, damage, or lack of volume. Consistency in your hair care routine is vital to seeing noticeable results.
Trim Regularly: Regular trims every 6-8 weeks can prevent split ends and promote healthy growth. Keeping your ends fresh will ensure your braids look neat and smooth without frizz or breakage.
Deep Conditioning Treatments: Incorporate deep conditioning masks into your routine at least once a week. These treatments hydrate the hair, improve elasticity, and reduce damage caused by heat styling or environmental factors.
Hair Supplements: If you want to boost hair growth or improve its overall strength and shine, consider taking hair supplements with biotin, keratin, or vitamins like A, C, and E. Consult your doctor or dermatologist before starting any new supplements.
2. Moisturize and Strengthen Your Hair
Braids, including Dutch braids, require robust and flexible hair. Dry or brittle hair can snap or break under the braiding tension, so keeping your strands moisturized and nourished is essential.
Hydrating Shampoo and Conditiyou’reInyou’reeadyou’reeady using one, switch to a moisturizing shampoo and conditioner. Look for sulfate-free formulas, as sulfates can strip your hair of its natural oils, leading to dryness.
Protein Treatments: Incorporate protein treatments into your routine to strengthen your hair and prevent breakage. These treatments help to rebuild damaged hair shafts, making your hair more resilient to styling stress.
Leave-In Conditioners: A lightweight leave-in conditioner or oil can help maintain moisture throughout the day. Use a product that protects against environmental damage and heat styling.
3. Minimize Heat Styling
Excessive use of heat tools can weaken hair, making it harder for your braids to look sleek and stay intact throughout the wedding day. Reducing your use of heat tools, such as blow dryers, straighteners, and curling irons, will help presehair’sunhair’ss hair’s strength and texture.
Air Dry When Possible: Let your hair air dry to avoid the drying effects of blow-drying. If you must use a hair dryer, apply a heat protectant and use it in a relaxed setting to minimize damage.
Avoid Over-Processing: If you color your hair, avoid back-to-back chemical treatments or excessive bleaching close to the wedding day. Chemical processing can leave your hair dry and prone to breakage, affecting the overall look of your Dutch braids.
4. Focus on Scalp Health
Healthy hair starts with a healthy scalp. Caring for your scalp can promote more robust hair growth, reduce dryness, and prevent issues like dandruff, which can detract from the polished look of your wedding hairstyle.
Scalp Massages: Regular scalp massages help stimulate blood flow to the hair follicles, promoting hair growth. You can use your fingertips or a scalp massager tool to gently massage your scalp for 5-10 minutes a few times a week.
Clarifying Shampoos: Use a clarifying shampoo once a month to remove buildup from styling products, oils, and dirt. This will leave your scalp clean and your hair refreshed, providing a solid foundation for your wedding-day Dutch braids.
Tea Tree Oil: If you experience dryness or itchiness, tea tree oil can soothe and moisturize the scalp. Add a few drops to your shampoo or conditioner to help maintain scalp health.
5. Hydrate and Nourish from Within
What you eat and drink plays a significant role in the health of your hair. Staying hydrated and maintaining a balanced diet rich in essential vitamins and minerals will support healthy hair growth and improve your lock” locks texture and appearance.
Drink Plenty of Water: Hydration is critical to maintaining moisture in your hair. Drinking enough water helps to keep your scalp hydrated and prevents dry, brittle hair.
Eat a Nutrient-Rich Diet: Foods high in vitamins A, C, and E, as well as omega-3 fatty acids, can help improve hair health. Include leafy greens, nuts, seeds, and fatty fish like salmon to nourish your hair from the inside out.
6. Hair Trials and Pre-Wedding Haircare
Focus on the civic bridal look in the final weeks before the it’sitimit’s timid. Ensure your hair is in optimal condition to hold the style of Dutcyou’vedcyou’vee you’ve
Hair Trials: Schedule at least one or two hair trials with your stylist before the wedding. This allows you to test different Dutch braid styles, make adjustments, and ensure that the style complements your dress, makeup, and overall theme.
Avoid Last-Minute Changes: Stick to your regular hair care routine before the wedding. Avoid any last-minute drastic hair changes, such as a new color or cut, as these can affect the final result of your Dutch braids.
Final Trim and Color: If you plan to color or trim your hair before the wedding, do so at least 1-2 weeks in advance. This allows the color to settle and ensures that your hair is in perfect condition for the big day without any last-minute stress.
7. Relax and Enjoy
Finally, relaxing in the days before your wedding is essential. Stress can negatively impact your overall health, so take time to unwind and trust that your preparation has set you up for success.
Conclusion
Proper hair maintenance in the months leading up to your wedding is crucial for ensuring that your Dutch braids look flawless and last throughout the day. By focusing on healthy hair habits—such as deep conditioning, minimizing heat damage, and taking care of yourself, achieve the beautiful polisheyou’vedeyou’venedyou’vened. Whether aiming for a sophisticated updo or a relaxed, bohemian look, these hair care tips will help you feel confident and radiant on your special day.
Personal Opinion: Why Dutch Braids Are the Perfect Wedding Hairstyle
In my experience working with brides and styling wedding hair, Dutch braids are an exceptional choice for a wedding hairstyle. They balance timeless elegance and modern chic, making them versatile enough to suit various wedding themes, from rustic bohemian to classic black-tie events. I believe the true beauty of Dutch braids lies in their ability to offer structure and sophistication while maintaining a soft, romantic touch.
One of the primary reasons I advocate for Dutch braids is their durability. Weddings are long events filled with dancing, moving, and emotional moments, which can test the limits of any hairstyle. Dutch braids, however, hold up remarkably well under these conditions, ensuring that your hair looks flawless from the ceremony to the last dance. The tight, underhand weaving of Dutch braids adds extra strength to the style, keeping it secure and intact throughout the day.
Another significant reason why Dutch braids are perfect for weddings is their adaptability. They can be styled in an intricate updo for a formal, sophisticated look or worn as loose, flowing braids for a more relaxed, bohemian vibe. Dutch braids also complement accessories such as floral crowns, delicate pins, or statement veils. This flexibility allows brides to express their style while ensuring their hair complements their overall bridal look.
Finally, Dutch braids are universally flattering. They add depth and dimension to the hair, creating a fuller, more voluminous appearance, ideal for those with fine or thin hair. At the same time, they work beautifully with long, thick hair by taming it into an elegant and structured design. Dutch braids offer a solution that can be customized to enhance, regardless of hair type or length.
In conclusion, Dutch braids are the perfect wedding hairstyle because they provide a harmonious blend of elegance, durability, and versatility. They create a stunning visual effect, ensure comfort and longevity throughout the event, and can be tailored to bride’sebride’sForride’sFor brides who want a timeless yet modern look that will hold up through every moment of their big day, Dutch braids are undoubtedly the way to go.
Expert Tips for Achieving the Perfect Dutch Braids
Achieving flawless Dutch braids requires a combination of technique, preparation, and the right products. Should you wear your hair or seek help from a stylist, these expert tips will ensure your Dutch braids turn out smooth, secure, and elegant—perfect for any occasion, especially weddings.
1. Start with Clean, TextuIt’sHcruIt’s
Starting with clean, textured hair is crucial to create Dutch braids that hold their structure. While freshly washed hair can be slippery, slightly textured hair provides the necessary grip for neat braiding—howedon’tywadon’turwadon’tur hair to be too stiff or greasy.
Wash the day before: For the best results, wash your hair the day before braiding. This allows natural oils to develop slightly, reducing slipperiness without making the hair oily.
Use texturizing products: If your hair is fine or freshly washed, apply a texturizing spray or dry shampoo to add grip. This will help the braid hold better and prevent slippage as you work.
2. Detangle Thoroughly
Before braiding, ensure your hair is entirely free of knots or tangles. Tangled hair can make braiding difficult and result in uneven tension, which affects the final look.
Use a wide-tooth comb: Start by gently detangling your hair with a wide-tooth comb to remove larger knots.
Follow with a brush: Following a comb, follow up with a smoothing brush to ensure your hair is thoroughly detangled and ready for braiding.
3. Master the Dutch Braiding Technique
Dutch braids are essentially an inverted version of French braids, where the sections of hair are woven under each other instead of over. The key to mastering this technique lies in consistent sectioning and tension.
Divide hair into even sections: Start by sectioning your hair into three equal parts at the crown. Keep the sections as smooth as possible to ensure the braid is symmetrical.
Weave under, not over: As you begin braiding, remember to cross the outer sections of hair under the middle section rather than bare it. This gives the braid its distinctive raised appearance.
Maintain consistent tension: Apply equal tension throughout the braid to keep it tight and secure. Loose tension can cause the braid to unravel or look messy, while too much stress can be uncomfortable, especially all-day wear like a wedding.
4. Use Clips to Manage FlyawBraid
One of the common challenges with Dutch braids is keeping flyaways and loose strands in check, particularly around the nape of the neck and hairline.
Use small clips or pins: Secure any sections being worked on with small, flat hair clips or bobby pins. This will help you maintain control and keep your braid looking polished.
Apply a styling gel: For a sleeker finish, you can apply a light styling gel or serum to smooth down flyaways as you braid.
5. Add Volume and Texture to the BraidBraid
If you prefer a fuller, more voluminous Dutc” braid,” “pancake” is a technique that allows you to create the illusion of thicker, more intricate braids.
Gently tug on each section: Braidr completes the braid and lightly pulls on the edges to loosen them. This gives the braid a more textured, voluminous look while keeping it secure.
Avoid over-pulling: Avoid pulling too hard, which can braid the braid or create uneven sections. Start with a small tBraidnd adjust until you achieve the desired volume.
6. Secure with a Strong Elastic
Use transparent elastic at the end of your Dutch braid to ensure it stays intact throughout, especially at a wedding or formal event.
Choose clear or neutral-colored elastics. They blend seamlesBraidnto the braid, giving it a clean, polished finish. If clear elastics are unavailable, use one that closely matches your hair color.
Double up for Braidity: If your hair is thick or long, consider doubling up the elastics to enBraid, ensuring the braid remains secure all day.
7. Finish with a Setting Spyou’ve
You have your Dutch braid, so finish the look with a light-hold hairspray or setting spray. This helps lock the braid in place and holds its shape through dancing, weather changes, or any other wedding day events.
Avoid heavy products: Opt for lightweiBraidprays that provide hold without stiffness or stickiness. You want your braid to stay in Braid but look soft and natural.
If you’re married in a humid climate, consider using an anti-humidity spray to keep frizz and flyaways at bay throughout the day.
8. Practice Before the BiyBraid
You’re your hair; practice is vital to perfecting your Dutch braid technique. you’reiwyou’ree you’re with a stylist; having a trial run will help you feel confident about your chosen style.
Try multiple variations: Experiment with Dutch braid styles, such as side braids, double braids, or braided updos, to find the perfect look for your face shape and wedding dress.
Consult with a professiyou’reIuyou’reaboutu’reabout braiding your hair; consider booking a consultation or trial with a professional hairstylist specializing in wedding braids.
9. Protect Your Hair at Night
If you plan to braid your hair the night before the wedding to save time, protect it while you sleep.
Sleep on a silk pillowcase: Silk pillowcases reduce friction, helping to prevent frizz and keeping your braid looking smooth.
Use a satin bonnet: For extra protection, sleep with your braid wrapped in a satin or silk bonnet to maintain the style overnight.
Conclusion
Perfecting the Dutch braid for your wedding day comes down to proper preparation, technique, and tools. Whether creating a loose, romantic braid or a sleek and structured look, following these expert tips will help you achieve a flawless braid that complements your bridal look. With consistent practice, the right products, and a touch of creativity, Dutch braids can elevate your wedding hairstyle to new heights, ensuring you look stunning throughout the celebration.
Frequently Asked Questions
1. What are Dutch braids?
Dutch braids are a type of braid where the sections of hair are woven under each other rather than over, creating a braid that stands out from the scalp. This technique produces a more raised and 3D effect than traditional French braids.
2. How do Dutch braids differ from braids?
The main difference between Dutch and French braids is the weaving technique. In Dutch braids, the outer sections of hair are crossed under the middle section, while in French braids, they are crossed over. This gives Dutch braids their distinctive, protruding appearance.
3. Can Dutch braids be worn for any wedding theme?
Dutch braids are versatile and can be adapted to suit various wedding themes. They can be styled in an elegant updo for a formal wedding or left loose and textured for a more relaxed, bohemian look. Accessories and braiding techniques can further customize them to match any theme.
4. How can I make my Dutch braids last all day?
To ensure Dutch braids last all day, start with slightly textured hair, use solid and clear elastics to secure the braid, and apply a lightweight hairspray or setting spray. Additionally, practice the braid technique tit’sstigit’sndtigit’snd secure.
5. Are Dutch braids suitable for short hair?
Dutch braids are generally best suited for medium to long hair. Braidever, if you have short hair, you can still achieve a similar look with hair extensions or by creating mini Dutch braids that add texture and detail to your hairstyle.
6. How can I add volume to my Dutch braids?
To add volume to Dutch braids, “use the” “pancake” technique by gently tugging on the edgthey’rerthey’reedthey’reed. Applying a texturizing spray or dry shampoo before braiding gives your hair more grip and body.
7. Can I do Dutch braids independently, or is it better to go to a stylist?
You can do Dutch braids independently with practice, especially with braiding techniques. However, if you want a more intricate style or are unsure of your braiding skills, consulting with a professional stylist can help you achieve a polished look.
8. What accessories work well with Dutch braids?
Dutch braids can be paired with floral crowns, delicate pins, or decorative combs. Choose accessories that complement your wedding theme and personal style while enhancing the braid without overwhelming it.
9. How do I care for my Dutch braids the night before the wedding?
If you plan to braid your hair the night before, protect your braids by sleeping on a silk pillowcase or using a satin bonnet to reduce friction and prevent frizz. This will help mBraidaid’sebraid’sndbraid’snd ensure it looks fresh on your wedding day.
10. What products should I use to prepare my hair for Dutch braids?
For best results, use a texturizing spray or dry shampoo to add grip to your hair. Apply a light styling gel or serum to smooth down any flyaways, and secure the braid by curing it with a strong, clear elastic. Finish with a lightweight hairspray to keep the braid in place.
11. Can Dutch braids be combined with other hairstyles?
Absolutely! Dutch braids can be combined with various hairstyles, such as buns, ponytails, or half-up Braiddown styles. They can also be incorporated into elaborate updos or paired with other braiding techniques for a unique look.
12. How do I remove Dutch braids without damaging my hair?
To remove Dutch braids, gently undo the braid by reversing the weaving process. Start from the end of the braid and work your way up. Avoid pulling or tugging on the hair to minimize breakage. Use a detangling spray to ease the process and prevent knots.
Feel free to reach out if you have more questions or need additional guidance on Dutch braids for your wedding!
Mulled wine hair color is rapidly becoming one of the most sought-after shades in the world of hair color trends. This rich, warm hue, inspired by the deep, spiced tones of mulled wine, offers a stunning blend of red, burgundy, and hints of purple. Its versatility makes it ideal for anyone looking to make a bold yet sophisticated statement with their hair.
But what exactly makes mulled wine hair color so universally flattering? For one, the depth and complexity of the shade can be customized to complement various skin tones, from fair to dark, and it can be tailored to suit different personal styles, whether you prefer something subtle or more vibrant. Additionally, this color exudes warmth and richness, making it a perfect choice for any season, but particularly for the colder months when people gravitate toward deeper, more luxurious hues.
This article will explore over 20 unique ideas for over 20 unique ideas revealing the correct version for your skin tone and how to maintain its vibrancy. Whether you’re considering a subtle ombre or transformation, this guide will provide you with all the inspiration and practical tips you need to achieve your perfect look.
What is Mulled Wine Hair Color?
Mulled wine hair color is a luxurious and rich shade that draws inspiration from mulled wine’s spiced tones—a festive drink made from red wine, spices, and fruit. This hair color is a captivating blend of deep reds, burgundy, and hints of purple, creating a sophisticated multidimensional hue.
Description and Origin of the Shade
The mulled wine hair color is named after the beverage, known for its deep, rich red hue and aromatic spices. Like the drink, this hair color evokes warmth, depth, and a sense of indulgence. The color typically combines a burgundy or dark red base with undertones of purple, maroon, and sometimes a touch of brown or gold to add dimension. The result is a vibrant, multi-tonal color that shimmers and changes subtly depending on the lighting.
This shade became popular as people sought more unique and personalized hair colors that still maintained a sense of elegance. Unlike the more traditional bright reds or subdued brunettes, mulled wine offers a perfect middle ground—it’s eye-catching without being overly flashy, and its rich tones complement a wide range of styles and skin tones.
How Mulled Wine Hair Color Differs from Other Red Shades
Mulled wine hair color stands out from other red shades due to its complexity and versatility. While standard red hair colors like copper or auburn focus primarily on orange or brown undertones, mulled wine incorporates deeper, cooler tones like burgundy and purple, giving the color a more sophisticated and mature appearance.
Another critical difference is the multidimensional aspect multidimensional. Traditional reds often have a uniform appearance, while mulled wine hair color is layered with different tones, giving it a more dynamic and vibrant look. The interplay of colors within mulled wine hair creates a depth that makes the hair appear fuller and more textured.
Ideal Skin Tones for Mulled Wine Hair Color
One of the most appealing aspects of mulled wine hair color is its versatility across various skin tones.
Fair Skin Tones: For those with fair skin, mulled wine hair color can create a striking contrast that highlights the delicacy of their complexion. The cooler undertones of the color, such as burgundy and purple, complement the pink or neutral undertones typically found in fair skin.
Medium Skin Tones: Individuals with medium skin tones benefit significantly from the warm aspects of mulled wine hair. The deep reds and subtle purples blend harmoniously with medium skisski skin or olive undertones, creating a balanced and radiant look.
Dark Skin Tones: Mulled wine hair color looks stunning on darker skin tones. The rich, deep shades enhance the natural warmth of dark skin, making the color pop while still appearing cohesive and natural. The burgundy and maroon hues, in particular, are incredibly flattering, adding depth and vibrancy without overwhelming the complexion.
Whether youyou’reming for a bold transformation or a subtle enhancement of your natural beauty, mulled wine hair color offers a range of possibilities that can be tailored to suit any individual. This unique blend of colors makes it stand out from other shades. It ensures it can be adapted to complement any skin tone, making it a versatile and universally flattering choice.
Top 20+ Mulled Wine Hair Color Ideas.
Mulled wine hair color is a stunning choice for anyone looking to add depth, richness, and a touch of sophistication to their hairstyle. With its blend of deep reds, burgundies, and purples, this color can be customized in countless ways to suit different styles, preferences, and skin tones. Below are over 20 inspiring mulled wine hair color ideas that showcase the versatility and beauty of this shade.
1. Classic Mulled Wine
Classic mulled wine hair color is the perfect choice for those who appreciate timeless elegance. This look features a solid, rich hue with an even blend of deep red and burgundy tones—It’It’seal for anyone who wants a sophisticated yet bold appearance that can easily transition from day to night.
2. Deep Burgundy Mulled Wine
If youyou’reawn to darker shades, deep burgundy mulled wine offers a more intense version of the color. This option leans heavily on the burgundy side, with less emphasis on red, resulting in a dramatic, almost wine-like appearance. It’It’srticularly flattering on those with darker skin tones, as it complements the skiskin’siskin’stural warmth.
3. Mulled Wine with Rose Gold Highlights
Consider adding rose gold highlights for a modern twist on the traditional mulled wine color. These subtle yet striking highlights add a touch of warmth and brightness to the hair, creating a beautiful contrast against the deeper tones of mulled wine. This style is perfect for those who want to lighten their hair without losing the richness of the base color.
4. Subtle Mulled Wine Ombre
An ombre effect can beautifully showcase the gradient of mulled wine hair color. Starting with a dark burgundy or maroon at the roots, the color gradually transitions to a lighter red or soft pink at the tips. This style is ideal for anyone who wants to experiment with color without committing to a full head of bright red.
5. Mulled Wine with Auburn Undertones
Adding auburn undertones to mulled wine hair creates a warm, earthy vibe. The auburn adds a subtle brownish-red hue, making this variation an excellent choice for those who prefer a more natural-looking red. It’It’sflattering option for both fair and medium skin tones.
6. Vibrant Mulled Wine Balayage
Balayage is a technique that involves hand-painting the hair to create a natural-looking gradient of color. A vibrant mulled wine balayage blends deep reds and purples with lighter burgundy or magenta tones, resulting in a seamless, sun-kissed effect. This style adds dimension and movement to the hair, making it perfect for long or wavy hair.
7. Dark Mulled Wine with Chocolate Low Lights
Consider incorporating chocolate lowlights for a more subdued take on mulled wine hair. These deep brown strands add depth and richness to the color, making it appear more natural and multidimensional. This combimultidimensionall on darker hair is ideal for those seeking a sophisticated, understated look.
8. Mulled Wine and Copper Blend
Mulled wine and copper tones create a vibrant, fiery look. The copper adds a bright, orange-red hue contrasting beautifully with mulled winwine’seper burgundy and purple tones. This style is bold and eye-catching, perfect for anyone looking to make a statement with their hair.
9. Mulled Wine with Red Velvet Accents
Red velvet accents add a luxurious touch to mulled wine hair. This style incorporates deeper, almost black-red tones reminiscent of red velvet cake, giving the hair a velvety, rich appearance. It’s an an an an elegant option perfect for special occasions or anyone who loves a bit of drama in their look.
10. Plum-infused mulled Wine
Adding plum tones to mulled wine hair results in a deep, mysterious, and utterly gorgeous color. The plum infusion gives the hair a cool, purple tint, making it an excellent option for those with cool undertones in their skin. It’It’sso a fantastic choice for fall and winter when darker, moodier colors are in vogue.
11. Mulled Wine with Fiery Red Tips
Consider adding fiery red tips to your mulled wine hair for a bold, edgy look. This style starts with a deep burgundy or maroon at the roots and gradually transitions to a bright, fiery red at the ends. It’It’sfun and vibrant way to play with color while maintaining mulled winwine’spth and richness
12. Smoky Mulled Wine
Smoky mulled wine hair combines deep red tones with cool, smoky grays and blacks. This unique blend creates a mysterious, almost gothic look that is perfect for those who prefer a darker, more unconventional style. The smoky tones add a layer of depth and complexity to the color.
13. Mulled Wine with Soft Pink Highlights
Add soft pink highlights throughout for a more feminine and playful take on mulled wine hair. The pink tones brighten the overall look and add a touch of whimsy without overpowering the deeper, richer base color. This style is charming on medium to long hair, as the pink highlights can be strategically placed to enhance the haihair’stural movement.
14. Mulled Wine with Blonde Streaks
Blonde streaks can add a surprising and refreshing twist to mulled wine hair. The contrast between the dark, rich base color and the lighter blonde strands creates a striking, high-contrast, modern, edgy look. This style is great for those who want to lighten their look without going full-blonde.
15. Mulled Wine with Magenta Tones
Magenta tones add a vibrant, almost electric quality to mulled wine hair. This style features a base of deep red or burgundy with bright magenta highlights or undertones, resulting in a bold and eye-catching color. It’It’sfantastic choice for those who love experimenting with vibrant colors and want a unique look.
16. Mulled Wine with Chestnut Highlights
For a more natural and earthy look, chestnut highlights can be a beautiful addition to mulled wine hair. The warm, brownish-red tones of chestnut blend seamlessly with the deep burgundy and purple hues of mulled wine, creating a harmonious and flattering color thathat’srfect for any season.
17. Mulled Wine with Purple Undertones
Adding purple undertones to mulled wine hair gives it a cool, vibrant twist. The purple adds depth and richness to the color, making it stand out even more. This style is ideal for those who want a unique and edgy look that retains mulled winwine’srmth and sophistication.
18. Metallic Mulled Wine
For a futuristic and high-fashion look, consider metallic mulled wine hair. This style incorporates metallic or iridescent tones into the deep red and burgundy base, giving the hair a shiny, almost reflective quality. It’It’sbold and daring choice perfect for those who want to stand out.
19. Mulled Wine with Gold Flecks
Gold flecks add a touch of luxury to mulled wine hair. This style features tiny strands of gold woven throughout the hair, creating a shimmering effect that catches the light beautifully. It’It’sglamorous option for special events or anyone wanting to add their everyday look.
20. Rich Mulled Wine Velvet
Rich mulled wine velvet hair is all about deep, intense color. This style emphasizes mulled strongest, most saturated tones, resulting in a velvety, almost plush appearance. It’It’sdramatic and sophisticated look thathat’srfect for those who love rich, luxurious colors.
21. Mulled Wine with Silver Highlights
Silver highlights add a modern and unexpected twist to mulled wine hair. The cool, silvery tones contrast beautifully with the warm, deep red base, creating a striking and edgy look. This style is perfect for those who want to experiment with color while maintaining elegance and sophistication.
These 20+ mulled wine hair color ideas demonstrate the versatility and beauty of this stunning shade. Whether you prefer something classic and understated or bold and daring, a mulled wine hair color variation is perfect for you.
How to Maintain Mulled Wine Hair Color
Mulled wine hair color is undeniably stunning, but like any vibrant shade, it requires proper care and maintenance to keep it looking fresh and lively. This rich blend of reds, burgundies, and purples can fade over time, especially if exposed to harsh elements or not treated with the right products. HerHere’sguide on maintaining your mulled wine hair color and keeping it as vivid as the day you left the salon.
1. Use Color-Safe Shampoos and Conditioners
The first step in maintaining mulled wine hair color is choosing the right shampoo and conditioner. Opt for products specifically formulated for color-treated hair. These are usually sulfate-free, which is crucial because sulfates can strip your hair of its natural oils and fade color faster. Look for shampoos and conditioners designed to protect and prolong hair color, adding moisture and shine without dulling the vibrancy of your mulled wine hue.
Recommended Product: A sulfate-free, color-protecting shampoo, and conditioner with UV filters can shield your hair from sun damage, which can cause color fading.
2. Wash Your Hair Less Frequently
Washing your hair too often can fade color, especially with rich, vibrant colors like mulled wine. Try to extend the time between washes to every 2-3 days. This allows the natural oils to protect your hair and preserve the color. If your scalp gets oily quickly or youyou’retive and need to freshen up, consider using a dry shampoo between washes.
Tip: When you wash your hair, use cool or lukewarm water instead of hot water. Hot water opens the hair cuticles, allowing color to escape, while cooler water helps to seal the cuticles and lock in the color.
3. Avoid Heat Styling Tools
Heat is one of the main culprits behind fading hair color. Avoid using heat-styling tools like flat irons, curling wands, and blow dryers whenever possible. If you must use them, always apply a heat protectant spray beforehand to minimize damage. Heat protectants form a barrier over the hair, reducing the heat’s impact and helping preserve your color.
Alternative: If you want to style your hair without heat, try braiding your hair overnight for natural waves or using foam rollers for curls. These methods are gentler on your hair and help maintain your mulled wine color.
4. Protect Your Hair from the Sun
Sun exposure can be just as damaging to your hair color as your skin. UV rays can break down the color molecules in your hair, leading to premature fading and a dull appearance. Protect your hair by wearing a hat or scarf whenever youyou’reending time outdoors. You can also use hair products with built-in UV protection to shield your strands from harmful sun rays.
Pro Tip: Spritz a leave-in conditioner with UV protection on your hair before heading outside. This protects your color and keeps your hair hydrated and soft.
5. Regular Touch-Ups and Gloss Treatments
Even with the best care, hair color naturally fades over time. Schedule regular touch-up appointments with your stylist to keep your mulled wine hair looking fresh. Depending on how fast your hair grows and how well you maintain the color, you might need a touch-up every 4-6 weeks.
In between touch-ups, consider getting a gloss treatment. A gloss adds a layer of shine and refreshes the color without needing a complete dye job. It can also help seal the hair cuticle, reducing frizz and enhancing the richness of your mulled wine shade.
6. Deep Condition Regularly
Color-treated hair often needs extra moisture to stay healthy and vibrant. Incorporate a deep conditioning treatment into your routine at least once a week. Deep conditioners penetrate the hair shaft, providing intense hydration and repairing any damage caused by coloring. This keeps your hair shiny, smooth, and full of life, essential for maintaining the vibrancy of your mulled wine color.
DIY Option: Use a hair mask with natural ingredients like avocado, honey, and olive oil. These ingredients are known for their moisturizing properties and can help keep your hair nourished and your color intact.
7. Avoid Chlorine and Hard Water
Chlorine, often found in swimming pools, can significantly damage hair, turning vibrant shades like mulled wine into a dull, faded mess. Before swimming, wet your hair and apply a leave-in conditioner or wear a swim cap to minimize chlorine absorption. If possible, rinse your hair immediately after swimming to remove any chlorine residue.
Hard water, which contains high levels of minerals, can also strip your hair of color. If you live in an area with hard water, consider installing a shower filter to reduce the mineral content and protect your hair color.
8. Use Color-Depositing Treatments
Use color-depositing conditioners or masks to keep your mulled wine color from fading between salon visits. These products contain pigments that refresh and enhance your hair color, helping to maintain its intensity. TheThey’rendy for red shades prone to fading more quickly than other colors.
Usage: Apply the color-depositing product as directed, usually once a week, to boost your color and keep it looking vibrant and fresh.
9. Be Gentle with Your Hair
Colored hair is more fragile, so treat it with care. Avoid rough towel drying, which can cause breakage and frizz. Instead, gently squeeze out excess water with a soft towel or an old t-shirt. When detangling, use a wide-tooth comb and start from the ends, working your way up to minimize damage.
Reminder: Sleeping on a silk or satin pillowcase can also reduce friction, helping to maintain hair health and the longevity of color.
10. Opt for Professional Hair Products
Lastly, invest in professional-grade hair care products. While drugstore products may be more affordable, they often lack the quality ingredients to preserve vibrant hair color. Professional products are formulated to nourish and protect color-treated hair, ensuring your mulled wine shade stays rich and lustrous for as long as possible.
Maintaining mulled wine hair color requires extra effort, but with the prop and products, you can enjoy your stunning shade for weeks. By following these tips, you’ll keep your hair looking healthy, vibrant, and full of life, allowing your mulled wine color to shine at its best.
Choosing the Right Mulled Wine Shade for Your Skin Tone
Selecting the perfect mulled wine hair color can enhance your features and complement your skin tone beautifully. With its rich blend of reds, purples, and burgundies, this shade can be customized to suit a variety of complexions. Here’s how to choose the best-mulled wine shade for your skin tone.
1. Fair Skin Tones
Fair skin tones often have cool undertones, making them ideal for mulled wine shades with cooler, purple-based hues. These shades can create a striking contrast against pale skin, bringing out the natural rosiness of your complexion. If you have fair skin, consider choosing a mulled wine color that leans towards deep burgundy or rich plum. These shades can enhance your complexion without overpowering it.
Best Shades:
Plum Mulled Wine: A deep, cool-toned purple with subtle red undertones, perfect for fair skin.
Burgundy Mulled Wine: A rich, deep red with cool undertones that add warmth without overwhelming your complexion.
2. Medium Skin Tones
Medium skin tones typically have neutral or warm undertones, which pair well with various mulled wine shades. You can experiment with warm and cool versions of this color if you have medium skin. Try a mulled wine shade that combines red and purple in equal measure for a balanced, flattering look. This will bring out the warmth in your skin while adding depth and dimension to your hair.
Best Shades:
Classic Mulled Wine: A balanced mix of red and purple that complements the warm undertones of medium skin.
Cherry Mulled Wine: A slightly brighter, redder version of mulled wine that adds vibrancy and complements the golden undertones in medium skin.
3. Olive Skin Tones
Olive skin tones usually have a warm, golden undertone, perfect for warmer mulled wine shades. Look for colors that emphasize the red and berry tones in mulled wine, as these harmonize beautifully with your complexion. Warmer shades will add a radiant glow to your skin, enhancing natural warmth.
Best Shades:
Berry Mulled Wine: A warm, berry-infused shade that complements olive skiskin’slden undertones.
Rustic Mulled Wine: A deep, red-based mulled wine with subtle hints of brown, perfect for enhancing the warmth in olive skin.
4. Dark Skin Tones
Dark skin tones can easily pull off rich, bold, mulled wine shades. The depth of your skin tone allows you to experiment with this color with more intense variations. Deep burgundy or plum-based mulled wine shades will create a stunning contrast, making your hair color pop against your skin. These shades also add a luxurious depth and richness to your overall look.
Best Shades:
Deep Burgundy Mulled Wine: A rich, dark red with subtle purple undertones that pairs beautifully with dark skin.
Aubergine Mulled Wine: A dark, eggplant-inspired shade that enhances darker skin tones, depth, and richness.
5. Warm vs. Cool Undertones
Understanding your skiskin’ desserts is crucial when selecting the right mulled wine shade. HerHere’squick guide:
Cool Undertones: If your skin has a pink, red, or blue tint, you likely have cool undertones. Shades like plum, aubergine, or any mulled wine with a solid purple base will suit you best.
Warm Undertones: If your skin has a golden, yellow, or peachy tint, you have warm undertones. Opt for mulled wine shades with a red or berry base to enhance your natural warmth.
Neutral Undertones: Your skin does not have neutral undertones, which means you have neutral undertones. You can pull off almost any shade of mulled wine, which means you have neutral undertones, but a balanced mix of red and purple might be the most flattering.
6. Consider Your Eye Color
Your eye color can also influence how a particular mulled wine shade will look on you. Here to pair your eye color with the right shade:
Blue or Green Eyes: Cool, purple-based mulled wine shades can make blue or green eyes stand out, creating a striking contrast.
Brown Eyes: Warm, red-based mulled wine shades can add warmth and depth, enhancing the richness of brown eyes.
Hazel Eyes: A balanced mulled wine shade combining red and purple can bring out the mulmultidimensionalnes in hmultidimens.
7. Consult with a Professional
If youyou’rendering which multidimensionalulledltidimensionalulled wine shade will suit you best, consider consulting with a professional colorist. A colorist can assess your skin tone, undertones, and eye color to recommend the most flattering shade. They can also help you achieve the perfect red, purple, and burgundy balance to match your unique complexion.
Choosing the right mulled wine shade for your skin tone ensures that your new hair color looks stunning and complements your natural beauty. By considering your skin tone, undertones, and eye color, you can select a shade that enhances your features and leaves you feeling confident and vibrant. A mulled wine shade is perfect for a subtle change or a bold transformation.
DIY vs. Professional Coloring: Which is Better for Mulled Wine Hair?
When achieving the perfect mulled wine hair color, you may wonder whether to go the DIY route or seek professional help. Both options have pros and cons, and the choice often depends on your experience, confidence, and desired outcome. LetLet’splore the benefits and challenges of each to help you decide which is better for your mulled wine hair transformation.
1. DIY Coloring: The Pros and Cons
Pros:
Cost-Effective: One of the main advantages of DIY hair coloring is the cost savings. Professional salon visits can be expensive, especially for intricate colors like mulled wine that require multiple steps. DIY kits are significantly cheaper and can be purchased at your local beauty supply store or online.
Convenience: Coloring your hair at home means you can do it on schedule—There’s need to no no book an appointment or wait weeks to see your stylist. DIY might be appealing if you prefer the comfort and privacy of your own space.
Creative Control: DIY coloring allows you complete control over the process. You can experiment with different shades and techniques to achieve a unique look. For those who enjoy being hands-on and have some experience with hair coloring, this can be a fun and rewarding experience.
Cons:
Risk of Mistakes: Achieving the perfect mulled wine shade can be tricky, especially if you’re not experienced. The complex mix of reds, purples, and burgundies requires precision in application and formulation. If not done correctly, DIY coloring increases the risk of uneven results, patchiness, or unwanted shades.
Limited Resources: Unlike salons, which use professional-grade products and tools, DIY kits are often more basic. You may not achieve the same vibrancy or longevity as you would with salon-quality products. Correcting any mistakes or adjusting the color later on can be challenging.
Damage Control: If not done properly, DIY hair coloring can potentially damage your hair. Without professional guidance, you might overprocess your hair, leading to dryness, breakage, or even hair loss.
2. Professional Coloring: The Pros and Cons
Pros:
Expertise and Precision: A professional colorist has the training and experience to create the perfect mulled wine shade tailored to your hair type, skin tone, and preferences. They understand the nuances of color mixing and application, ensuring a more even, vibrant, and long-lasting result.
Access to Quality ProduProduchigh-qualityhuses-high-qualityfeprofess thatathat areucts thattthat thatsarelly unavailable to them. These products can achieve richer colors, better coverage, and longer-lasting results while being gentler on your
Customized Experience: A professional can customize your mulled wine color to suit your style, whether you want a subtle hint of color or a bold, dramatic look. They can also recommend additional treatments, such as deep conditioning or glossing, to enhance color and keep your hair healthy.
Damage Prevention: Professionals know how to minimize the risk of damage during the coloring process. They can assess your condition and take the necessary precautions to protect it, such as using bond-building treatments or choosing a lower-volume developer.
Cons:
Higher Cost: The expertise and quality of professional coloring come at a price. Salon visits for complex colors like mulled wine can be expensive, especially if multiple sessions are required to achieve the desired result.
Time Commitment: Achieving and maintaining a mulled wine hair color at a salon can be time-consuming. YouYou’lled to book appointments, possibly for multiple sessions, and factor in the time spent traveling to and from the salon.
Less Control: While professionals are skilled at what they do, you may have less creative control over the outcome. Communicating your vision clearly and trusting the process is essential, but this can be difficult if you like to experiment and take risks.
3. Factors to Consider When Choosing Between DIY and Professional Coloring
Experience Level: If youyou’rew to hair coloring or have had trouble with DIY color, professional coloring is likely the safer option. DIY could be a fun and rewarding challenge for those with experience and confidence in their abilities.
Desired Outcome: If you are specific, complex,, samultidimensionale or want a multidimensional color with multi-multi-dimensionallights, a professional colorist is your best bet. For simpler, single-process color, DIY might be sufficient.
Hair Health: Consider your haihair’sucmultidimensional’sready damaged or prone to breakage; a professional can help you achieve your desired color while minimizing further damage. DIY might be worth the risk if your hair is healthy and resilient.
Budget: Your budget plays a significant role in your decision. DIY may be the more attractive option if cost is a substantial concern if cost is significant or concern. However, if you can afford it, investing in professional coloring can save you time and potential headaches in the long run.
4. Personal Opinion: The Best Approach for Mulled Wine Hair Color
In my experience, mulled wine is a color that genuinely benefits from professional expertise. The complexity of this shade—with its rich interplay of reds, purples, and burgundies—can be challenging to achieve and maintain at home. A professional colorist can tailor the shade to your skin tone and apply the color evenly and precisely. They can also provide the necessary treatments to keep your hair healthy and vibrant between colorings.
However, if youyou’renfident in your DIY skills and enjoy coloring your hair at home, achieving a beautiful mulled wine shade on your own is possible. Just be sure to invest in quality products, follow the instructions carefully, and be prepared to do some extra maintenance to keep your color looking fresh.
Ultimately, whether you choose DIY or professional coloring, the key is to ensure that your hair is healthy and cared for throughout the process. This will help you achieve the best possible color and keep your hair looking and feeling its best.
Personal Opinion: Why Mulled Wine Hair Color is the Perfect Choice for a Bold Yet Elegant Look
When making a statement with your hair, few can color balance boldness and elegance, quite-mulled wine. As someone who has experimented with various hair colors over the years, I can confmultidimensionalthis rich, multi-multidimensionale multidisc multidimensional..
1. A Harmonious Blend of Boldness and Sophistication
Mulled wine hair color is not just a shade; it’s attitude. The deep, warm tones of burgundy and red evoke a sense of confidence and strength, while the subtle hints of multidimensional add a layer of sophistication and depth. This combination makes mulled wine ideal for those who want to make a bold impression without sacrificing elegance.
Unlike some vibrant hair colors that can be too loud or edgy, mulled wine has a refined quality that makes it suitable for various occasions and settings. Whether attending a formal event, a casual get-together, or a day at the office, this shade adapts beautifully, enhancing your overall look without overpowering it.
2. Versatility Across Skin Tones
One of the reasons I love mulled wine hair color is its versatility. This shade complements a wide range of skin tones, from fair to deep. The richness of the color can be adjusted to match your natural undertones, ensuring that it enhances your complexion rather than clashing with it.
For those with cooler skin tones, a mulled wine shade with more prominent purple and blue undertones can create a striking contrast that highlights the coolness of your complexion. On the other hand, if you have a warmer skin tone, opting for a mulled wine shade with more red and brown undertones can create a harmonious, warm look that feels natural and luxurious.
3. Timeless Appeal
While hair color trends come and go, mulled wine has a timeless appeal that transcends fads. Its color feels current and classic, making it a great long-term choice for those who prefer to stick with one shade for an extended period. The subtle complexity of the color ensures that it remains exciting and dynamic over time, unlike some colors that can feel one-dimensional or monotonous after a while.
4. Perfect for Expressing Individuality
In a world where personal expression is more valued than ever, mulled wine hair color offers a way to stand out while still feeling polished. It’It’scolor that speaks to creativity and Individuality but does so in an approachable and wearable way youyou’reoking to refresh your look or make a significant change; mulled wine provides a perfect middle ground between classic and contemporary, making it an ideal choice for anyone looking to express their unique style.
5. Low-Key Maintenance with High Impact
Another reason I’mI’mfan of mulled wine hair color is its relatively low maintenance compared to bold shades. While it does require some upkeep to keep the color vibrant, the dark, rich tones tend to fade gracefully. This means you can go a bit longer between touch-ups without worrying about your hair looking washed out or uneven.
Additionally, mulled wine is a shade that pairs well with darker roots, which can be a game-changer for those who want to stretch the time between salon visits. This natural blending of roots into the mulled wine hue can create a chic, lived-in look that remains stylish as it grows.
Conclusion: A Confident, Elegant Choice
I think mulled wine hair color is the perfect choice for anyone looking to make a bold yet elegant statement. It’s a versatile, timeless shade that complements various skin tones, expresses Individuality, and offers a sophisticated edge that few other colors can match. If you’re considering a change and want a color that embodies confidence and class, mulled wine is the way to go.
FAQs about Mulled Wine Hair Color
1. What is mulled wine hair color?
Mulled wine hair co a rich, warm shade that blends deep burgundy, red, and subtle purple tones. Inspired by the color of the spiced winter beverage, this hair color is botmultidimensionalnt, offering a multidimensional look.
2. Does mulled wine hair color fade quickly?
Like most red-based hair colors, mulled wine can fade faster than other shades, primarily if not correctly maintained. To prolong the vibrancy of your color, use color-safe shampoos and conditioners, minimize heat styling, and avoid excessive sun exposure.
3. Is mulled wine hair color multi-dimensional skin tones?
Mulled wine hair color is versatile and can be customized to suit various skin tones. Cooler skin tones often pair well with shades with purple or blue undertones, while warmer skin tones look great with shades with red or brown undertones.
4. Can I achieve mulled wine hair color at home?
It is possible to achieve mulled wine hair color at home, especially if youyou’reperienced with DIY hair coloring. However, because this shade requires a careful balance of tones to reach the proper depth and dimension, many people opt for professional coloring to ensure the best results.
5. How do I maintain my mulled wine hair color?
Use sulfate-free, color-safe shampoos and conditioners to maintain your mulled wine hair color. Regular touch-ups and deep conditioning treatments will help keep your hair vibrant and healthy. Minimizing exposure to sun, chlorine, and heat styling can prevent your color from fading prematurely.
6. How often will I need to touch up mulled wine hair color?
Touch-up frequency depends on how fast your hair grows and how vibrant you want your color to remain. Typically, you may need to touch up your roots every 4-6 weeks, with occasional full-color refreshes to maintain the richness of the shade.
7. Will mulled wine hair color work on dark hair?
Yes, mulled wine hair color can work beautifully on dark hair, but it often requires some lightening first to achieve the desired vibrancy. If your hair is very dark, a professional colorist can help lift your base color to the appropriate level before applying the mulled wine shade.
8. What should I do if my mulled wine hair color starts to fade?
If your color starts to fade, you can refresh your shade with color-depositing shampoos or conditioners designed for red or burgundy hair. Scheduling a gloss treatment with your stylist can also revive the richness and shine of your mulled wine hair.
9. Can I mix mulled wine hair color with other colors?
Mulled wine hair color can be mixed with other shades for a custom look. Some popular combinations include blending it with deeper reds, warm browns, or even a hint of violet for a unique, personalized color. Consult with your colorist to create a blend that complements your style and complexion.
10. Is mulled wine hair color high maintenance?
Mulled wine hair color requires moderate maintenance. While it doedoesn’ted as frequent touch-ups as some lighter or more vibrant colors, keeping it looking its best requires regular care, including using color-protecting products and avoiding harsh treatments that can cause the color to fade.
11. How can I make mulled wine hair color last longer?
To extend the life of your mulled wine hair color, wash your hair with cold water, avoid daily washing, and use a leave-in conditioner to protect your hair from environmental stressors. Additionally, consConsConsidertant spray if you spend much time outdoors.
12. What hairstyles look best with mulled wine hair color?
Mulled wine hair color looks stunning with a variety of hairstyles. Whether you prefer soft waves, sleek straight styles, or intricate braids, the rich tones of mulled wine add depth and dimension to any look. Layered cuts and multidimensional styles enhance the multidimensional effect of the color.
Tmumultidimensionalrs some of the most common questions about mulled wine hair color, providing concise, informative answers that help readers make informed decisions about their hair color choices.
Your living room is more than just a place to relax—it’s the heart of your home, where you entertain guests, spend quality time with family, and express your style. The decor you choose for this space can significantly impact its overall feel and functionality, making it essential to consider each element carefully. Whether moving into a new home or looking to refresh your current space, thoughtful living room decor can transform your room into a stylish and inviting haven.
This article will explore 20 creative and practical living room decor ideas that will help you elevate your space. From selecting the right color palette to incorporating innovative technology, these tips are designed to inspire you and guide you in creating a living room that truly reflects your personality and lifestyle. By the end of this guide, you’ll have a wealth of ideas to help you achieve a well-decorated living room that combines comfort, style, and functionality.
Are you ready to transform your living room? Let’s explore these stylish tips to bring your space new life.
Choosing the Right Color Palette
Selecting the right color palette is the foundation of successful living room decor. Colors can set the tone, evoke emotions, and create a sense of harmony in your space. Whether you prefer a calm and serene environment or a bold and vibrant atmosphere, the colors you choose will significantly influence the overall mood of your living room.
Understanding the Impact of Color
Colors can change the perception of a room’s size, warmth, and light. Light colors like soft whites, creams, and pastels make a space feel larger and more open, while darker shades like deep blues, rich greens, and charcoal can create a cozy, intimate atmosphere. Neutral colors like beige, gray, and taupe are versatile and timeless, serving as a perfect backdrop for various styles and accents.
Warm colors (reds, oranges, yellows) are known for their energizing and welcoming qualities, making them ideal for spaces where you entertain guests. On the other hand, cool colors (blues, greens, purples) tend to be calming and soothing, which can be perfect for creating a relaxing environment in your living room.
Tips for Selecting the Right Colors
Start with a Base Color: Choose a neutral or subtle shade as your base color, which will dominate the room. This could be the color of your walls, large furniture pieces, or a prominent rug. Base colors should be versatile and timeless, providing a solid foundation for other accents.
Incorporate Accent Colors: Add one or two accent colors to create interest and depth once you have a base color. These can be introduced through cushions, artwork, throw blankets, or small decor items. Accent colors should complement the base color and reflect your style.
Consider the Lighting: The amount and type of lighting in your living room can dramatically affect how colors appear. Natural light can make colors look more vibrant, while artificial lighting can alter their tone. Test your chosen colors in different lighting conditions to ensure they look as appealing in the evening as during the day.
Balance Bold Colors: If you’re drawn to bold or dark colors, use them sparingly to avoid overwhelming the space. Consider using a bold color on an accent wall or in smaller doses through accessories and textiles. Balancing bold colors with neutrals can create a dynamic yet harmonious look.
Test Before You Commit: Always test paint samples on your walls before committing to a color. Paint small sections and observe how the color changes throughout the day as the light changes. This will help you avoid costly mistakes and ensure you’re happy with your choice.
Incorporating Trends Without Overcommitting
While exploring the latest color trends is tempting, it’s important to choose colors you’ll love for years to come. Trendy colors can be fun, but they can also quickly feel outdated. If you want to incorporate current trends, consider using easily changeable elements like throw pillows, rugs, or wall art rather than permanent fixtures like wall colors or large furniture pieces.
Creating a Cohesive Look
Consider the color scheme of adjoining rooms to achieve a cohesive look. If your living room flows into a dining room or hallway, ensure that the colors harmonize across these spaces. This doesn’t mean all rooms must be the same color, but they should complement each other to maintain a consistent flow throughout your home.
In conclusion, choosing the right color palette is crucial in decorating your living room. By understanding the impact of different colors, considering your lighting, and balancing trends with timeless choices, you can create a beautiful, inviting, and comfortable space. Whether you prefer a monochromatic scheme or a vibrant mix of hues, the right colors will set the stage for the rest of your decor, making your living room a true reflection of your style.
Maximizing Natural Light
Natural light is a powerful element in living room decor, as it enhances the ambiance, makes the space feel more extensive, and highlights the colors and textures in your room. A well-lit living room looks more inviting and positively affects your mood and energy. Here’s how to maximize natural light in your living room to create a bright, airy space.
1. Use Light, Reflective Colors
One of the simplest ways to amplify natural light in your living room is by choosing light, reflective colors for your walls, ceilings, and large furniture pieces. Whites, creams, soft grays, and pastels reflect more light than darker colors, making your space more open and bright. For the best effect, paint with a satin or semi-gloss finish, reflecting even more light.
2. Opt for Sheer Window Treatments
Heavy curtains and dark drapes can block natural light from entering your living room. Instead, choose sheer or lightweight fabrics for your window treatments to allow sunlight to filter through. If you need privacy, consider layering with translucent blinds or shades that can be adjusted to control light levels while maintaining a bright atmosphere.
3. Position Mirrors Strategically
Mirrors are fantastic for reflecting natural light and making a room appear larger. Place a large mirror opposite or adjacent to a window to bounce light around the room. You can also experiment with a gallery of smaller mirrors to achieve a similar effect while adding an artistic touch to your decor.
4. Keep Windows Clean and Clear
It may seem obvious, but clean windows are essential for maximizing the natural light entering your living room. Dust, dirt, and streaks can reduce light penetration, making your room feel dimmer. Regularly clean your windows inside and out to ensure you get the most light possible.
5. Choose Reflective Surfaces
Incorporate reflective surfaces in your living room to further enhance natural light. Glass coffee tables, metallic decor, glossy finishes, and even polished wood can all help to reflect light and brighten your space. These elements serve a practical purpose and add a touch of elegance and sophistication to your decor.
6. Trim Back Outdoor Foliage
If you have large trees or shrubs outside your windows, consider trimming them back to allow more sunlight to filter into your living room. While greenery adds beauty and shade, overgrown plants block valuable natural light. You can balance shade and sunlight perfectly by maintaining your outdoor landscaping.
7. Opt for Open Layouts and Low Furniture
An open layout naturally allows light to flow freely throughout your living room. Avoid placing tall or bulky furniture near windows where it could obstruct light. Instead, choose low-profile furniture that won’t block the sunlight’s path. If you have an open-plan living room, consider keeping the layout as uncluttered as possible to maintain a light and airy feel.
8. Consider Skylights or Solar Tubes
Consider installing skylights or solar tubes for living rooms that lack sufficient natural light due to their location or window size. Skylights provide a direct daylight source from above, brightening even the darkest corners of your living room. Solar tubes, which are smaller and more affordable, capture sunlight from the roof and channel it into the room, providing natural light without the need for major renovations.
9. Use Glass Doors or Partitions
If your living room adjoins another room or an outdoor space, consider using glass doors or partitions to allow light to pass through. French doors, sliding glass doors, or even large glass panels can help to share light between spaces, making your entire home feel more connected and open.
10. Lighten Up Flooring and Rugs
Dark floors can absorb light, making your living room feel smaller and dimmer. If you’re looking to maximize natural light, consider using lighter flooring options such as light wood, laminate, or even whitewashed tiles. Alternatively, add a light-colored rug to your existing floor to brighten the space. Rugs with subtle patterns can add texture and interest without detracting from the overall brightness of the room.
Creating a Bright and Inviting Space
Maximizing natural light in your living room not only makes the space more aesthetically pleasing but also contributes to a healthier and more uplifting environment. By thoughtfully arranging your decor, choosing reflective materials, and keeping your windows clear, you can transform your living room into a bright, welcoming area where natural light plays a starring role. Whether you have a sun-drenched space or a room that needs a little help, these tips will ensure that you’re making the most of the natural light available to you.
Layering Textures for Comfort and Style
Layering textures in your living room is a surefire way to add depth, interest, and a sense of coziness to the space. While color and lighting are crucial elements of decor, texture brings a tactile dimension that can make your living room feel more inviting and polished. By combining different materials, finishes, and textiles, you can create a living room that not only looks beautiful but also feels comfortable and lived-in. Here’s how to master the art of layering textures to enhance both comfort and style in your living room.
1. Start with a Textured Foundation
The foundation of your living room’s texture comes from the larger elements like flooring, walls, and large furniture pieces. Consider incorporating textured flooring options such as a soft wool rug, a jute carpet, or hardwood floors with a visible grain. On the walls, you can use materials like exposed brick, shiplap, or wallpaper with a subtle pattern to introduce texture. For furniture, choose pieces with materials like linen, velvet, or leather that naturally offer a tactile experience.
2. Mix Different Fabrics
One of the most effective ways to layer textures is by mixing different fabrics throughout the room. Pairing smooth materials like silk or satin with rougher textures like burlap or chunky knits creates a visually interesting contrast. For example, you could drape a velvet throw over a linen sofa or add silk cushions to a wool armchair. This contrast not only adds visual appeal but also enhances the sensory experience, making the room more comfortable and inviting.
3. Incorporate Natural Materials
Natural materials bring warmth and organic texture to your living room, grounding the space and connecting it to nature. Consider adding elements like a rattan chair, a wicker basket, or wooden side tables with a raw, unfinished look. Stone accents, like a marble coffee table or a slate fireplace surround, can also add an earthy texture. These natural materials introduce a sense of authenticity and timelessness to your decor.
4. Layer Rugs for Depth
Rugs are a versatile tool for adding texture underfoot while also defining different areas within your living room. Consider layering rugs to create a dynamic, multi-dimensional look. For instance, you can place a smaller, patterned rug on top of a larger, neutral rug to add visual interest and depth. Mixing different textures—such as a flat-woven rug with a fluffy shag rug—can create a cozy, inviting atmosphere.
5. Play with Throw Pillows and Blankets
Throw pillows and blankets are some of the easiest and most effective ways to layer texture in your living room. Choose pillows in a variety of fabrics, such as cotton, velvet, faux fur, and knitted wool, to add softness and visual appeal. Mixing different shapes and sizes of pillows can also create a more dynamic and comfortable arrangement. A chunky knit or a fringed throw blanket draped over the back of a sofa or armchair adds an extra layer of warmth and texture.
6. Add Texture with Window Treatments
Window treatments are often overlooked as a source of texture, but they can significantly impact the feel of your living room. Heavy drapes in materials like velvet or brocade can add a luxurious, plush texture, while lightweight linen curtains offer a more relaxed, airy feel. If you prefer a minimalist look, consider wooden blinds or bamboo shades for a natural, textured appearance that complements the rest of your decor.
7. Use Decorative Accents Wisely
Decorative accents such as vases, sculptures, and wall art can also contribute to the layered texture of your living room. Choose items with interesting finishes, such as a ceramic vase with a matte glaze, a metal sculpture with a hammered finish, or a painting with thick, impasto brushstrokes. These accents not only add texture but also serve as focal points that draw the eye and add personality to the space.
8. Experiment with Metallics and Glass
Metallic elements like brass, copper, or chrome can add a sleek, reflective texture to your living room, balancing out softer, matte finishes. Consider incorporating metallic accents through items like lamps, picture frames, or side tables. Similarly, glass elements such as a coffee table, vases, or light fixtures introduce a smooth, transparent texture that can contrast beautifully with more opaque materials.
9. Don’t Forget About Plants
Plants are a wonderful way to add natural texture and life to your living room. The greenery and organic shapes of leaves and stems introduce a fresh, vibrant texture that softens the overall look of the room. Consider a variety of plants with different leaf shapes, sizes, and textures to create a more layered and dynamic display. Pots and planters made of materials like terracotta, concrete, or woven baskets further enhance the textural richness.
10. Balance and Harmonize
While layering textures is about mixing and matching different elements, it’s important to maintain a sense of balance and harmony in your living room. Avoid overwhelming the space with too many competing textures by choosing a few key textures to highlight and ensuring they complement each other. For instance, if you have a heavily textured sofa, balance it with smoother, simpler accessories. The goal is to create a space that feels cohesive, comfortable, and visually pleasing.
Creating a Cozy and Stylish Atmosphere
Layering textures in your living room adds a tactile dimension that elevates the overall decor, making the space feel more cozy, stylish, and inviting. By thoughtfully combining various materials and finishes, you can create a room that not only looks beautiful but also offers a rich sensory experience. Whether you’re aiming for a modern, minimalist aesthetic or a warm, bohemian vibe, layering textures is the key to achieving a living room that feels both comfortable and sophisticated.
Selecting the Perfect Furniture Pieces
The furniture you choose for your living room serves as the foundation of your space’s overall aesthetic and functionality. Selecting the perfect pieces involves more than just picking items that look good; it’s about ensuring that your furniture complements the room’s layout, aligns with your personal style, and meets your comfort needs. Here’s how to select the ideal furniture for your living room, blending style and practicality to create a cohesive, inviting space.
1. Define Your Style and Functionality Needs
Before you start shopping for furniture, it’s essential to have a clear understanding of your personal style and how you plan to use your living room. Are you drawn to a modern, minimalist look, or do you prefer something more traditional and cozy? Do you need a space that’s great for entertaining guests, or are you more focused on creating a family-friendly environment? Defining your style and functionality needs will help guide your furniture choices and ensure that each piece serves a purpose while contributing to the overall design.
2. Consider the Room’s Layout and Flow
The layout of your living room plays a crucial role in determining which furniture pieces will work best. Start by assessing the room’s size, shape, and natural flow of movement. For smaller spaces, consider furniture with a smaller footprint, like a loveseat instead of a full-size sofa, o a round coffee table that allows for easier navigation. In larger rooms, you might opt for a sectional sofa or a set of armchairs to fill the space and create distinct seating areas. Make sure to leave enough space for people to move around comfortably and maintain a sense of balance in the room.
3. Choose a Comfortable and Stylish Sofa
The sofa is often the centerpiece of the living room, making it one of the most important furniture choices you’ll make. When selecting a sofa, comfort should be your top priority. Consider the depth of the seat, the firmness of the cushions, and the height of the backrest to ensure it meets your comfort preferences. In terms of style, choose a sofa that aligns with the overall theme of your decor. For a modern look, opt for a sleek, low-profile design with clean lines. For a more traditional space, consider a sofa with rolled arms and plush cushions. Don’t forget to think about fabric durability, especially if you have pets or children.
4. Add Versatile Seating Options
In addition to your sofa, it’s a good idea to include versatile seating options that can accommodate different activities and guests. Armchairs, ottomans, and accent chairs can provide additional seating while also adding character to the room. Consider pieces that can be easily moved around, allowing you to reconfigure the seating arrangement based on your needs. Swivel chairs, for instance, offer flexibility and can be rotated to face different areas of the room, making them perfect for open-concept spaces.
5. Select the Right Coffee Table
The coffee table is both a functional and decorative piece in your living room. When selecting a coffee table, consider its height in relation to your seating. The table should be no more than two inches higher or lower than the seat height of your sofa to ensure comfort and convenience. In terms of style, the coffee table should complement the other furniture in the room. For example, a glass-top table can add a touch of elegance and make a small room feel more open, while a wooden table can bring warmth and texture to the space. Also, think about storage needs—tables with shelves or drawers can help keep the room clutter-free.
6. Incorporate Functional and Stylish Storage
Living rooms often serve as multifunctional spaces, so it’s essential to include storage solutions that keep the area organized while maintaining a stylish appearance. Consider furniture pieces that offer hidden storage, such as a storage ottoman or a coffee table with built-in compartments. Bookshelves, media consoles, and sideboards can provide ample space for storing books, electronics, and decorative items. Opt for pieces that match the overall style of your living room and consider a mix of open and closed storage to balance practicality with aesthetics.
7. Invest in a Statement Piece
A statement piece can elevate your living room decor, adding a focal point that draws attention and sets the tone for the rest of the room. This could be a bold sofa, an eye-catching armchair, or a unique coffee table. When choosing a statement piece, make sure it reflects your personal style and complements the other elements in the room. Keep in mind that the statement piece should stand out without overwhelming the space—balance is key.
8. Balance Comfort with Aesthetics
While it’s important to select furniture that enhances the visual appeal of your living room, comfort should never be compromised. Furniture that looks great but is uncomfortable to use will detract from the enjoyment of your space. Test out seating options before making a purchase, and prioritize pieces that offer both style and comfort. Consider factors like cushion firmness, back support, and fabric texture to ensure that each piece is as comfortable as it is beautiful.
9. Harmonize Furniture Styles
When selecting multiple furniture pieces, it’s important to ensure that they harmonize with each other. This doesn’t mean that everything has to match perfectly—mixing different styles can create a more interesting and personalized look. However, the pieces should complement each other in terms of color, scale, and overall aesthetic. For example, if you have a modern sofa, pair it with mid-century modern chairs or a minimalist coffee table to create a cohesive look.
10. Personalize with Finishing Touches
Once you’ve selected your main furniture pieces, it’s time to add the finishing touches that will make your living room truly your own. Personalize the space with decorative accessories like throw pillows, blankets, and rugs that reflect your style and add comfort. Consider incorporating art, plants, and lighting to further enhance the room’s ambiance. These finishing touches help tie the room together, creating a cohesive, stylish, and inviting living space.
Creating a Functional and Stylish Living Room
Selecting the perfect furniture pieces for your living room involves balancing style, comfort, and functionality. By carefully considering your room’s layout, your personal style, and how you plan to use the space, you can choose furniture that not only looks great but also meets your practical needs. Whether you’re starting from scratch or updating your current decor, following these guidelines will help you create a living room that is both stylish and comfortable, making it a space you and your guests will love spending time in.
Incorporating Statement Lighting
Lighting is a crucial element in any living room, serving both practical and aesthetic purposes. The right lighting can set the mood, highlight your decor, and even make a room feel more spacious and inviting. Incorporating statement lighting into your living room design can elevate the overall ambiance, adding a touch of sophistication and style that enhances the room’s character. Here’s how to choose and incorporate statement lighting to transform your space.
1. Understand the Role of Lighting in Your Living Room
Before selecting your statement lighting, it’s essential to understand the various roles that lighting plays in a living room. There are three primary types of lighting to consider:
Ambient Lighting: This is the general lighting that illuminates the entire room, usually provided by ceiling fixtures, chandeliers, or recessed lights.
Task Lighting: Focused lighting used for specific activities, such as reading or working. Examples include table lamps, floor lamps, and adjustable wall sconces.
Accent Lighting: Lighting that highlights specific features or decor elements, such as artwork, architectural details, or textured walls. This includes spotlights, track lighting, and picture lights.
Incorporating a combination of these lighting types ensures that your living room is well-lit, functional, and visually appealing.
2. Choose a Statement Piece that Reflects Your Style
A statement light fixture serves as a focal point in the room, capturing attention and setting the tone for the entire space. When choosing a statement lighting piece, consider your overall decor style. For a modern or contemporary living room, you might opt for a sleek, geometric chandelier or a bold pendant light with clean lines. If your style is more traditional, consider a grand crystal chandelier or a classic lantern-style fixture. For a bohemian or eclectic space, look for unique and artistic lighting options, such as a colorful glass pendant or a sculptural floor lamp.
The key is to select a piece that not only stands out but also complements the other elements in the room, creating a cohesive design.
3. Scale and Proportion Matter
When incorporating statement lighting, it’s important to consider the scale and proportion of the fixture in relation to the size of your living room. A large, dramatic chandelier might overpower a small room, while a tiny pendant light could get lost in a spacious area.
To find the right size, consider the dimensions of your room and the height of your ceiling. As a general rule, the diameter of a chandelier or pendant light should be about one-third to half the width of the room. For ceiling height, a fixture should hang 7-8 feet above the floor in rooms with standard ceilings, and slightly higher if your ceilings are taller.
If you’re placing a chandelier over a coffee table, ensure there’s enough clearance so it doesn’t obstruct the view or impede movement around the table.
4. Layer Your Lighting
While a statement piece can be the star of your living room, it shouldn’t be the only source of light. Layering your lighting creates depth and dimension, ensuring the room is well-lit for various activities and moods.
In addition to your main statement fixture, incorporate other lighting sources such as floor lamps, table lamps, and wall sconces. For example, you could pair a grand chandelier with sleek floor lamps to create a balanced mix of ambient and task lighting. Accent lighting, such as LED strips under shelving or picture lights above artwork, can add a subtle glow that highlights specific areas of the room.
Layering also allows you to control the intensity of light, creating a more comfortable and inviting atmosphere.
5. Experiment with Bulb Types and Light Temperatures
The type of bulbs you use and their light temperature can significantly impact the look and feel of your living room. Warm light (2700K-3000K) creates a cozy and inviting ambiance, making it ideal for living rooms where you want to relax or entertain guests. Cooler light (3500K-4100K) is more energizing and works well for task-oriented areas or rooms with a modern, clean aesthetic.
Consider the brightness (measured in lumens) as well, ensuring that your statement piece provides enough light for the room’s size and purpose. Dimmable bulbs are a great option for living rooms, as they allow you to adjust the light intensity to suit different occasions.
Also, explore different types of bulbs, such as LED, incandescent, or vintage Edison bulbs, depending on the look you want to achieve. LED bulbs are energy-efficient and come in a range of temperatures and brightness levels, making them a versatile choice for statement lighting.
6. Highlight Architectural Features and Art with Accent Lighting
If your living room has interesting architectural features or artwork, accent lighting can enhance these elements and create a dramatic effect. Use spotlights, wall-mounted fixtures, or even a statement floor lamp to draw attention to a beautiful fireplace, a textured wall, or a piece of art.
Accent lighting not only adds visual interest but also complements your statement fixture, creating a cohesive and layered lighting scheme.
7. Use Statement Lighting to Define Zones
In open-concept living spaces, statement lighting can help define different zones within the room. For example, a large pendant light or chandelier can anchor the seating area, while a series of smaller pendant lights or wall sconces can delineate a reading nook or dining space.
This approach not only adds functionality but also contributes to the overall design, making each area of the room feel intentional and well-defined.
8. Consider Innovative and Artistic Lighting Designs
Don’t be afraid to think outside the box when choosing statement lighting. Innovative and artistic designs can add a unique touch to your living room, making it truly one-of-a-kind. Look for fixtures that incorporate unexpected materials, shapes, or technologies.
For instance, a sculptural light fixture made from recycled materials can be both a conversation piece and an eco-friendly choice. Or, consider smart lighting options that allow you to change the color and intensity of the light with a simple app, adding versatility and modern flair to your space.
9. Balance Statement Lighting with Other Decorative Elements
While statement lighting is meant to stand out, it’s impcrucial balance it with other decorative elements in the room. Too many bold features can create visual clutter, detracting from the impact of your lighting.
Instead, let your statement fixture shine by keeping other elements, such as furniture and accessories, relatively simple and complementary. This approach ensures that your lighting serves as a focal point without overwhelming the space.
10. Personalize Your Lighting Choices
Ultimately, your statement lighting should reflect your personal style and taste. Whether you prefer something classic, modern, or eclectic, choose a fixture that resonates with you and enhances the overall atmosphere of your living room.
Consider adding personal touches, such as custom-made fixtures or vintage pieces that have special meaning to you. Personalizing your lighting choices not only makes your living room unique but also creates a space that feels truly yours.
Illuminating Your Living Room with Style
Incorporating statement lighting into your living room decor is a powerful way to enhance the room’s ambiance and showcase your personal style. By carefully selecting the right piece, considering scale and proportion, and layering different types of lighting, you can create a space that is both functional and visually stunning. Statement lighting serves as more than just a source of illumination—it becomes an integral part of your living room’s design, elevating the entire space to new levels of sophistication and comfort.
Using Area Rugs to Define Spaces
Area rugs are a versatile and powerful tool in interior design, especially when it comes to defining spaces in a living room. Whether your living room is part of an open-concept floor plan or a more traditional layout, the strategic use of area rugs can help delineate different zones, add warmth, and tie the overall design together. Here’s how you can use area rugs effectively to transform your living room.
1. Define Seating Areas
One of the most common ways to use an area rug is to define the seating area in a living room. This creates a visual boundary that anchors the furniture and makes the space feel more cohesive. When choosing a rug for this purpose, ensure it is large enough to fit under all the key pieces of furniture, such as the sofa, coffee table, and armchairs. Ideally, the front legs of your seating furniture should rest on the rug, while the back legs can either sit on or off the rug, depending on the size of the space.
For smaller living rooms, consider a rug that just fits the coffee table, with the seating arranged around it. This approach can make the room feel more spacious while still providing a defined area for conversation and relaxation.
2. Separate Different Functional Zones
In open-concept living spaces, area rugs are essential for creating distinct zones. For example, you can use one rug to define the seating area and another to delineate a dining space or a reading nook within the same room.
By using rugs with different patterns, colors, or textures, you can visually separate these areas while maintaining a harmonious overall design. This is particularly useful in large, open rooms where the boundaries between different functional areas might otherwise be unclear.
3. Create a Focal Point
An area rug can serve as a focal point in your living room, drawing attention to a particular part of the space. For instance, a bold, patterned rug under the coffee table can become the centerpiece of the room, around which all other elements are arranged.
To create a focal point, choose a rug that contrasts with the rest of your decor, either through color, pattern, or texture. If your furniture and walls are neutral, a vibrant rug can add a pop of color and become the star of the room. Conversely, if your living room features bold furniture or artwork, a more subdued rug can provide a grounding effect.
4. Add Texture and Comfort
Beyond their ability to define spaces, area rugs add texture and comfort to a living room. A plush, high-pile rug can make a seating area feel cozy and inviting, while a flat-weave rug might be more appropriate for high-traffic areas where durability is key.
Consider layering rugs to enhance texture and visual interest. For example, you might place a smaller, textured rug on top of a larger, neutral base rug to create depth and dimension. This layering technique works well in eclectic or bohemian designs, where mixing patterns and textures is encouraged.
5. Coordinate with Other Decor Elements
To ensure your area rug ties the room together, coordinate it with other decor elements, such as throw pillows, curtains, or artwork. The rug doesn’t have to match these items exactly, but it should complement the color scheme and overall style of the room.
For example, if your living room features a lot of earthy tones, a rug in shades of brown, beige, or green will harmonize with the space. On the other hand, if your decor is more modern with monochrome elements, a black-and-white rug can reinforce the minimalist aesthetic.
6. Play with Patterns
Area rugs offer an opportunity to introduce patterns into your living room decor. Whether you prefer geometric designs, floral motifs, or abstract art, a patterned rug can add character and dynamism to the space.
When using a patterned rug, consider the scale of the pattern in relation to the size of the room and other decor elements. Large, bold patterns work well in spacious rooms with minimal furniture, while smaller patterns can add subtle interest to more compact spaces.
Also, if your furniture or walls already feature strong patterns, choose a rug with a simpler design to avoid overwhelming the room. Conversely, if the rest of the decor is relatively plain, a vibrant patterned rug can bring energy and personality to the space.
7. Consider Shape and Size
The shape and size of an area rug can significantly impact the room’s layout and flow. While rectangular rugs are the most common, don’t be afraid to explore other shapes, such as round, oval, or even irregularly shaped rugs.
Round rugs, for instance, can soften the look of a living room with a lot of straight lines and angular furniture. They’re also great for creating a cozy, intimate seating area. On the other hand, a large, rectangular rug can help elongate the room and make it feel more expansive.
When selecting the size of your rug, ensure it’s proportional to the space and the furniture. A rug that’s too small can make the room feel disjointed, while a rug that’s too large might overwhelm the space. As a general guideline, leave about 18 inches of bare floor around the rug’s edges to create a balanced look.
8. Use Rugs to Add Warmth and Insulation
Area rugs are not just decorative; they also add warmth and insulation to your living room. In colder climates or seasons, a thick, woolen rug can help retain heat and make the room feel more comfortable.
Even in warmer climates, rugs made from natural fibers like jute or sisal can add a layer of insulation without making the room feel too warm. These materials are also durable and easy to clean, making them ideal for high-traffic areas.
9. Experiment with Color Schemes
Rugs offer a versatile way to experiment with color schemes in your living room. If you’re hesitant to commit to bold wall colors or furniture, a colorful rug can be a more flexible option.
For instance, a vibrant rug with multiple colors allows you to pick up accent tones in other decor elements, such as cushions, throws, or artwork. This approach creates a cohesive color scheme that can be easily updated by switching out the rug or accessories.
Alternatively, if you prefer a more neutral palette, a rug in subtle shades of gray, beige, or cream can add sophistication without overpowering the room. Neutral rugs also provide a timeless look that can adapt to changing trends and tastes.
10. Maintain Balance with Other Design Elements
While area rugs can define spaces and add personality, it’s important to maintain balance with other design elements in the room. Avoid using multiple rugs with competing patterns or colors that clash with each other. Instead, choose rugs that complement the overall design and work together to create a harmonious flow.
If you’re using more than one rug in the same room, consider varying the textures or patterns to add interest while maintaining a cohesive look. For example, you might pair a textured jute rug with a soft, patterned wool rug, ensuring that the colors coordinate with the rest of the decor.
Enhancing Your Living Room with Area Rugs
Using area rugs to define spaces in your living room is a strategic way to enhance both functionality and aesthetics. By carefully selecting the right size, shape, pattern, and material, you can create distinct zones that add depth, warmth, and character to your space. Whether your goal is to anchor a seating area, separate different functional zones, or simply add a touch of comfort and style, area rugs are a versatile tool that can transform your living room into a cohesive and inviting environment.
Creating a Focal Point
A well-designed living room should have a focal point that draws the eye and anchors the overall design. The focal point serves as the room’s visual center, guiding how the furniture is arranged and setting the tone for the entire space. Whether it’s an architectural feature, a piece of art, or a striking piece of furniture, creating a focal point is essential for a cohesive and balanced living room design. Here’s how you can establish a compelling focal point in your living room.
1. Highlighting Architectural Features
If your living room has existing architectural features, such as a fireplace, large windows, or built-in shelving, these elements naturally lend themselves to becoming the focal point. Emphasize these features by arranging furniture to face or frame them, making them the central attraction of the room.
For example, if you have a fireplace, position your seating arrangement around it, and consider adding decorative elements like a mirror, artwork, or mantel decor to enhance its prominence. If large windows offer a beautiful view, ensure that your furniture arrangement allows for unobstructed sightlines, making the view a key part of the room’s aesthetic.
2. Using Statement Art or Decor
A single piece of statement art or decor can effectively serve as the focal point of your living room. Whether it’s a large painting, a sculpture, or a gallery wall, art can bring personality and visual interest to the space.
When selecting artwork, consider its scale in relation to the room. A large painting above a sofa or mantle can command attention and set the mood for the entire room. Alternatively, a gallery wall with a mix of framed art and photographs can create a dynamic focal point that reflects your personal style.
To make the art truly stand out, keep the surrounding decor relatively simple, allowing the focal point to shine without competing elements.
3. Introducing a Bold Accent Wall
Creating an accent wall is another effective way to establish a focal point in your living room. An accent wall can be painted in a bold color, covered with patterned wallpaper, or clad in a different material, such as wood, stone, or exposed brick.
The key to a successful accent wall is choosing a design that contrasts with the rest of the room while still complementing the overall color scheme. For example, if your living room features neutral tones, a deep blue or rich green accent wall can add depth and sophistication. On the other hand, a textured material like reclaimed wood can introduce warmth and a rustic charm.
Once the accent wall is in place, arrange your furniture to draw attention to it. Consider placing your main seating area or a significant piece of furniture, like a console or entertainment center, against the accent wall to enhance its impact.
4. Showcasing a Statement Piece of Furniture
A statement piece of furniture can serve as the focal point of your living room, whether it’s a luxurious sofa, a vintage coffee table, or an eye-catching armchair. This approach is particularly effective in minimalist or modern living rooms where the furniture itself is the star of the show.
When choosing a statement piece, consider both its design and function. A brightly colored or uniquely shaped sofa can become the centerpiece of the room, while a beautifully crafted wooden coffee table can draw attention to the center of your seating area.
To highlight the statement piece, keep the surrounding decor understated, allowing the focal point to take center stage without overwhelming the room.
5. Incorporating a Feature Lighting Fixture
Lighting can also be used to create a focal point in your living room. A dramatic chandelier, pendant light, or series of wall sconces can draw the eye and add a touch of elegance or modernity to the space.
For instance, a large chandelier placed above a seating area can instantly become the room’s focal point, adding both light and visual interest. Similarly, a row of pendant lights over a console or bar area can create a striking visual element that anchors that part of the room.
When using lighting as a focal point, consider the fixture’s design, size, and placement in relation to the rest of the room. Ensure that it complements the overall style of the space while standing out as a defining feature.
6. Using Mirrors to Enhance the Focal Point
Mirrors are a versatile tool in interior design, and they can be used to enhance or create a focal point in your living room. A large mirror above a fireplace, sofa, or console can reflect light and space, making the room feel larger and more open.
Mirrors with interesting frames or unique shapes can serve as focal points in their own right. For example, a sunburst mirror can add a touch of glamor and become the centerpiece of a living room, while a floor-length mirror in a decorative frame can add height and drama to the space.
When placing a mirror, consider what it will reflect. Ideally, it should reflect a pleasing view or another key design element in the room, reinforcing the focal point and enhancing the overall aesthetic.
7. Arranging Furniture to Focus on the Focal Point
The way you arrange your furniture can significantly influence the effectiveness of your chosen focal point. The goal is to direct attention toward the focal point while maintaining a comfortable and functional layout.
For example, if your focal point is a fireplace, arrange your seating so that it faces the fireplace, creating a cozy and inviting space. If your focal point is a large window with a view, ensure that the furniture doesn’t block the view and that it frames the window effectively.
Avoid cluttering the focal point with too many competing elements. Instead, allow space around the focal point to let it breathe and stand out. The furniture arrangement should feel natural and guide the eye toward the focal point without feeling forced or contrived.
8. Enhancing the Focal Point with Accessories
Once you’ve established a focal point, enhance it with carefully chosen accessories. This could include items like vases, plants, books, or decorative objects that complement the focal point without overpowering it.
For instance, if your focal point is a statement art piece, you might add a few coordinating accessories on a nearby console or shelf to reinforce the color scheme or theme. If your focal point is a fireplace, consider adding a few well-placed accessories on the mantel or hearth to create a balanced and harmonious look.
The key is to keep the accessories understated and complementary, ensuring they enhance rather than detract from the focal point.
Creating a Cohesive Design
Creating a focal point in your living room is crucial for achieving a cohesive and visually appealing design. Whether you choose to highlight an architectural feature, a piece of art, a statement piece of furniture, or a bold accent wall, the focal point should anchor the room and guide the overall design.
By carefully selecting and enhancing your focal point with complementary furniture, lighting, and accessories, you can create a living room that is both functional and aesthetically pleasing. The result is a space that not only captures attention but also invites relaxation and enjoyment.
Adding Greenery and Natural Elements
Incorporating greenery and natural elements into your living room is a timeless way to breathe life into your space. Plants and natural decor bring warmth, texture, and a sense of calm, creating a more inviting and harmonious environment. Whether you have a green thumb or prefer low-maintenance options, there are numerous ways to add greenery and natural elements that complement any design style. Here’s how you can seamlessly integrate nature into your living room decor.
1. Choosing the Right Plants for Your Space
The first step in adding greenery to your living room is selecting plants that thrive in your environment and suit your decor style. Consider factors like light availability, temperature, and the amount of care each plant requires.
Low-Light Plants: If your living room has limited natural light, opt for low-light tolerant plants such as snake plants, pothos, or ZZ plants. These are not only resilient but also add a modern touch with their sleek, sculptural leaves.
Bright, Sunlit Rooms: For living rooms with ample sunlight, consider plants like fiddle leaf figs, succulents, or rubber plants. These thrive in bright conditions and can make a bold statement with their large leaves and vibrant colors.
Air-Purifying Plants: Some plants, like peace lilies, spider plants, and Boston ferns, are known for their air-purifying properties. These are excellent choices if you want to enhance both the aesthetic and air quality of your living room.
When arranging plants, consider varying the heights and sizes to create visual interest. Grouping plants together in clusters or placing them at different levels, such as on shelves, stands, or hanging from the ceiling, can add depth and dimension to your space.
2. Incorporating Natural Materials
Beyond live plants, natural materials can also introduce organic warmth and texture to your living room. Incorporating elements like wood, stone, jute, and natural fibers can create a cohesive and grounded aesthetic.
Wooden Furniture and Accents: Wooden furniture, whether it’s a coffee table, shelving unit, or sideboard, adds a rustic or earthy feel to the room. Consider using reclaimed wood or pieces with natural grain patterns for added character.
Stone and Ceramic Decor: Items like stone vases, ceramic planters, or marble tabletops introduce a touch of elegance and timelessness. These materials bring in natural beauty with their unique textures and colors.
Woven and Natural Fiber Textiles: Rugs, cushions, and throws made from natural fibers like jute, wool, or cotton add softness and warmth to the room. Woven baskets can serve as both storage and decorative elements, enhancing the natural vibe.
Using these materials in your living room not only reinforces a connection with nature but also adds variety to the textures and finishes in the space, making it more visually engaging.
3. Incorporating Greenery into Existing Decor
Adding greenery doesn’t always require a complete overhaul of your living room decor. You can easily integrate plants into your existing setup to enhance the space with minimal effort.
Window Sills and Shelving: Small potted plants or succulents can be placed on window sills or shelves to add a touch of green without taking up much space. This works especially well in smaller living rooms where floor space is limited.
Corner Plants: Utilize empty corners by placing tall plants, such as a palm or a fiddle leaf fig, to fill the space and draw the eye upwards. This not only adds greenery but also balances the room’s proportions.
Coffee Table Displays: Create a simple yet effective centerpiece on your coffee table with a small group of plants, combined with other decorative items like candles or books. This adds an organic element to your living room’s focal point.
Hanging Planters: Hanging planters are a great way to add greenery without taking up floor space. They can be placed near windows, in front of blank walls, or even above furniture to introduce greenery at different heights.
These subtle additions can dramatically transform your living room by bringing in the freshness and vitality of nature.
4. Integrating Natural Color Schemes
Incorporating natural color schemes in your living room can further enhance the connection with the outdoors. Earthy tones like greens, browns, beiges, and muted blues are calming and blend well with greenery.
Green Accents: Use shades of green in your cushions, rugs, or curtains to complement the plants in your room. Green is a versatile color that can range from soft sage to deep emerald, offering various options to suit your style.
Earthy Neutrals: Incorporate earthy neutrals such as beige, taupe, or terracotta to create a warm and inviting atmosphere. These colors pair well with botany and natural materials, creating a harmonious look.
Natural Blues and Grays: For a more coastal or serene vibe, use muted blues and grays. These colors evoke the sky and sea, making them a perfect match for a nature-inspired living room.
Using these colors alongside your greenery can create a cohesive and serene environment that feels both refreshing and grounded.
5. Maintaining Your Greenery
Maintaining the plants in your living room is crucial for keeping them vibrant and healthy. Understanding the specific needs of each plant will help ensure they thrive.
Watering: Overwatering is a common mistake. Research the water requirements for each plant and stick to a consistent schedule. Some plants prefer to dry out between waterings, while others need more frequent hydration.
Light Requirements: Ensure your plants are placed in areas that receive the appropriate amount of light. If your living room lacks sufficient natural light, consider using grow lights to supplement.
Pruning and Cleaning: Regularly prune your plants to remove dead or yellowing leaves and promote healthy growth. Wipe down the leaves with a damp cloth to remove dust and keep them looking fresh.
A little care goes a long way in keeping your greenery lush and enhancing the overall ambiance of your living room.
Bringing the Outdoors In
Adding greenery and natural elements to your living room is an effective way to create a serene and inviting space. The presence of plants and natural materials not only beautifies your home but also promotes a sense of well-being and connection to nature. By thoughtfully selecting and maintaining greenery, and integrating natural materials and colors, you can transform your living room into a refreshing oasis that reflects the beauty of the outdoors.
Utilizing Mirrors for Space Enhancement
Mirrors are versatile and powerful tools in interior design, especially when it comes to enhancing and transforming living spaces. By strategically placing mirrors, you can create the illusion of more space, improve lighting, and add visual interest to your living room. Here’s how you can effectively use mirrors to enhance your living room’s design:
1. Creating the Illusion of Space
Mirrors can make a room feel larger and more open by reflecting light and expanding the visual boundaries of the space. This is particularly beneficial for smaller living rooms or areas with limited natural light.
Large Mirrors: A large mirror placed on a focal wall or behind a major piece of furniture, such as a sofa, can make the room appear more expansive. This technique is effective in amplifying the perception of space and making the room feel less confined.
Full-Length Mirrors: Full-length mirrors can be positioned strategically to create the illusion of depth. Placing one in a corner or along a narrow wall can visually extend the space, giving the room a more airy and open feel.
When using mirrors to create the illusion of space, ensure they are proportionate to the room’s scale. A mirror that is too large or too small may disrupt the balance and harmony of the design.
2. Enhancing Natural and Artificial Light
Mirrors can help to enhance both natural and artificial lighting in your living room, making the space feel brighter and more inviting.
Reflecting Natural Light: Position mirrors opposite windows or light sources to reflect natural light around the room. This can brighten up dark corners and make the entire space feel more illuminated and welcoming.
Amplifying Light Fixtures: Place mirrors near light fixtures, such as lamps or chandeliers, to enhance their effect. The reflection from the mirrors will amplify the light, making the room feel warmer and more vibrant.
Ensure that mirrors are clean and free of smudges to maximize their light-reflecting capabilities. A well-placed mirror can make a significant difference in the ambiance of your living room.
3. Adding Visual Interest and Style
Mirrors are not only functional but also serve as decorative elements that can enhance the style of your living room. The design, shape, and frame of a mirror can contribute to the room’s overall aesthetic.
Statement Mirrors: Choose mirrors with unique shapes or ornate frames to serve as focal points. For example, a sunburst mirror or an oversized geometric mirror can add a touch of elegance and become a standout feature in the room.
Gallery Walls: Incorporate mirrors into a gallery wall alongside artwork and photographs. This adds variety and texture to the wall, creating a dynamic visual display that reflects light and enhances the room’s decor.
Decorative Frames: Select mirrors with decorative frames that complement your existing furniture and decor. Frames in materials like wood, metal, or glass can add style and contribute to the room’s overall theme.
When choosing mirrors, consider their design and how they fit into the existing decor. A mirror should enhance the room’s style without overwhelming the space.
4. Enhancing Architectural Features
Mirrors can highlight and enhance existing architectural features in your living room, adding depth and visual interest.
Fireplace Mantels: Place a large mirror above a fireplace mantel to draw attention to this central feature. The mirror’s reflection can enhance the fireplace’s visual impact and create a focal point in the room.
Accent Walls: Use mirrors to accentuate textured or painted accent walls. A strategically placed mirror can highlight the wall’s design and add dimension, making it stand out even more.
Be mindful of the mirror’s size and placement to ensure it complements rather than competes with architectural features.
5. Framing Views and Focal Points
Mirrors can be used to frame and enhance specific views or focal points in your living room, creating a more cohesive and attractive layout.
Framing Views: Position mirrors to frame attractive outdoor views or interesting interior features. For example, a mirror can be placed to reflect a beautiful garden view or an art piece, making it a key element in the room’s design.
Highlighting Focal Points: Use mirrors to enhance focal points such as a stylish piece of furniture or an interesting architectural detail. A mirror placed behind or adjacent to these elements can draw attention and add visual interest.
Ensure that mirrors are positioned in a way that complements the focal point rather than distracting from it.
6. Utilizing Mirrors in Functional Areas
In addition to their decorative uses, mirrors can serve functional purposes in your living room, enhancing its utility and convenience.
Entryway Mirrors: Place a mirror near the entryway or in a hallway to provide a convenient spot for quick checks before heading out. This can also help to make the entry area feel more open and inviting.
Mirrored Furniture: Consider incorporating furniture with mirrored surfaces, such as coffee tables or side tables. These pieces can add a touch of glamour and reflect light, enhancing the overall ambiance of the living room.
When using mirrors in functional areas, balance their practical uses with their decorative impact to maintain a cohesive and stylish design.
7. Creating Symmetry and Balance
Mirrors can be used to create symmetry and balance in your living room’s design, contributing to a harmonious and well-organized space.
Symmetrical Arrangements: Place mirrors in symmetrical arrangements to create a balanced look. For example, two identical mirrors flanking a piece of artwork or a fireplace can add structure and order to the design.
Balancing Furniture: Use mirrors to balance out furniture arrangements. For example, if one side of the room feels heavy with furniture, a mirror on the opposite wall can create visual equilibrium and enhance the room’s flow.
Ensure that the mirrors’ placement aligns with the overall design principles and enhances the room’s symmetry and balance.
8. Choosing the Right Mirror Style
Selecting the right mirror style is crucial for achieving the desired effect in your living room. Consider factors such as shape, size, and frame to ensure the mirror complements the room’s decor.
Shape and Size: Choose a mirror shape and size that fit the scale of your room and the wall where it will be placed. Large, rectangular mirrors work well for expansive walls, while smaller, round mirrors can add interest to more compact areas.
Frame Style: The mirror’s frame should complement your existing decor. For a modern look, opt for sleek, minimal frames, while ornate frames can add a touch of classic elegance.
Selecting a mirror that aligns with your living room’s style will enhance the overall design and functionality of the space.
Transforming Your Living Room with Mirrors
Utilizing mirrors in your living room can dramatically enhance its appearance and functionality. By creating the illusion of space, amplifying light, and adding visual interest, mirrors are a versatile design element that can transform your living room into a brighter, more stylish, and inviting space. Whether used as focal points, functional pieces, or decorative accents, mirrors offer endless possibilities for elevating your home’s decor.
Personalizing with Art and Photography
Adding art and photography to your living room is a powerful way to infuse your personality and interests into the space. Personal touches can make your living room feel uniquely yours, reflecting your tastes, experiences, and creativity. Here’s how you can effectively use art and photography to personalize your living room:
1. Selecting Art that Resonates
Art can significantly impact the mood and aesthetic of your living room. Choosing pieces that resonate with you and complement your decor can make the space feel more personal and cohesive.
Reflecting Personal Style: Choose artworks that reflect your personal style and preferences. Whether you prefer modern abstract pieces, classic landscapes, or eclectic mixed-media works, the art should resonate with your aesthetic sensibilities.
Creating a Theme: Consider creating a theme with your art selection. For example, you might focus on travel photography, botanical prints, or local artists. A cohesive theme can tie together different elements of the room and add a sense of unity.
When selecting art, consider how the colors, styles, and subjects will interact with your existing decor. Art should enhance and complement the space rather than clash with it.
2. Curating a Gallery Wall
A gallery wall is an excellent way to display multiple pieces of art and photography, creating a dynamic and visually engaging focal point in your living room.
Mix and Match: Combine different sizes, frames, and styles of art to create a varied and interesting gallery wall. Include a mix of paintings, photographs, and prints for a diverse look.
Arranging the Layout: Before hanging, lay out the arrangement on the floor to visualize how the pieces will look together. You can also use paper templates on the wall to experiment with different configurations.
Incorporating Personal Photos: Adding personal photographs to the gallery wall can make the display more meaningful. Mix family portraits, travel snapshots, and candid shots to create a personal and visually rich collection.
A well-curated gallery wall can become a focal point in your living room, showcasing your personal taste and adding character to the space.
3. Showcasing Personal Photography
Displaying your own photography is a beautiful way to personalize your living room and share your unique perspective with guests.
Framing and Displaying Photos: Select your best photographs and have them professionally framed or printed on canvas. Choose frames that complement your decor style, whether sleek and modern or ornate and traditional.
Creating a Photographic Story: Arrange your photographs in a sequence that tells a story or reflects a theme. For example, you might make a visual journey through your travels or document a special event.
Using Different Display Methods: Use photo ledges, floating shelves, or clipboards to display your photos. These methods allow for easy rotation and updates, keeping your display fresh and dynamic.
By showcasing your photography, you bring a sense of individuality and warmth to your living room, making it feel more personal and inviting.
4. Incorporating Art into Functional Spaces
Integrating art into your living room’s functional areas can enhanceetics and practicality.
Artistic Furniture: Consider incorporating art into furniture, such as custom-painted coffee tables or upholstered chairs with unique patterns. This approach blends functionality with creative expression.
Decorative Accessories: Use art-inspired accessories, such as decorative pillows, rugs, or throws with artistic prints. These elements can add visual interest and complement the art on your walls.
By blending art with functional items, you can create a living room that is both stylish and practical, enhancing the overall design and atmosphere.
5. Creating a Personal Art Collection
Building a personal art collection can be a fulfilling way to personalize your living room and invest in pieces that hold sentimental value.
Collecting Art Over Time: Start by acquiring art pieces that resonate with you and fit your budget. Over time, you can build a collection that reflects your evolving tastes and experiences.
Supporting Local Artists: Consider purchasing art from local artists or craft fairs. Supporting local talent can add a unique and personal touch to your collection and provide a connection to your community.
Displaying Collectibles: Use shelving units or display cases to showcase collectible art pieces, such as sculptures, pottery, or vintage prints. These items can add depth and interest to your living room decor.
Building a personal art collection allows you to create a deeply meaningful space that reflects your unique journey and interests.
6. Customizing Art Frames and Matting
Customizing the frames and matting for your art can enhance its appearance and make it stand out in your living room.
Choosing the Right Frame: Select frames that complement the style and color of the artwork. Consider sleek metal or minimalist frames for modern art, while traditional pieces may benefit from ornate wooden frames.
Custom Matting: Custom matting enhances the presentation of your art. It can provide a visual buffer between the artwork and the frame, adding a professional touch and drawing attention to the piece.
Customizing frames and matting ensures that your art is displayed in the best possible way, enhancing its visual impact and integrating it seamlessly into your decor.
7. Mixing Art Styles and Media
Mixing different art styles and media can add visual interest and complexity to your living room decor.
I am combining Mediums: Pair paintings with photographs, prints with sculptures, and modern art with vintage pieces. This mix of styles and media can create a dynamic and eclectic atmosphere.
Balancing Elements: Ensure that the different art pieces are balanced in color, scale, and placement. This prevents the display from feeling chaotic and maintains a cohesive look.
Mixing art styles and media allows you to create a visually stimulating living room that reflects your diverse tastes and interests.
8. Personalizing with Artful DIY Projects
DIY art projects can add a personal touch to your living room and offer a creative outlet for your design ideas.
Creating Custom Art: Experiment with making your art pieces, such as abstract paintings, collages, or handmade prints. These custom pieces can be tailored to fit your decor and personal style.
Framing Personal Items: Frame sentimental items, such as ticket stubs, postcards, or fabric swatches, to create unique and meaningful artwork. These items can tell a story and add a personal touch to your living room.
DIY projects allow you to infuse your living room with creativity and personal significance, making the space uniquely yours.
Transforming Your Living Room with Art and Photography
Personalizing your living room with art and photography effectively infuses your space with individuality and style. By carefully selecting and displaying art that resonates with you, creating gallery walls, and incorporating personal photography, you can transform your living room into a reflection of your personality and interests. Whether through curated collections, DIY projects, or custom framing, art and photography offer endless possibilities for creating a living room that is both visually appealing and deeply personal.
Embracing Minimalism or Maximalism
Choosing between minimalism and maximalism in your living room decor can set the tone for the entire space. Both styles offer unique advantages and can transform your living area into a reflection of your aesthetic. Understanding these design philosophies can help you create a living room that looks great and feels right for you.
1. Understanding Minimalism
Minimalism is a design philosophy emphasizing simplicity, functionality, and a clean aesthetic. It focuses on reducing clutter and using space efficiently to create a serene and uncluttered environment.
Critical Principles of Minimalism: Minimalism is characterized by a “less is more” approach. It favors simple lines, neutral color palettes, and a restrained use of decorative elements. Furniture and decor are selected for their functionality and form, often resulting in a streamlined, cohesive look.
Benefits of Minimalism: Embracing minimalism can lead to a more organized and stress-free living environment. By reducing clutter and focusing on essential pieces, you create a space that feels calm and visually balanced. Minimalism also makes it easier to maintain a clean and tidy living room.
When adopting a minimalist approach, choose high-quality, timeless pieces and avoid over-accessorizing. This approach will help maintain the simplicity and elegance of the design.
2. Embracing Maximalism
Maximalism, in contrast, celebrates abundance and creativity. It’s about embracing bold patterns, rich colors, and an eclectic mix of furnishings and decor to create a vibrant and personalized living space.
Key Principles of Maximalism: Maximalism encourages layering and mixing various elements to achieve a lush and visually stimulating environment. It often features a wide range of textures, colors, and patterns, with a focus on creating a space that is both unique and expressive.
Benefits of Maximalism: Maximalism allows for greater creativity and personalization. It enables you to showcase your interests and personality through a diverse array of items, resulting in a living room that feels dynamic and full of life. Maximalism can also make the space feel cozy and inviting through its rich textures and layers.
When embracing maximalism, focus on creating harmony among the different elements. Despite the abundance of items, aim for a balanced composition that avoids overwhelming the space.
3. Creating a Minimalist Living Room
To successfully achieve a minimalist living room, consider these key elements:
Neutral Color Palette: Use neutral colors like white, beige, and gray as a base. These colors help create a calm and cohesive environment and can be accented with subtle shades.
Simple Furniture: Opt for furniture with clean lines and minimal ornamentation. Pieces should be functional and straightforward, contributing to the uncluttered aesthetic.
Decluttered Space: Keep surfaces clear and avoid overcrowding the room with accessories. Storage solutions should be sleek and hidden to maintain the minimalist look.
Focus on Quality: Select a few high-quality items rather than many smaller pieces. Each item should serve a purpose and contribute to the overall design.
Incorporating minimalist design principles will help you create a living room that is serene, functional, and visually pleasing.
4. Designing a Maximalist Living Room
To design a successful maximalist living room, embrace these key principles:
Bold Colors and Patterns: Use vibrant colors and varied patterns to create visual interest. Don’t shy away from mixing different styles and designs to achieve a lively and eclectic look.
Layered Textures: Incorporate a range of textures, such as plush rugs, velvet cushions, and metallic accents. Layering textures adds depth and warmth to the space.
Eclectic Furniture and Decor: Mix and match furniture pieces and decor items to create a unique and personalized environment. Incorporate antiques, modern pieces, and artisanal items to add character.
Personal Collections: Display personal collections, artwork, and souvenirs that reflect your tastes and experiences. This approach adds individuality and a sense of history to your living room.
Maximalism allows for an expressive and visually rich living room. By carefully selecting and arranging various elements, you can create a space that feels both dynamic and deeply personal.
5. Finding Balance Between Minimalism and Maximalism
If you’re drawn to elements of both minimalism and maximalism, you can create a balanced living room that incorporates aspects of each style:
Minimalist Base with Maximalist Accents: Start with a minimalist base, such as neutral walls and simple furniture, and add maximalist accents like colorful artwork, patterned rugs, and eclectic decor. This approach combines the tranquility of minimalism with the vibrancy of maximalism.
Layered Simplicity: Use a minimalist approach to select furniture and major decor items, then layer in maximalist elements like textured throws, decorative pillows, and varied artwork. This method provides visual interest without overwhelming the space.
Selective Maximalism: Focus on a few standout maximalist elements while maintaining a minimalist approach to the rest of the decor. For example, you might feature a bold statement piece of furniture or artwork while keeping other elements simple and understated.
By blending elements from both styles, you can create a living room that is uniquely tailored to your preferences and offers the best of both worlds.
6. Personalizing Your Approach
Ultimately, the choice between minimalism and maximalism should reflect your personal preferences and lifestyle. Consider how each style aligns with your needs and how you want to experience your living space.
Reflecting Personal Taste: Choose the style that resonates most with your personal aesthetic and lifestyle. Whether you prefer the serene simplicity of minimalism or the vibrant complexity of maximalism, let your design choices reflect your individuality.
Practical Considerations: Consider practical aspects such as maintenance, storage, and functionality. Minimalism may offer ease of upkeep, while maximalism can provide a more personalized and cozy environment.
Your living room should be a space where you feel comfortable and inspired. Embracing either minimalism or maximalism—or a combination of both—will help you create a living room that truly feels like home.
Transforming Your Living Room with Style Choices
Embracing either minimalism or maximalism—or finding a balance between the two—can significantly transform your living room. Each style offers distinct advantages and can shape the overall ambiance of the space. By understanding the principles of both styles and considering your personal preferences, you can create a living room that is both aesthetically pleasing and uniquely reflective of your personality and lifestyle.
Playing with Patterns
Patterns can inject energy and personality into your living room, transforming it from a simple space into a vibrant and engaging environment. Playing with patterns allows you to experiment with various visual elements, creating a cohesive yet dynamic look. Here’s how to effectively incorporate patterns into your living room decor:
1. Understanding Pattern Basics
Patterns come in a variety of styles, from geometric and floral to abstract and tribal. Each type of pattern can influence the mood and aesthetic of your living room.
Types of Patterns: Familiarize yourself with different types of patterns, such as stripes, polka dots, paisleys, and chevrons. Each pattern brings a unique character and can be used to evoke specific feelings or themes.
Pattern Scale: Consider the scale of the patterns you choose. Large-scale patterns can serve as focal points, while smaller patterns can add subtle texture and interest. Mixing different scales can create a layered and visually intriguing effect.
Understanding the basics of patterns helps you make informed decisions about how to use them in your living room design.
2. Mixing Patterns Effectively
Mixing patterns can be a bold design choice that adds depth and visual interest. To achieve a harmonious look, follow these guidelines:
Balance Patterns: Combine patterns that complement each other in terms of color and style. For example, pair a geometric pattern with a floral one, ensuring they share a common color palette to maintain cohesion.
Use Pattern Hierarchy: Establish a hierarchy by choosing one dominant pattern and supporting it with smaller, complementary patterns. This approach prevents the space from feeling chaotic and ensures a balanced design.
Mix Different Types: Experiment with different types of patterns, such as mixing stripes with florals or abstract prints. This diversity adds richness to the decor and prevents the room from feeling monotonous.
Effective pattern mixing involves balancing pigments to create a visually appealing and cohesive design.
3. Incorporating Patterns in Fabrics
Fabrics are a great way to introduce patterns into your living room. From upholstery to textiles, patterns can enhance the look and feel of various elements:
Patterned Upholstery: Choose patterned fabrics for upholstery, such as sofas or chairs, to make a statement. Opt for patterns that align with your overall decor style and color scheme.
Decorative Pillows and Throws: Use patterned pillows and throws to add texture and visual interest to your living room. This approach allows you to incorporate patterns without overwhelming the space.
Curtains and Rugs: Incorporate patterns through curtains and rugs to tie together different elements of the room. Choose patterns that complement your existing decor and add a touch of style.
Incorporating patterns in fabrics can help you achieve a cohesive and well-designed living room while allowing for creative expression.
4. Using Patterns on Walls
Patterns can also be introduced through wall treatments, adding a unique and stylish element to your living room:
Wallpaper: Consider using patterned wallpaper to create an accent wall or cover an entire room. Choose patterns that reflect your personal style and enhance the overall decor.
Wall Art and Decals: Incorporate patterned wall art or decals to add visual interest. This approach allows for flexibility and easy updates to your decor.
Patterned Paint Techniques: Experiment with patterned paint techniques, such as stenciling or sponging, to add subtle patterns to your walls. This method offers a customizable and unique touch.
Using patterns on walls can significantly impact the overall look of your living room, adding depth and character to the space.
5. Creating a Patterned Focal Point
A patterned focal point can draw attention and create a striking visual element in your living room:
Statement Furniture: Choose a piece of furniture with a bold pattern, such as a patterned sofa or armchair, to serve as the focal point of the room. Ensure that the surrounding decor complements the pattern.
Accent Walls: Create a patterned accent wall with wallpaper or paint to serve as a backdrop for other design elements. This approach adds drama and visual interest to the space.
Feature Rugs: Use a patterned rug as a central feature to define the seating area and add character to the room. Choose a rug pattern that complements the overall decor and ties together different elements.
A well-designed patterned focal point can enhance the visual appeal of your living room and make it stand out.
6. Combining Patterns with Solid Colors
Balancing patterns with solid colors can create a harmonious and visually appealing living room design:
Solid Color Backdrops: Use solid color backdrops, such as walls or furniture, to balance out bold patterns. This approach allows patterns to stand out while maintaining a cohesive look.
Pattern Accents: Incorporate patterned accents in small doses, such as through decorative accessories or textiles, while keeping the majority of the decor in solid colors. This method ensures that patterns add interest without overwhelming the space.
Color Coordination: Coordinate the colors of your patterns with the solid elements in the room. Choose colors that complement each other and create a unified look.
Combining patterns with solid colors helps maintain balance and prevents the room from feeling visually cluttered.
7. Experimenting with Pattern Placement
Experimenting with pattern placement can enhance the design and create a dynamic living room:
Patterned Borders: Use patterned borders on rugs, curtains, or wall treatments to add subtle patterning. This approach introduces patterns in a less overwhelming way.
Patterned Accessories: Incorporate patterned accessories, such as lampshades, vases, or picture frames, to add visual interest without dominating the space.
Layering Patterns: Layer different patterns in the same area, such as combining patterned pillows with a patterned rug. Ensure that the patterns are coordinated and complementary.
Experimenting with pattern placement allows for creative expression while maintaining a cohesive and stylish living room design.
8. Personalizing with Patterns
Patterns can be personalized to reflect your unique style and preferences:
Custom Patterns: Create custom patterns for textiles or wall treatments that align with your personal taste. This approach allows for a unique and tailored design.
Patterned Collections: Incorporate collections of patterned items, such as vintage textiles or artisanal ceramics, to add personal flair and character to your living room.
Cultural and Artistic Influences: Use patterns inspired by cultural or artistic influences that resonate with you. This approach adds depth and meaning to your decor.
Personalizing with patterns allows you to create a living room that is uniquely reflective of your style and interests.
Transforming Your Living Room with Patterns
Playing with patterns offers a versatile and creative way to enhance your living room decor. Whether you embrace bold patterns or use them subtly, patterns can add visual interest, texture, and personality to your space. By understanding how to mix, balance, and place patterns effectively, you can create a living room that is both stylish and uniquely yours. Experiment with different patterns and placements to find the perfect combination that enhances the beauty and functionality of your living room.
Arranging Furniture for Functionality and Flow
Arranging furniture effectively in your living room is crucial for creating a space that is both functional and visually appealing. Proper furniture arrangement can enhance the flow of the room, maximize usability, and ensure a comfortable environment. Here’s how to achieve a well-designed layout that meets your needs:
1. Understanding the Room Layout
Before arranging furniture, it’s essential to understand the layout of your living room:
Measure Your Space: Take accurate measurements of the room, including the dimensions of walls, windows, doors, and any architectural features. This information helps in selecting appropriately sized furniture and planning the layout.
Identify Traffic Patterns: Observe the natural flow of movement within the room. Ensure that pathways are transparent and allow for movement between areas without obstruction.
Consider Functionality: Determine the primary functions of the room. Whether it’s a space for entertaining, relaxing, or working, the furniture arrangement should support these activities.
Understanding the layout and functions of your living room sets the stage for a compelling and harmonious furniture arrangement.
2. Creating Zones
Dividing the living room into functional zones can enhance its usability and organization:
Seating Area: Designate a central seating area for relaxation and conversation. Arrange sofas and chairs to face each other or a focal point, such as a coffee table or entertainment center, to encourage interaction.
Entertainment Zone: If you have a TV or entertainment system, create a dedicated zone for comfortable viewing. Position the furniture to face the screen, ensuring that it is visible from all seating areas.
Reading Nook: If space permits, create a cozy reading nook with a comfortable chair, lamp, and small side table. Place it near a window or in a quiet corner to enhance its appeal.
Creating distinct zones helps organize the living room and ensures that each area serves its intended purpose effectively.
3. Arranging Furniture for Flow
Achieving a smooth flow in your living room is essential for creating a comfortable and functional space:
Anchor the Space: Start by placing a large piece of furniture, such as a sofa, against a prominent wall or central area. This piece serves as an anchor for the rest of the arrangement and helps define the layout.
Balance the Arrangement: Distribute furniture evenly across the room to create visual balance. Avoid clustering all large pieces on one side of the room, as this can make the space feel lopsided.
Allow for Movement: Ensure there is ample space for movement between furniture pieces. Leave enough room for easy passage and avoid blocking pathways or creating tight squeezes.
Arranging furniture for flow ensures that the living room is functional, comfortable, and visually balanced.
4. Choosing the Right Furniture Arrangement
Selecting the right arrangement depends on the size and shape of your living room:
Symmetrical Layout: For a balanced and formal look, arrange furniture symmetrically. Place matching pieces, such as two identical sofas or chairs, on either side of a central element, such as a coffee table.
Asymmetrical Layout: For a more casual and dynamic look, use an asymmetrical arrangement. Mix and match different furniture pieces and styles to create visual interest and a relaxed atmosphere.
Open Layout: In open-concept spaces, use furniture arrangement to define different areas. Arrange furniture to create distinct zones while maintaining a sense of openness and flow.
Choosing the right arrangement enhances the aesthetic and functional qualities of your living room.
5. Incorporating Multi-Functional Furniture
Multi-functional furniture can maximize space and add versatility to your living room:
Storage Solutions: Opt for furniture with built-in storage, such as coffee tables with drawers or ottomans that open up. These pieces help keep the room organized and reduce clutter.
Convertible Furniture: Consider convertible furniture, such as sofa beds or extendable tables, to accommodate various needs. This type of furniture adds flexibility to the space and can be adapted for different uses.
Modular Furniture: Modular furniture allows for customization and rearrangement. Choose modular sofas or shelving units that can be adjusted to fit different configurations and functions.
Incorporating multi-functional furniture enhances the practicality and versatility of your living room.
6. Using Rugs to Define Areas
Rugs can help define different areas within your living room and add visual interest:
Define the Seating Area: Place a large rug under the seating area to anchor the space and create a cohesive look. Ensure that the rug is large enough to accommodate all furniture within the zone.
Create Visual Separation: Use rugs to visually separate different zones, such as a reading nook or entertainment area. Choose rugs with contrasting patterns or colors to highlight each area.
Enhance the Flow: Arrange rugs to enhance the flow of the room. Ensure that they complement the furniture arrangement and do not obstruct pathways.
Using rugs to define areas helps organize the space and adds a layer of texture and color.
7. Personalizing Your Furniture Arrangement
Personalizing your furniture arrangement allows you to create a living room that reflects your style and preferences:
Incorporate Personal Items: Add personal touches, such as family photos, artwork, or cherished objects, to the furniture arrangement. These elements make the space feel more inviting and unique.
Experiment with Layouts: Don’t be afraid to experiment with different layouts until you find one that works best for your needs. Move furniture around and test different configurations to achieve the desired look and functionality.
Adjust for Comfort: Prioritize comfort in your furniture arrangement. Ensure that seating is comfortable and accessible, and that the arrangement supports your daily activities and lifestyle.
Personalizing your furniture arrangement ensures that your living room is both functional and reflective of your individual style.
8. Evaluating and Adjusting
Once you’ve arranged your furniture, take the time to evaluate and adjust as needed:
Test the Layout: Live with the arrangement for a few days and assess how well it works. Make note of any areas that feel uncomfortable or inconvenient and adjust accordingly.
Seek Feedback: Ask family members or guests for their feedback on the arrangement. Their insights can provide valuable perspectives on how the space functions and feels.
Make Adjustments: Based on your evaluation and feedback, make any necessary adjustments to improve the layout. This might involve moving furniture, changing the arrangement, or adding new elements.
Evaluating and adjusting your furniture arrangement ensures that the living room meets your needs and enhances overall comfort and functionality.
Transforming Your Living Room with Effective Furniture Arrangement
Arranging furniture for functionality and flow is key to creating a living room that is both practical and aesthetically pleasing. By understanding the room layout, creating distinct zones, and choosing the right arrangement, you can enhance the usability and flow of your living space. Incorporate multi-functional furniture, use rugs to define areas, and personalize the arrangement to reflect your style. Evaluating and adjusting the layout ensures that your living room remains comfortable and adaptable to your needs. With thoughtful arrangement, your living room can become a well-designed and inviting space that enhances both form and function.
Integrating Smart Technology
Integrating smart technology into your living room can enhance convenience, comfort, and efficiency. From controlling lighting and climate to managing entertainment systems, smart devices offer a range of possibilities to modernize your space. Here’s how to seamlessly incorporate smart technology into your living room decor:
1. Understanding Smart Technology
Before integrating smart technology, it’s important to understand the different types of devices and their functions:
Smart Hubs: A smart hub acts as the central controller for various smart devices, allowing you to manage and automate them from a single interface. Common examples include Amazon Echo, Google Nest Hub, and Apple HomePod.
Smart Lighting: Smart lighting systems enable you to control your lights remotely, adjust brightness, and set schedules or scenes. Popular options include Philips Hue and LIFX.
Smart Thermostats: These devices allow you to control your home’s temperature remotely and optimize energy usage. Examples include the Nest Learning Thermostat and Ecobee.
Smart Entertainment Systems: Smart TVs, speakers, and streaming devices offer advanced features such as voice control, integrated streaming services, and smart home compatibility.
Understanding the range of smart technology available helps you choose devices that best fit your needs and preferences.
2. Enhancing Lighting with Smart Technology
Smart lighting can transform the ambiance and functionality of your living room:
Adjustable Brightness: Use smart bulbs or fixtures to adjust the brightness of your living room according to different activities, such as reading, watching TV, or entertaining guests.
Color Control: Many smart lighting systems offer color-changing options, allowing you to create various moods or themes with different colors and settings.
Voice and App Control: Control your lights using voice commands through smart speakers or through dedicated apps on your smartphone. This provides convenience and ease of use.
Integrating smart lighting enhances the versatility and ambiance of your living room, making it adaptable to various activities and preferences.
3. Optimizing Climate Control
Smart thermostats and climate control systems improve comfort and efficiency:
Remote Temperature Management: Adjust your home’s temperature from anywhere using a smartphone app or voice commands. This feature is particularly useful for ensuring a comfortable environment before you arrive home.
Energy Efficiency: Smart thermostats learn your preferences and adjust settings to optimize energy usage, potentially lowering utility bills while maintaining comfort.
Integration with Other Devices: Connect your thermostat to other smart devices, such as windows sensors or weather forecasts, to enhance climate control based on external factors.
Optimizing climate control with smart technology contributes to a more comfortable and energy-efficient living space.
4. Upgrading Entertainment Systems
Smart entertainment systems offer advanced features and convenience:
Streaming Integration: Use smart TVs and streaming devices to access a wide range of content from various services, including Netflix, Hulu, and Amazon Prime Video.
Voice Control: Control your entertainment systems using voice commands. Smart speakers can manage playback, adjust volume, and switch between sources with ease.
Multi-Room Audio: Set up smart speakers throughout your living room and home to play music in sync or in different zones, providing a seamless audio experience.
Upgrading entertainment systems with smart technology enhances your viewing and listening experiences while offering greater control and flexibility.
5. Enhancing Security and Privacy
Smart technology can also improve the security and privacy of your living room:
Smart Cameras: Install smart security cameras to monitor your living room and receive alerts about any unusual activity. Many cameras offer real-time video streaming and integration with other smart devices.
Smart Locks: Use smart locks to control access to your home. You can lock or unlock doors remotely and grant access to trusted individuals through your smartphone.
Sensors and Alerts: Incorporate smart sensors to detect motion, glass breakage, or other security breaches. These sensors can send alerts and integrate with your home’s security system.
Enhancing security with smart technology provides peace of mind and greater control over your home’s safety.
6. Streamlining Daily Routines
Smart technology can simplify and streamline your daily routines:
Voice Assistants: Utilize voice assistants to set reminders, manage to-do lists, and control smart devices. This hands-free approach adds convenience to your daily tasks.
Automations: Create automated routines for your living room, such as turning on lights at sunset or adjusting the thermostat when you leave the house. Automation helps maintain a comfortable and efficient environment.
Smart Plugs: Use smart plugs to control non-smart devices, such as lamps or appliances, through your smartphone or voice commands. This extends smart functionality to existing items.
Streamlining daily routines with smart technology enhances convenience and efficiency, making everyday tasks easier to manage.
7. Integrating Technology with Decor
Ensure that smart technology complements your living room decor:
Discreet Placement: Position smart devices, such as speakers and hubs, in locations that blend with the decor rather than standing out. Choose devices with sleek, minimal designs that match your aesthetic.
Cable Management: Use cable management solutions to keep cords and wires organized and hidden. This maintains a clean and uncluttered appearance in your living room.
Stylish Covers: For devices that may not blend seamlessly with your decor, consider using stylish covers or decorative elements to integrate them into your design.
Integrating technology with decor ensures that smart devices enhance rather than detract from the overall aesthetic of your living room.
8. Future-Proofing Your Smart Home
Consider future advancements and compatibility when integrating smart technology:
Compatibility with Other Devices: Choose smart devices that are compatible with existing systems and future upgrades. Look for devices that support major smart home ecosystems, such as Amazon Alexa, Google Assistant, or Apple HomeKit.
Scalability: Select devices that can be easily expanded or integrated with additional smart technology. This allows you to grow your smart home setup over time without major overhauls.
Software Updates: Ensure that the devices you choose receive regular software updates to maintain security and functionality. This helps keep your technology current and reliable.
Future-proofing your smart home ensures long-term compatibility and scalability, allowing for seamless integration of new technology as it becomes available.
Transforming Your Living Room with Smart Technology
Integrating smart technology into your living room offers numerous benefits, including enhanced convenience, comfort, and efficiency. By understanding and implementing smart lighting, climate control, entertainment systems, and security solutions, you can create a modern and adaptable living space. Ensure that technology complements your decor and consider future-proofing to accommodate advancements. With thoughtful integration, smart technology can significantly enhance the functionality and enjoyment of your living room, making it a truly connected and modern space.
Choosing Window Treatments Wisely
Window treatments play a crucial role in the aesthetics and functionality of your living room. They provide privacy, control natural light, and can enhance or complement your overall decor. Choosing the right window treatments involves considering various factors such as style, material, and practicality. Here’s how to make informed decisions when selecting window treatments for your living room:
1. Assessing Your Needs
Before choosing window treatments, assess your needs based on the room’s function and your personal preferences:
Privacy: Determine how much privacy you require. For high privacy needs, opt for treatments that fully block the view from outside, such as heavy drapes or shades.
Light Control: Consider how much natural light you want to allow into the room. Treatments with adjustable features, like blinds or shades, offer flexibility in light control.
Insulation: If you want to enhance energy efficiency, choose window treatments that provide insulation, such as thermal curtains or cellular shades.
Assessing your needs helps you select window treatments that match both your practical requirements and aesthetic preferences.
2. Understanding Different Types of Window Treatments
Familiarize yourself with the various types of window treatments available:
Curtains: Curtains are versatile and come in a wide range of fabrics, colors, and patterns. They can be used alone or layered with other treatments for added style and function.
Blinds: Blinds offer precise control over light and privacy. Options include vertical blinds, horizontal blinds, and mini blinds, each with varying degrees of opacity and control.
Shades: Shades, such as roller shades, Roman shades, and cellular shades, provide a sleek and streamlined appearance. They are available in different materials and opacity levels to suit various needs.
Shutters: Shutters add a classic and timeless look to your windows. They provide excellent light control and privacy while enhancing the architectural style of your living room.
Understanding the different types of window treatments helps you choose the one that best fits your style and functional needs.
3. Selecting the Right Fabric
The fabric of your window treatments impacts both their appearance and performance:
Lightweight Fabrics: Fabrics like linen, cotton, and sheers allow more natural light to filter through and create a breezy, airy look. They are ideal for casual and relaxed spaces.
Heavyweight Fabrics: Fabrics such as velvet, brocade, and thermal linings offer better insulation and light-blocking capabilities. They add a sense of luxury and formality to the room.
Durability and Maintenance: Consider how much maintenance is required for different fabrics. Some fabrics are machine washable, while others may require professional cleaning.
Selecting the right fabric ensures that your window treatments meet your functional needs and complement your living room decor.
4. Choosing the Right Color and Pattern
The color and pattern of your window treatments can significantly impact the room’s look and feel:
Neutral Colors: Neutral colors, such as white, beige, or gray, create a timeless and versatile backdrop that complements various decor styles. They also make the room feel larger and brighter.
Bold Colors: Bold or vibrant colors can add a pop of personality and make a statement. Use these colors to create focal points or tie together other elements in the room.
Patterns: Patterns, such as stripes, florals, or geometric designs, can add visual interest and texture. Ensure that the pattern complements your existing decor and does not overwhelm the space.
Choosing the right color and pattern helps to enhance the overall aesthetic of your living room and ensures that the window treatments integrate seamlessly with the decor.
5. Measuring and Installing
Proper measurement and installation are crucial for achieving a polished and functional look:
Measuring: Measure the width and height of your windows accurately. For a full coverage effect, consider measuring outside the window frame to allow the treatments to extend beyond the edges.
Installation: Follow the manufacturer’s guidelines for installation, or hire a professional if needed. Ensure that the treatments are hung securely and at the correct height for optimal performance and appearance.
Accurate measuring and proper installation ensure that your window treatments fit well and function as intended.
6. Combining Treatments for a Customized Look
Combining different types of window treatments can create a customized and stylish look:
Layering: Layer curtains with blinds or shades to add depth and versatility. For example, use sheer curtains for light filtering and add heavier drapes for privacy and insulation.
Valances and Cornices: Add valances or cornices above your window treatments for a finished and decorative look. They can hide hardware and enhance the overall style of the treatments.
Tiebacks and Holdbacks: Use tiebacks or holdbacks to drape curtains neatly when open. These accessories can add a decorative touch and help maintain a clean, tailored look.
Combining treatments allows you to create a look that is both functional and aesthetically pleasing, tailored to your personal style.
7. Considering Energy Efficiency
Energy-efficient window treatments can help reduce heating and cooling costs:
Thermal Curtains: These curtains have insulating properties that help keep the room warm in winter and cool in summer. They can also reduce outside noise.
Cellular Shades: Cellular shades, also known as honeycomb shades, trap air between layers, providing excellent insulation and energy efficiency.
Reflective Blinds: Blinds with reflective coatings can help block heat from the sun and reduce cooling costs.
Considering energy efficiency helps improve comfort and lower energy bills while maintaining the room’s aesthetic appeal.
8. Personalizing Your Window Treatments
Personalize your window treatments to reflect your style and preferences:
Custom Designs: Opt for custom-made window treatments to ensure a perfect fit and tailored design. Custom options allow for unique fabric choices, colors, and patterns.
Decorative Hardware: Choose decorative hardware, such as curtain rods or tiebacks, that complements your decor. Hardware can add a finishing touch and enhance the overall look of your treatments.
DIY Options: Consider DIY options for a personalized touch. Create your own curtains or shades using fabric of your choice for a one-of-a-kind design.
Personalizing window treatments ensures that they align with your style and contribute to a cohesive and inviting living room.
9. Maintaining and Caring for Window Treatments
Proper maintenance and care help extend the lifespan of your window treatments:
Cleaning: Follow the care instructions for your window treatments, which may include machine washing, hand washing, or professional cleaning. Regular cleaning helps maintain their appearance and performance.
Repair: Address any issues, such as broken hardware or damaged fabric, promptly to prevent further damage. Minor repairs can often be done yourself, while major repairs may require professional assistance.
Sun Protection: Protect fabrics from prolonged exposure to direct sunlight, which can cause fading and deterioration. Use UV-protective coatings or rotate treatments to minimize sun damage.
Maintaining and caring for your window treatments ensures that they continue to enhance your living room’s appearance and functionality over time.
Transforming Your Living Room with Thoughtful Window Treatments
Choosing window treatments wisely can significantly impact the look and functionality of your living room. By assessing your needs, understanding different types, selecting the right fabrics and colors, and considering energy efficiency, you can create a space that is both stylish and practical. Personalize your treatments to reflect your unique style and maintain them properly to ensure long-lasting beauty and performance. Thoughtful window treatment choices enhance the overall decor and contribute to a comfortable and well-designed living space.
Displaying Collections and Personal Items
Displaying collections and personal items in your living room can add character, create focal points, and reflect your individuality. These displays not only personalize your space but also offer opportunities to showcase your interests and cherished memories. Here’s how to effectively and stylishly display collections and personal items in your living room:
1. Curate Your Collection
Begin by curating the items you want to display. Consider the following steps:
Select Meaningful Items: Choose pieces that have personal significance or reflect your interests, such as travel souvenirs, art collections, or family heirlooms.
Group Similar Items: Organize items into thematic groups. This helps create a cohesive look and makes the display more visually appealing.
Limit the Number: Avoid overcrowding by selecting a manageable number of items to display. This allows each piece to stand out and be appreciated.
Curating your collection ensures that the displayed items are meaningful and visually balanced, enhancing the overall aesthetic of your living room.
2. Choose Display Methods
Select appropriate display methods to showcase your items effectively:
Shelving Units: Use open shelving units to display collections in an organized manner. Floating shelves or built-in shelves can provide a clean and modern look.
Display Cabinets: Glass-fronted display cabinets or curio cabinets protect and highlight your items while keeping them dust-free.
Gallery Walls: Create a gallery wall for art and framed photos. Arrange them in a grid or salon-style for a dynamic and personalized display.
Display Tables: Use console tables, coffee tables, or side tables to showcase smaller items, such as vases or decorative objects.
Choosing the right display method ensures that your items are showcased attractively and functionally within your living room.
3. Arrange with Balance and Symmetry
Arrange your items with balance and symmetry to create a harmonious look:
Symmetrical Displays: For a classic and orderly look, arrange items symmetrically. Place similar items on either side of a central focal point or mirror the arrangement on both sides of a display unit.
Asymmetrical Displays: For a more relaxed and modern feel, use asymmetrical arrangements. Group items in a visually pleasing way, ensuring that there is a sense of balance despite the lack of symmetry.
Layering: Layer items by placing some objects in the foreground and others in the background. This adds depth and visual interest to the display.
Arranging with balance and symmetry or using layering techniques helps create a cohesive and engaging display that complements your living room decor.
4. Incorporate Lighting
Proper lighting can enhance the visibility and impact of your displayed items:
Spotlighting: Use adjustable spotlights or track lighting to highlight specific items or areas of your display. This draws attention to your collection and adds drama.
LED Strips: Install LED strips along shelves or inside cabinets to provide subtle, even lighting that highlights your items without overwhelming them.
Ambient Lighting: Use ambient lighting to create a warm and inviting atmosphere around your display. Table lamps or floor lamps placed strategically can contribute to the overall lighting scheme.
Incorporating lighting enhances the visual appeal of your display and creates a focal point in your living room.
5. Use Display Accessories
Enhance your display with thoughtful accessories and arrangements:
Plinths and Stands: Use plinths or stands to elevate and highlight individual items. This adds prominence and draws the eye to key pieces.
Trays and Bowls: Arrange smaller items on decorative trays or bowls. This helps organize and group items while adding a stylish touch.
Frames and Mats: Use frames or mats to present photos, art, or documents. This adds structure and focus to these items and integrates them into the display.
Using display accessories helps to highlight and organize your items, contributing to a polished and cohesive look.
6. Consider Scale and Proportion
Ensure that the scale and proportion of your items are appropriate for the display area:
Size Appropriateness: Choose display items that are proportionate to the size of the display area. Large items should be balanced with larger spaces, while smaller items work well in smaller displays.
Height Variation: Incorporate varying heights in your display to create visual interest. Use items of different heights to avoid a monotonous look and add dynamic elements.
Considering scale and proportion ensures that your display fits well within the space and maintains visual harmony.
7. Rotate Displays Seasonally
Rotating your displays seasonally keeps the decor fresh and interesting:
Seasonal Themes: Change out items to reflect seasonal themes or holidays. For example, display autumnal decor in fall and festive decorations during the holiday season.
New Collections: Introduce new pieces from recent travels, events, or acquisitions to keep the display current and reflective of your evolving tastes.
Rotating displays seasonally adds variety and keeps your living room decor dynamic and engaging.
8. Personalize with Unique Items
Incorporate unique and personal items to make the display truly yours:
DIY Creations: Display handmade or DIY items that you’ve created. This adds a personal touch and showcases your creativity.
Family Memories: Include family photos, heirlooms, or personal mementos that tell a story and add emotional significance to the display.
Travel Souvenirs: Showcase souvenirs or artifacts from your travels to celebrate experiences and bring a sense of adventure to your living room.
Personalizing with unique items adds individuality and depth to your display, making it a true reflection of your personality and experiences.
9. Maintain and Update Displays
Regular maintenance and updates ensure that your displays remain appealing and in good condition:
Dusting and Cleaning: Regularly dust and clean displayed items to keep them looking their best. Use appropriate cleaning methods for different materials.
Rearranging: Periodically rearrange or refresh your display to keep it looking new and to highlight different aspects of your collection.
Checking for Damage: Inspect items for any signs of damage or wear. Repair or replace items as needed to maintain the integrity of the display.
Maintaining and updating displays ensures that they continue to enhance your living room and remain visually appealing.
10. Enhancing Display Integration
Ensure that your displays integrate seamlessly with the overall living room decor:
Color Coordination: Choose items and accessories that coordinate with the color scheme of your living room. This creates a unified and cohesive look.
Style Consistency: Ensure that the style of your displays complements the overall decor style of your living room, whether it’s modern, traditional, or eclectic.
Functional Integration: Consider how the displays function within the space. For example, use display tables that also serve as functional furniture pieces, such as coffee tables with built-in storage.
Enhancing display integration ensures that your collections and personal items enhance rather than detract from the overall decor of your living room.
Showcasing Your Personal Touch
Displaying collections and personal items in your living room allows you to infuse your space with individuality and character. By curating your collection, choosing the right display methods, arranging items with balance, incorporating lighting, and personalizing your display, you create a living room that reflects your unique style and interests. Regular maintenance and thoughtful integration with your overall decor ensure that your displays remain a cherished and dynamic part of your living room, contributing to a space that is both stylish and deeply personal.
Creating Cozy Nooks
Creating cozy nooks in your living room can transform it into a warm and inviting retreat. These small, intimate spaces offer a perfect spot for relaxation, reading, or simply unwinding. Here’s how to create cozy nooks that enhance the comfort and style of your living room:
1. Identify the Ideal Spot
Choose a location in your living room that lends itself to creating a cozy nook:
Corner Spaces: Utilize corners of the room, which can be perfect for creating a snug and private area.
Window Seats: If you have a bay window or a large window, consider turning it into a cozy nook with built-in seating.
Unused Areas: Look for underutilized spaces, such as behind a sofa or near a bookshelf, that can be transformed into a cozy corner.
Identifying the ideal spot ensures that the nook is strategically placed to make the most of the space and natural light.
2. Select Comfortable Seating
Comfortable seating is crucial for a cozy nook. Consider the following options:
Oversized Chairs: Choose an oversized armchair or a plush recliner that invites relaxation. Look for options with soft upholstery and ample cushioning.
Benches with Cushions: Use a cushioned bench or daybed for a versatile seating option. Add plenty of throw pillows for added comfort.
Bean Bags or Floor Cushions: For a casual and laid-back nook, use bean bags or large floor cushions that can be easily rearranged.
Selecting comfortable seating ensures that your nook becomes a favored spot for lounging and relaxation.
3. Add Soft Textiles
Incorporate soft textiles to enhance the coziness of your nook:
Throw Blankets: Drape a soft, cozy throw blanket over your seating. Choose fabrics like wool, knit, or faux fur for added warmth and texture.
Throw Pillows: Add a variety of throw pillows in different sizes and textures. Mix and match patterns and colors to create a visually appealing and inviting space.
Area Rugs: Place a plush area rug under the seating area to add warmth and define the nook. Opt for a rug carpet with a soft texture that feels good underfoot.
Adding soft textiles contributes to the overall comfort and inviting atmosphere of your cozy nook.
4. Incorporate Ambient Lighting
Lighting plays a significant role in creating a cozy atmosphere. Consider these lighting options:
Table Lamps: Use a table lamp with a soft, warm light to create a gentle glow. Choose lamps with adjustable brightness or dimmers for customizable lighting.
Floor Lamps: Place a floor lamp with a flexible arm or shade next to your seating. This allows you to direct light where needed, perfect for reading or relaxing.
String Lights: Hang string lights or fairy lights around the nook for a whimsical and cozy touch. These lights add a soft, ambient glow and create a magical atmosphere.
Incorporating ambient lighting helps to set the mood and enhance the coziness of your nook.
5. Add Personal Touches
Personalize your nook to make it uniquely yours:
Artwork and Photos: Hang artwork, photos, or prints on the walls near your nook. Choose pieces that reflect your personality and style.
Decorative Items: Add decorative items such as candles, small plants, or cherished objects that make the space feel personal and inviting.
Books and Magazines: Place a small bookshelf or magazine rack within arm’s reach of your seating. This provides easy access to reading materials and adds to the relaxed vibe.
Adding personal touches ensures that the nook reflects your taste and enhances the overall coziness of the space.
6. Create a Sense of Enclosure
Creating a sense of enclosure makes the nook feel like a separate retreat:
Curtains or Screens: Use curtains, folding screens, or a decorative room divider to create a sense of privacy and separation from the rest of the room.
Bookcases or Shelving: Place a low bookcase or shelving unit around the nook to provide a physical and visual boundary.
Canopies or Tents: Consider installing a fabric canopy or tent over the nook for an added sense of coziness and seclusion.
Creating a sense of enclosure helps to define the nook and makes it feel like a personal sanctuary.
7. Incorporate Nature
Bring elements of nature into your cozy nook to enhance the calming atmosphere:
Houseplants: Add small houseplants or succulents to your nook. Plants add a touch of nature and freshness, improving air quality and creating a soothing environment.
Natural Materials: Use natural materials such as wood, rattan, or bamboo in your decor. These materials add texture and warmth to the space.
Incorporating nature helps to create a serene and inviting nook that feels connected to the outdoors.
8. Include Functional Elements
Add functional elements to make your nook practical as well as cozy:
Side Tables: Place a small side table or end table next to your seating. This provides a surface for placing drinks, snacks, or books.
Storage Solutions: Incorporate storage solutions such as baskets or bins to keep the nook organized and clutter-free. Use these for storing blankets, magazines, or other essentials.
Charging Stations: Add a charging station or outlet for electronic devices. This ensures that your nook is convenient for both relaxation and productivity.
Including functional elements makes the nook more versatile and enhances its usability.
9. Use Color and Pattern
Color and pattern can enhance the cozy feel of your nook:
Warm Colors: Choose warm, soothing colors such as soft blues, greys, or earthy tones for your textiles and decor. These colors create a calming and inviting atmosphere.
Patterns and Prints: Incorporate patterns and prints through throw pillows, rugs, or blankets. Patterns such as stripes, florals, or geometric designs can add visual interest and comfort.
Using color and pattern effectively enhances the overall ambiance of your cozy nook and contributes to its inviting nature.
10. Consider Seasonal Changes
Update your cozy nook with seasonal changes to keep it fresh and relevant:
Seasonal Textiles: Swap out textiles such as throws and pillows with seasonal patterns and colors. For example, use cozy knit blankets in winter and light, airy fabrics in summer.
Seasonal Decor: Incorporate seasonal decor elements such as autumn leaves, holiday ornaments, or fresh flowers. These updates keep the nook feeling current and connected to the time of year.
Considering seasonal changes ensures that your cozy nook remains inviting and adaptable throughout the year.
11. Enhance with Scent
Adding pleasant scents can enhance the coziness of your nook:
Scented Candles: Light scented candles to add a warm glow and a comforting fragrance. Choose scents like lavender, vanilla, or cinnamon for a relaxing atmosphere.
Essential Oil Diffusers: Use an essential oil diffuser to infuse the space with calming aromas. Essential oils like eucalyptus, chamomile, or sandalwood can create a soothing environment.
Potpourri: Place a bowl of potpourri in the nook for a subtle and long-lasting scent. This adds a decorative touch and a pleasant aroma.
Enhancing with scent helps to create a multi-sensory experience that contributes to the overall coziness of your nook.
Conclusion
Creating cozy nooks in your living room adds warmth, comfort, and personality to your space. By choosing the right spot, selecting comfortable seating, incorporating soft textiles, and adding personal touches, you can transform a small area into a welcoming retreat. Incorporate ambient lighting, create a sense of enclosure, and bring in elements of nature to enhance the coziness. Adding functional elements, using color and pattern, and considering seasonal changes ensure that your nook remains inviting and adaptable. With thoughtful design and personalization, your cozy nook will become a cherished spot for relaxation and enjoyment in your living room.
Mixing Vintage and Modern Styles
Combining vintage and modern styles in your living room creates a dynamic and eclectic space that blends the charm of the past with the sleekness of contemporary design. This fusion can result in a uniquely personalized and stylish environment. Here’s how to mix vintage and modern styles effectively:
1. Understand the Basics of Both Styles
Before you start mixing, it’s essential to understand the characteristics of both vintage and modern styles:
Vintage Style: Typically features traditional elements, ornate details, and a sense of nostalgia. Vintage pieces might include antique furniture, classic patterns, and rich textures.
Modern Style: Focuses on minimalism, clean lines, and functionality. Modern design often incorporates neutral colors, geometric shapes, and innovative materials.
Understanding these basics helps you create a balanced mix that honors the essence of both styles.
2. Find a Common Ground
To achieve a harmonious blend of vintage and modern styles, identify common elements:
Color Palette: Choose a color palette that complements both styles. Neutral tones like beige, grey, and white can act as a unifying base, while accent colors can highlight vintage or modern elements.
Materials: Combine materials that work well with both styles. For example, a modern sofa might be paired with a vintage rug, or a vintage coffee table might be placed on a sleek, contemporary carpet.
Finding common ground ensures that the combination of styles feels intentional and cohesive.
3. Balance Proportions and Scale
Achieving balance is key when mixing vintage and modern elements:
Proportions: Ensure that the proportions of vintage and modern pieces are in harmony. Avoid overcrowding the space with either style. For example, if you have a large vintage armchair, pair it with a modern side table that complements its size.
Scale: Pay attention to the scale of your furniture and decor. A large vintage piece can be balanced with modern accents that have a similar scale or visual weight.
Balancing proportions and scale helps to create a visually appealing and functional living room.
4. Create Contrast with Accessories
Accessories can be a great way to mix vintage and modern styles without overwhelming the space:
Lighting: Combine vintage lighting fixtures like chandeliers with modern floor lamps. This contrast adds visual interest and highlights the unique features of each style.
Artwork: Hang vintage frames with contemporary art pieces or vice versa. This approach creates a striking focal point and bridges the gap between styles.
Textiles: Use modern fabrics for pillows or throws on vintage furniture, or add vintage patterns to modern upholstery.
Creating contrast with accessories allows you to introduce both styles in a way that feels intentional and stylish.
5. Use Modern Furniture with Vintage Accents
Incorporate modern furniture as the foundation of your living room, then enhance it with vintage accents:
Modern Furniture: Choose clean-lined, contemporary furniture pieces as your base. A modern sofa, coffee table, or shelving unit can serve as a neutral backdrop.
Vintage Accents: Add vintage elements like antique lamps, retro rugs, or classic artwork to these modern pieces. This layering creates depth and character.
Using modern furniture with vintage accents ensures that the space feels balanced and thoughtfully curated.
6. Incorporate Vintage Finds with Contemporary Layouts
Combine vintage finds with contemporary layouts to create a cohesive look:
Vintage Finds: Incorporate vintage furniture pieces, such as an old-fashioned armchair or a retro sideboard, into your modern layout.
Contemporary Layouts: Arrange your modern furniture in a clean, organized layout that emphasizes simplicity and functionality. Position vintage finds strategically within this layout to create visual interest.
Incorporating vintage finds with contemporary layouts ensures that the space feels both fresh and nostalgic.
7. Mix Patterns and Textures
Mixing patterns and textures can enhance the blend of vintage and modern styles:
Patterns: Combine vintage patterns like florals or paisleys with modern patterns such as geometric designs or abstract prints. Use these patterns on rugs, curtains, and cushions.
Textures: Layer different textures, such as a sleek modern leather sofa with a vintage velvet armchair. Mixing textures adds richness and depth to the space.
Mixing patterns and textures creates a vibrant and engaging living room that reflects both styles.
8. Consider Architectural Elements
Architectural elements can bridge the gap between vintage and modern styles:
Molding and Trim: Incorporate traditional molding or trim with modern wall treatments or paint colors. This blend creates a seamless transition between styles.
Fireplace Design: Pair a vintage-style fireplace surround with a contemporary mantel or hearth. This combination enhances both the classic and modern aspects of your living room.
Considering architectural elements ensures that the integration of vintage and modern styles feels cohesive and well-planned.
9. Focus on Statement Pieces
Statement pieces can act as focal points that unify vintage and modern styles:
Vintage Statement Pieces: Choose a standout vintage item like an ornate mirror or an antique chest. Place it in a prominent spot to draw attention.
Modern Statement Pieces: Include a modern piece with bold design, such as a sculptural coffee table or a sleek contemporary art installation. Position it strategically to complement vintage elements.
Focusing on statement pieces highlights both styles and creates a visually striking living room.
10. Maintain Consistency and Flow
Ensure that your living room has a consistent flow and visual harmony:
Flow: Arrange furniture and decor in a way that allows for easy movement and interaction. Ensure that vintage and modern pieces are evenly distributed throughout the space.
Consistency: Maintain consistency in the quality and style of materials. For instance, if you use high-quality vintage fabrics, pair them with well-made modern furniture for a cohesive look.
Maintaining consistency and flow ensures that the mix of vintage and modern styles feels integrated and harmonious.
11. Personalize the Space
Add personal touches to make the blend of vintage and modern styles uniquely yours:
Personal Collections: Display personal collections or heirlooms alongside modern decor. This adds character and makes the space feel lived-in.
DIY Projects: Incorporate DIY projects that blend vintage and modern elements, such as repurposed furniture or custom artwork.
Personalizing the space ensures that the combination of styles reflects your individual taste and lifestyle.
Conclusion
Mixing vintage and modern styles in your living room creates a rich, eclectic environment that combines the charm of the past with contemporary design. By understanding the basics of both styles, finding common ground, balancing proportions, and creating contrast with accessories, you can achieve a harmonious blend. Using modern furniture with vintage accents, incorporating vintage finds into contemporary layouts, and mixing patterns and textures further enhance the fusion. Focus on statement pieces, maintain consistency and flow, and personalize the space to create a living room that is both stylish and uniquely reflective of your personality.
Enhancing Your Space with Accent Walls
Accent walls are a fantastic way to add visual interest and personality to your living room. By focusing on a single wall, you can create a striking focal point that enhances the overall design of your space. Here’s how to effectively incorporate accent walls into your living room decor:
1. Choose the Right Wall
Selecting the appropriate wall for your accent can make a significant difference:
Focal Point Wall: Typically, the wall behind your main seating area, such as the sofa or fireplace, is an ideal choice. This wall naturally draws attention and provides a central backdrop for your accent.
Feature Walls: Consider walls that have architectural features like built-in shelves or large windows. These elements can enhance the accent wall’s visual impact.
Choosing the right wall ensures that your accent wall complements and enhances your existing room layout.
2. Pick a Bold Color or Pattern
The key to a successful accent wall is selecting a color or pattern that stands out:
Bold Colors: Opt for a vibrant or deep color that contrasts with the rest of the room. Colors like navy blue, emerald green, or rich burgundy can create a dramatic effect.
Patterns: Use patterned wallpaper, geometric designs, or textured paints to add dimension and interest. Patterns can range from subtle textures to bold prints, depending on your style preference.
Picking a bold color or pattern ensures that the accent wall becomes a striking feature in your living room.
3. Consider Different Finishes
The finish of your accent wall can affect its visual appeal:
Matte Finish: Provides a smooth, subtle look and helps hide imperfections. Ideal for a more understated accent.
Glossy Finish: Reflects light and adds a sleek, contemporary touch. This finish can make the color appear more vibrant.
Textured Finishes: Incorporate materials like brick, stone, or wood panels for a tactile and unique appearance. Textured finishes add depth and character to your accent wall.
Choosing the right finish helps enhance the desired effect of your accent wall, whether subtle or bold.
4. Integrate Art and Decor
Enhance your accent wall with carefully chosen art and decor:
Artwork: Hang a large piece of art or a gallery of smaller works to draw attention to the accent wall. Choose artwork that complements the wall’s color or pattern.
Shelving: Install floating shelves or built-in units on the accent wall to display decorative items, books, or plants. Shelving adds functionality and visual interest.
Mirrors: Place a mirror on the accent wall to reflect light and create a sense of space. Mirrors can also serve as decorative elements that enhance the wall’s impact.
Integrating art and decor adds layers of visual interest and personalizes the accent wall.
5. Use Lighting to Highlight the Wall
Lighting can dramatically enhance the effect of your accent wall:
Wall Sconces: Install wall sconces on either side of the accent wall to highlight its features and create a warm ambiance.
Spotlights: Use adjustable spotlights or track lighting to focus on the accent wall. This technique draws attention to the wall and adds a dramatic flair.
Backlighting: Incorporate LED strip lights or backlighting behind shelves or artwork on the accent wall to create a glowing effect.
Using lighting effectively enhances the visual impact of your accent wall and adds ambiance to the room.
6. Coordinate with the Room’s Decor
Ensure that the accent wall complements the rest of the room’s decor:
Color Coordination: Choose colors for the accent wall that coordinate with your existing furniture, rugs, and accessories. The wall should enhance rather than clash with the overall color scheme.
Style Harmony: Ensure that the style of the accent wall matches the room’s overall design theme. A modern accent wall should harmonize with contemporary furniture and decor, while a rustic wall might suit a more traditional room.
Coordinating with the room’s decor ensures that the accent wall integrates seamlessly into the overall design.
7. Experiment with Different Materials
Explore various materials to create a unique accent wall:
Wood Panels: Use reclaimed wood or wooden slats for a warm, natural look. Wood panels add texture and a rustic charm.
Brick or Stone: Incorporate brick or stone veneer for an industrial or natural aesthetic. These materials create a bold, textured statement.
Fabric or Upholstery: Apply fabric or upholstered panels for a soft, luxurious touch. This option adds texture and can be used for a cozy, comfortable effect.
Experimenting with different materials allows you to create a distinctive accent wall that reflects your style.
8. Ensure Easy Maintenance
Consider the ease of maintenance when choosing materials and finishes:
Washable Paints: Opt for washable or durable paints for easy cleaning and long-lasting results. This is particularly important for high-traffic areas.
Protective Finishes: Use protective coatings or finishes on textured materials to prevent wear and tear.
Ensuring easy maintenance helps keep your accent wall looking fresh and attractive over time.
9. Add Functional Elements
Incorporate functional elements into the accent wall design:
Built-in Storage: Integrate built-in storage solutions like cabinetry or shelving. This adds practicality and maximizes space usage.
Home Office Area: Create a designated workspace on the accent wall with a stylish desk and shelves. This approach blends function and style.
Adding functional elements enhances the usability of your accent wall while maintaining its decorative appeal.
10. Personalize with Custom Touches
Add personal touches to make the accent wall uniquely yours:
Custom Murals: Commission a custom mural or artwork that reflects your personality and interests. This adds a personal and artistic element.
DIY Projects: Consider DIY projects like painted stencils or hand-crafted features to create a one-of-a-kind accent wall.
Personalizing the accent wall ensures that it reflects your individual style and preferences.
Conclusion
Accent walls are a powerful tool for transforming your living room with style and flair. By choosing the right wall, picking bold colors or patterns, considering different finishes, and integrating art and decor, you can create a stunning focal point. Use lighting, coordinate with the room’s decor, and experiment with materials to enhance the impact. Ensure easy maintenance and add functional or personalized touches to make the accent wall truly unique. Embrace these tips to elevate your living room and create a space that is both visually captivating and uniquely yours.
Seasonal Decor: Refreshing Your Space Year-Round
Refreshing your living room with seasonal decor is a great way to keep your space vibrant and engaging throughout the year. By incorporating seasonal elements, you can celebrate the changing seasons and create a living room that feels fresh and inviting. Here’s how to effectively incorporate seasonal decor into your living room:
1. Embrace the Changing Colors
Colors play a significant role in seasonal decor. Adjusting your color palette with the seasons can dramatically change the ambiance of your living room:
Spring: Opt for light, airy colors like pastels, soft greens, and cheerful yellows. These colors evoke a sense of renewal and freshness.
Summer: Choose vibrant, bold colors such as turquoise, coral, and sunny yellows. These shades reflect the lively and energetic spirit of summer.
Fall: Incorporate warm, rich colors like burnt orange, deep red, and golden yellow. These hues mimic the changing leaves and create a cozy atmosphere.
Winter: Use cool, calming colors like navy blue, silver, and white. These colors create a serene and festive ambiance.
Adjusting your color palette to match the season ensures your living room feels current and seasonal.
2. Swap Out Textiles
Textiles are an easy way to update your living room decor for each season:
Spring: Switch to light, breathable fabrics for pillows, throws, and curtains. Floral or botanical prints can add a touch of springtime charm.
Summer: Choose lightweight, moisture-wicking materials for a cool and comfortable feel. Bright, playful patterns and nautical themes can evoke summer vibes.
Fall: Opt for cozy, textured fabrics like velvet, wool, and knit. Warm tones and plaid or checkered patterns enhance the autumnal feel.
Winter: Use heavier, insulating fabrics like flannel and faux fur. Rich textures and deep colors add warmth and coziness.
Swapping out textiles allows for a quick and impactful seasonal update without major changes.
3. Introduce Seasonal Scents
Scent can significantly influence the atmosphere of your living room. Use seasonal scents to enhance the ambiance:
Spring: Fresh, floral scents such as lavender, jasmine, or citrus can invigorate and refresh your space.
Summer: Opt for tropical and fruity scents like coconut, pineapple, or sea breeze to evoke a carefree summer atmosphere.
Fall: Embrace warm, spicy scents like cinnamon, pumpkin spice, or apple cider to create a welcoming, autumnal environment.
Winter: Choose cozy, comforting scents like vanilla, pine, or peppermint to enhance the winter season’s warmth.
Introducing seasonal scents creates a multisensory experience that complements your decor.
4. Decorate with Seasonal Plants
Plants and flowers can bring a touch of nature into your living room:
Spring: Incorporate blooming flowers like tulips, daffodils, or hyacinths. Potted plants with fresh green foliage also add a vibrant touch.
Summer: Use hardy outdoor plants like succulents, ferns, or bright, colorful flowers. Consider a small indoor herb garden for a fresh touch.
Fall: Choose autumnal plants like chrysanthemums, ornamental kale, or branches with colorful leaves. Pumpkins and gourds can also be used as decor.
Winter: Opt for evergreen plants, poinsettias, or holly. These plants provide a festive and lush appearance during the colder months.
Decorating with seasonal plants adds a natural element and reflects the time of year.
5. Update Wall Art and Decorations
Seasonal wall art and decorations can refresh the look of your living room:
Spring: Hang artwork featuring floral motifs, nature scenes, or pastel colors. Consider removable wall decals or framed botanical prints.
Summer: Choose beach-themed art, tropical prints, or colorful abstract pieces. Seasonal wreaths or garlands can also add a fun touch.
Fall: Opt for artwork with autumn themes, like harvest scenes or rustic prints. Add fall-themed garlands or leaf-shaped wall hangings.
Winter: Use festive artwork with winter scenes or holiday themes. Snowflake decorations or cozy winter landscapes can enhance the seasonal feel.
Updating wall art and decorations keeps your space aligned with the current season.
6. Refresh Your Lighting
Lighting can significantly impact the mood of your living room. Adjust your lighting to match the seasons:
Spring: Use bright, natural lighting with sheer curtains or light-filtering shades. Add soft, ambient lights like string lights or lanterns.
Summer: Maximize natural light and use cool, bright lighting options. Consider LED bulbs for a crisp and cleprecisefect.
Fall: Opt for warm, dim lighting with table lamps, floor lamps, or candles. Amber or orange-toned bulbs can create a cozy atmosphere.
Winter: Use layered lighting with a mix of ambient, task, and accent lights. Cozy, warm lighting creates a comforting environment during the colder months.
Refreshing your lighting helps to set the tone and mood for each season.
7. Incorporate Seasonal Accessories
Accessories can make a big difference in seasonal decor:
Spring: Use decorative bowls with fresh flowers, pastel-colored vases, or spring-themed figurines. Add light, airy rugs or cushions.
Summer: Introduce beach-themed accessories, like seashell bowls, tropical prints, or colorful throws. Use bright, cheerful patterns.
Fall: Decorate with autumn-themed items like woven baskets, pumpkin-shaped candles, or cozy blankets. Add plaid or tweed accessories.
Winter: Use holiday-themed accessories, such as snowflake ornaments, festive candles, or cozy knit throws. Incorporate seasonal garlands or wreaths.
Incorporating seasonal accessories allows for a quick update that adds seasonal flair to your living room.
8. Rotate Decorative Items
Rotating decorative items periodically helps keep your space feeling fresh:
Spring: Transition from winter decor to spring items, such as replacing heavy throws with light, floral ones.
Summer: Swap out spring items for summer-themed decor, like beach accessories or tropical prints.
Fall: Update summer decor with fall items, like replacing bright colors with warm tones and adding autumnal decorations.
Winter: Transition to winter decor with cozy, festive elements, such as holiday ornaments and winter-themed accessories.
Rotating decorative items ensures that your living room stays aligned with the current season.
9. Update Your Entryway and Accents
Refresh your entryway and accent areas with seasonal touches:
Spring: Use a floral wreath on the door, add a welcome mat with spring motifs, and place fresh flowers in the entryway.
Summer: Opt for a nautical-themed welcome mat, summer-colored accents, and decorative beach-inspired items.
Fall: Use a fall-themed wreath, place pumpkins and gourds by the entryway, and incorporate autumn-colored doormats.
Winter: Decorate with a festive wreath, holiday-themed welcome mats, and cozy, winter-inspired entryway decor.
Updating your entryway and accents sets the tone for the rest of your living room and welcomes the season.
10. Personalize Seasonal Decor
Personalize your seasonal decor to reflect your taste and lifestyle:
Custom Creations: Create DIY seasonal decorations or incorporate family traditions into your decor. Personalized items add a unique touch.
Seasonal Displays: Arrange seasonal displays that reflect your interests, such as holiday collectibles or handmade crafts.
Personalizing seasonal decor ensures that your living room feels uniquely yours and enhances the seasonal experience.
Conclusion
Seasonal decor offers a delightful way to refresh your living room throughout the year. By embracing changing colors, swapping out textiles, introducing seasonal scents, and updating wall art and lighting, you can create a space that feels fresh and inviting. Incorporate seasonal plants, accessories, and personalized touches to enhance the ambiance. With these tips, you can celebrate each season and keep your living room vibrant and engaging year-round.
Bob cuts have long been a favorite in hairstyling, and they are known for their versatility and timeless appeal. They offer a chic and modern look that suits a variety of face shapes and hair textures. For those with thick hair, bob cuts can be particularly transformative, providing a structured yet lightweight feel that can tame the Volume and add definition.
Choosing the proper bob cut for thick hair ensures the style looks fabulous. From classic and sleek to edgy and textured, a bob cut can cater to every preference. In this guide, we’ll explore 13 stunning bob cuts specifically designed to help you achieve a featherlight feel without compromising style.
Our comprehensive overview of short, messy hair ideas will offer valuable insights when seeking inspiration for your next haircut or practical advice on maintaining your new look. So, let’s dive into the world of bob cuts and discover the perfect style for your thick locks.
2. Benefits of Bob Cuts for Thick Hair
1. Volume Management
Managing its Volume is one of the most significant challenges of having thick hair. Bob cuts are excellent for reducing bulk and making thick hair more manageable. The structured Shape of a bob helps to distribute the hair’s weight, preventing it from looking too heavy or unruly.
2. Versatility
Bob cuts are incredibly versatile, allowing for various styling options. Whether you prefer a sleek, polished look or a tousled, messy style, a bob can be easily adapted to suit your mood and occasion. This flexibility makes it ideal for those who like to switch their look frequently.
3. Low Maintenance
For individuals with busy lifestyles, bob cuts are relatively low maintenance compared to longer hairstyles. They require less time to wash, dry, and style, making your daily hair routine quicker and more straightforward. Additionally, the shorter length means fewer tangles and knots, saving you from prolonged detangling sessions.
4. Enhanced Texture
Bob cuts can enhance the natural Texture of thick hair. Whether your hair is straight, wavy, or curly, the proper bob cut can accentuate its best features. For instance, a layered or textured bob can add movement and dimension, giving your hair a lively and dynamic appearance.
5. Modern and Timeless Appeal
Bobs are modern and timeless, making them a fashionable choice that never goes out of style. They can be tailored to suit contemporary trends while maintaining a classic elegance that withstands the test of time. This dual appeal ensures that your bob cut will remain stylish and relevant.
6. Face-Framing Effect
Bob cuts can be customized to highlight your facial features beautifully. Adjusting the length and layers, a bob can frame your face flatteringly, accentuating your cheekbones, jawline, and eyes. This customization allows for a personalized look that complements your unique face shape.
7. Healthier Hair
Regular trims and shorter lengths can contribute to healthier hair overall. With a bob cut, you are more likely to keep up with trims, reducing the risk of split ends and damage. The result is hair that looks and feels healthier, shinier, and more vibrant.
In summary, bob cuts offer numerous benefits for those with thick hair, from volume management and versatility to low maintenance and enhanced Texture. They provide a stylish and practical solution that can be tailored to fit your individual preferences and lifestyle. With the proper bob cut, your thick hair can be transformed into a chic and featherlight masterpiece.
3. Classic Bob
Definition and Characteristics
The classic bob is a timeless hairstyle that has been a staple in the beauty world for decades. Characterized by its even length and sleek Finish, it typically falls around the jawline, creating a clean and sophisticated silhouette. This cut works exceptionally well with thick hair, providing structure and control without sacrificing Volume.
Benefits for Thick Hair
Structure and Shape The classic bob’s even length gives it a well-defined shape that can tame thick hair, preventing it from looking too bulky. This structured cut helps evenly distribute the hair’s weight, making it easier to manage.
Versatility in Styling Despite its simplicity, the classic bob is versatile and can be styled in numerous ways. You can wear it straight for a sleek, polished look or add waves for a more relaxed, casual vibe. Thick hair holds styles well, so you can experiment with different looks to suit various occasions.
Timeless Appeal: The classic: Bob never goes out of style. Its timeless appeal makes it a safe choice for those who want a hairstyle that remains fashionable through changing trends. It’s a cut that It’s confidence and elegance.
Styling Tips
Sleek and Straight For an elegant and straight look, blow-dry your hair using a round brush to achieve a smooth finish. A flat iron can help to eliminate any remaining frizz and give your bob a polished appearance. Use a heat protectant spray to shield your hair from heat damage.
Soft Wavs:: use a curling iron or a straightener to create soft waves. Take small sections of hair and wrap them around the tool, holding for a few seconds before releasing. Once all sections are curled, gently run your fingers through your hair to loosen the waves for a more natural look. Finish with a light-hold hairspray to maintain the style without making it stiff.
Volume Boost: If you prefer more Volume, apply a volumizing mousse to damp hair before blow-drying. Use a round brush to lift the hair at the roots as you dry, and consider adding some backcombing at the crown for extra height. A texturizing spray can also add body and movement to your classic bob.
Maintenance
Maintaining a classic bob involves regular trims every six to eight weeks to keep the ends neat and prevent split ends. This routine helps maintain the clean lines that define the classic bob. Additionally, using quality hair care products tailored for thick hair, such as hydrating shampoos and conditioners, will keep your hair healthy and manageable.
In conclusion, the classic bob is perfect for thick-haired people who seek a stylish, timeless, and manageable cut. Its simplicity and versatility make it an excellent foundation for various styles, ensuring you look chic and sophisticated in any setting.
4. Layered Bob
Definition and Characteristics
The layered bob is a dynamic variation of the classic bob, designed to add movement, dimension, and Volume to your hair. Unlike the classic bob, even lengtbob’se layered bob incorporates multiple layers of varying lengths, creating a more textured and voluminous look. This style is particularly effective for thick hair, as it helps to reduce bulk while enhancing the hair’s natural hair’s bounce.
Benefits for Thick Hair
Volume Control Layers are excellent for managing the Volume of thick hair. By strategically cutting different lengths throughout the hair, a layered bob can remove excess weight, preventing your hair from looking too heavy or flat.
Enhanced Movement Layers introduce movement and fluidity to the hair, making it look lively and dynamic. This can be especially beneficial for thick hair, which can sometimes appear rigid or lifeless if not styled properly.
Versatility in Styling The layered bob offers a lot of versatility. Whether you prefer a sleek, straight look or a tousled, messy style, the layers provide a foundation that supports various styling options. This makes it easy to adapt your look to different occasions and moods.
Styling Tips
Blow-Dry for Volume: To maximize the Volume and movement of a layered bob, blow-dry your hair using a round brush. Focus on lifting the hair at the roots and curling the ends slightly under to enhance the layers. A volumizing mousse applied to damp hair before drying can further boost the lift and body.
Textured Waves: For a casual::, beachy look, use a curling wand or a straightener to create loose waves. Wrap small sections of hair around the tool and hold for a few seconds before releasing. After curling all sections, tousle your hair with your fingers and apply a texturizing spray to define the waves and add a bit of grit.
Sleek and Straight: If you prefer a more polished look, straighten your hair with a flat iron. The layers will still add a subtle texture and dimension, preventing the style from looking too flat. Use a heat protectant spray to avoid damage and finish with a shine serum to smooth any flyaways.
Maintenance
Maintaining a layered bob involves regular trims every six to eight weeks to keep the layers looking fresh and prevent split ends. Proper hair care is essential, so use shampoos and conditioners for thick hair to keep it healthy and hydrated. Deep conditioning treatments can also help maintain the layers’ integritlayers’ess and breakage.
Personal Opinion
In my experience, the layered bob is a fantastic option for those with thick hair who want to embrace a more textured and dynamic style. Its ability to control Volume while adding movement makes it a versatile and practical choice. I love how a layered bob can transform the overall look and feel of thick hair, making it appear lighter and more manageable without sacrificing its natural beauty.
In conclusion, the layered bob is an excellent choice for anyone looking to add dimension and movement to their thick hair. Its versatile nature allows for various styles, ensuring you can easily switch up your look to match any occasion or mood. A layered bob can keep your hair alert and stylish with proper care and maintenance.
5. Textured Bob
Definition and Characteristics
The textured bob is a stylish, modern take on the traditional bob cut. This hairstyle incorporates various cutting techniques to create layers, choppy ends, and a tousled finish, resulting in a look complete with movement and dimension. The textured bob is perfect for those with thick hair as it helps to break up the density, making the hair feel lighter and more manageable.
Benefits for Thick Hair
Reduced Bulk Textured bobs are excellent for reducing the bulkiness of thick hair. Incorporating layers and choppy ends helps to thin out the hair, giving it a more lightweight and airy feel.
Enhanced Natural Texture This style enhances your hair’s natural hair, whether straight, wavy, or curly. The varied lengths within the cut create a lived-in, effortless look that works well with the natural movement of thick hair.
Effortless Styling The textured bob is inherently low-maintenance, making it ideal for those who prefer a quick and easy styling routine. The tousled Finish requires minimal effort to achieve, often just a bit of scrunching or tousling with your fingers.
Styling Tips
Beachy Waves To achieve the quintessential textured bob look, spray damp hair with sea salt and scrunch it with your hands. Allow your hair to air dry, or use a diffuser to enhance natural waves. This method gives your hair that sought-after beachy Texture.
Tousled and Messy For a more tousled appearance, apply a texturizing spray to dry hair and use your fingers to create movement and separation. Twist small sections of hair and release them to make a messy, undone look. This style works particularly well with the natural thickness of your hair.
Piecey Ends: To emphasize the choppy ends of a textured bob, use a small amount of styling cream or wax. Apply it to the ends of your hair, twisting and defining each piece to create a more pronounced texture. This technique adds a bit of edge to the overall style.
Maintenance
Keeping a textured bob looking fresh involves regular trims every six to eight weeks to maintain the Shape and prevent the ends from becoming too blunt. Use hair care products designed for thick hair to keep it healthy and hydrated, and incorporate a weekly deep conditioning treatment to maintain the integrity of your layers and prevent dryness.
Personal Opinion
As someone who loves experimenting with different hairstyles, I find the textured bob one of the most versatile and flattering cuts for thick hair. It strikperfect balancealow-maintenance allowing for effortless elegance. The way it enhances the natural Texture of thick hair makes it a go-to choice for anyone looking to embrace a more casual, lived-in look.
In conclusion, the textured aa is a fantastic option for those with thick hair who want a modern, effortless style. Its ability to reduce bulk, enhance natural Texture, and offer easy Styling makes it a practical and fashionable choice. With proper care and maintenance, a textured bob can keep your hair looking chic and manageable every day.
6. Inverted Bob
Definition and Characteristics
The inverted or graduated bob is a contemporary twist on the traditional hairstyle. Characterized by shorter hair at the back and longer strands at the front, this cut creates a distinctive angled look that adds a modern edge to the classic bob. The stacked layers at the back add Volume and height, while the longer front pieces frame the face beautifully.
Benefits for Thick Hair
Volume and Shape: The stacked layers at the back of an inverted bob provide significant Volume and Shape, making it an excellent choice for those with thick hair. This cut helps to manage the hair’s bulk while giving it an attractive lift and movement.
Face-Framing Effect: The longer front pieces of the inverted bob elegantly frame the face, accentuating your features. This can be particularly flattering for those with thick hair, as the cut helps to soften and balance the overall look.
Modern and Edgy Look The sharp angle of the inverted bob gives it a contemporary, edgy appearance. It’s versatile and can be dressed up or down, making it suitable for professional settings and casual outings.
Styling Tips
Sleek and Polished: For an elegant and pan-elegant look, use a flat iron to straighten the hair, emphasizing the sharp angle of the cut. Apply a heat protectant spray before styling to prevent damage, and finish with a shine serum to enhance the smoothness.
Textured Waves: To add Texture and dimension, use a curling iron to create loose waves. Wrap sections of hair around the iron, hold for a few seconds, and release. Once all sections are curled, gently brush through the waves with a wide-tooth comb and apply a light-hold hairspray to set the style.
Voluminous Blowout Achieve a vo::luminous blowout using a ro brush and a blow-dryer. Focus on lifting the roots at the back to enhance the stacked layers and create a fuller appearance. Use a volumizing mousse or spray to add extra lift and hold.
Maintenance
Maintaining an inverted bob involves regular trims every six to eight weeks to keep the Shape in Shape and prevent the ends from becoming uneven. Given the cut’s structure, the layers and angles must be precise. Using hair care products designed for thick hair, such as hydrating shampoos and conditioners, will help keep your hair healthy and manageable.
Personal Opinion
The inverted bob is one of thick hair’s most stylish and flattering cuts. Its unique structure provides excellent volume control and Shape, making it an ideal choice for a chic and modern look. The inverted bob’s versatility allows for a range of styling options, from sleek and sophisticated to tousled and casual, ensuring you can adapt your hairstyle to any occasion.
In conclusion, the inverted bob is a superb choice for those with thick hair who seek a modern, edgy, and manageable cut. Its distinctive angled Shape and sharpened layers offer style and functionality, making it a standout option in bob hairstyles. With the proper care and Styling, an inverted bob can keep your stylStylingking fresh, stylish, and effortlessly chic.
7. Asymmetrical Bob
Definition and Characteristics
The asymmetrical bob is a bold and contemporary take on the classic bob hairstyle. Defined by its uneven lengths—one side being longer than the other—this cut creates a striking and edgy look perfect for those who want to make a fashion statement. The asymmetry can be subtle or dramatic, depending on personal preference, and it works exceptionally well with thick hair, providing a unique shape and Volume.
Benefits for Thick Hair
Unique Shape and Structure The asymmetrical bob provides a distinct shape that helps manage the bulkiness of thick hair. The varying lengths create an interesting visual contrast, making the hair appear lighter and more dynamic.
Versatility in StylStylingpite its unconventional look, the tStylingmetrical bob offers plenty of styling versatility. You can straighten it for a sleek, modern finish or add waves for a more playful and textured appearance. The asymmetry naturally adds a touch of sophistication to any style.
Face-Flattering Angles The varying lengths of an asymmetrical bob can be tailored to flatter different face shapes. The longer side can frame the face beautifully, while the shorter side adds a chic, edgy vibe.
Styling Tips
Sleek and Straight For an elegant and polished look, use a flat iron to straighten your hair, accentuating the different lengths. Apply a heat protectant spray to prevent damage, and finish with a shine serum for a smooth, glossy finish.
Loose Waves: To add Texture and movement, use a curling wand or straightener to create loose waves. Wrap small sections of hair around the tool, hold for a few seconds, and release. Gently tousle the waves with your fingers and apply a texturizing spray to enhance the look.
Defined Ends: Highlight the asymmetry by defining the ends of your hair with a small amount of styling cream or wax. Twist the ends to create a more pronounced, piecey look that emphasizes the cut’s unique Shape.
Maintenance
Maintaining an asymmetrical bob involves regular trims every six to eight weeks to keep the shapeShapeasymmetry sharp and precise. Given the unique nature of this cut, the ends must look neat and prevent any unevenness from becoming too pronounced. Use hair care products tailored for thick hair, such as hydrating shampoos and conditioners, to keep your hair healthy and manageable.
Personal Opinion
In my experience, the asymmetrical bob is a fantastic choice for those with thick hair who want an attractive hairstyle. Its unconventional shape lines create a modern, edgy look that can be sophisticated and playful. The asymmetrical bob allows for creative expression and can be easily adapted to suit different occasions and moods. I love how this cut brings out the natural beauty of thick hair while offering a unique and stylish appearance.
In conclusion, the asymmetrical bob is an excellent option for individuals with thick hair who seek a distinctive and fashionable cut. Its unique shape flexibility in styling and face-flattering angles make it a standout choice for bob hairstyles. With proper care andmaintenancee, an asymmetrical bob can keep your hair looking fresh, stylish, and effortlessly chic daily.
8. Shaggy Bob
Definition and Characteristics
The shaggy bob is a relaxed and tousled take on the traditional bob haircut. Characterized by its layered, choppy ends and textured look, this style gives off a carefree, effortless vibe. The shaggy bob works particularly well with thick hair, leveraging the natural Volume and Texture to create a dynamic and voluminous appearance. This cut is perfect for those who prefer a casual, lived-in style that still looks chic and modern.
Benefits for Thick Hair
Volume Management The shaggy bob layers help reduce the bulkiness of thick hair, making it more manageable. The choppy ends and textured layers create a sense of movement and lightness, giving the hair a more featherlight feel.
Effortless Style The shaggy bob is designed to look tousled and undone, requiring effort. This makes it an excellent choice for those who want a low-maintenance yet stylish look.
Enhanced Texture Thick hair often has a lot of natural Texture, which the shaggy bob beautifully enhances. The layers and choppy ends highlight the hair’s natural Texture, making the most of its Volume and body.
Styling Tips
Air-Dried Texture: Embrace your hair’s natural Texture by letting it air dry. Apply a lightweight mousse or texturizing spray to damp hair and scrunch it with your fingers. This will enhance the shaggy, tousled look without needing it.
Beachy Waves For a beachy wave effect, spray damp hair with sea salt and scrunch it with your hands. You can also use a curling wand to create loose, undone waves. Finish with a light-hold hairspray to keep the waves in place.
Messy Bun or Half-Up Style The shaggy bob can easily be styled into a messy bun or a half-up, half-down look. These styles work well with the natural Texture and layers of the cut, adding a playful and casual touch to your look.
Maintenance
Regular trims are essential to keeping a shaggy bob looking its best. Aim to trim every six to eight weeks to maintain the shape and prevent the ends from becoming too ragged. Use hair care products that enhance Texture, such as volumizing shampoos and conditioners, and incorporate a weekly deep conditioning treatment to keep your hair healthy and hydrated.
Personal Opinion
This is a fantastic choice for those with thick hair who want a stylish yet low-maintenance look. The layers and choppy ends add a lot of movement and dimension, making the hair feel lighter and more manageable. I particularly love how the shaggy bob enhances the natural Texture of thick hair, giving it a carefree and effortless appearance. This cut is perfect for anyone embracing a more relaxed and playful style without sacrificing sophistication.
In conclusion, the shaggy bob is an excellent option for individuals with thick hair who want a modern, effortless hairstyle. Its layered, textured look provides volume management and easy styliStylinging it a practical and fashionable style. With proper care andmaintenancee, a shaggy bob can keep your hair chic and full of life daily.
9. daily ob
Definition and Characteristics
The choppy bob is a modern and edgy take on the classic bob hairstyle. Defined by its uneven, jagged layers, this cut creates a textured, dynamic look that adds Volume and movement to thick hair. The choppy bob can vary in length, from just below the ears to shoulder length, and is ideal for those who want a stylish, contemporary haircut that stands out.
Benefits for Thick Hair
Texture and Movement: This bob’s uneven chbob’slayers add significant Texture and movement to thick hair, making it appear lighter and more voluminous. The cut helps break up the density of thick hair, creating a more balanced and manageable look.
Versatility in Styling The choppy bob offers excellent versatility in styling. Whether you prefer a sleek, straight Style or a tousled, wavy style, the choppy layers add dimension and interest, allowing you to experiment with different looks.
Edgy and Modern Appeal: The choppy bob exudes a relaxed, modern vibe that can be casual and sophisticated. It’s a bold choice for those looking to make a statement with their hairstyle while still enjoying the practicality of a bob.
Styling Tips
Sleek and Straight Use a flat I::ron to straighten your hair, emphasizing the choppy layers for an elegant, Polian elegantantok. Apply a heat protectant spray before styling. Finish with a shine serum to enhance styling and smoothness.
Tousled Waves To achieve a tousled, beachy look, use a curling wand to create loose waves. Wrap small sections of hair around the wand, hold for a few seconds, and release. Gently tousle the waves with your fingers and apply a texturizing spray for added Volume. Hold.
Defined Ends: Highlight the choppy layers by defining the ends with a small amount of styling cream or wax. Twist the ends to create a piecey, textured look that emphasizes the cut’s uniShapehape.
Maintenance
Maintaining a choppy bob involves regular trims every six to eight weeks to keep the layers sharp and prevent the ends from becoming uneven. Given the cut’s textured cuts, using products that enhance and maintain the hair’s health is essential. Opt for hydrating shampoos and conditioners, and consider using a deep conditioning treatment weekly to nourish your hair.
Personal OpinionThisThis
This is an excellent choice for those with thick hair who want a stylish and contemporary look. The choppy layers add a lot of Texture and movement, making the hair feel lighter and more manageable. I particularly appreciate how the choppy bob can quickly adapt to different styles, from straight to tousled and wavy. This cut is perfect for anyone embracing a modern, edgy, practical, and fashionable hairstyle.
In conclusion, the choppy bob is a fantastic option for individuals with thick hair who seek a dynamic and textured hairstyle. Its uneven, jagged layers provide volume and movement, making it a standout choice for bob haircuts. With proper care maintenanceance, a choppy bob can keep your hair looking fresh, stylish, and effortlessly chic daily.
10. Blunt Bob
Definition and Characteristics
The blunt bob is a sleek and sophisticated variation of the classic bob haircut. Characterized by its straight-across cut with no layering, this style creates a uniform, sharp edge that offers a clean, polished look. The blunt bob can be worn at various lengths, from chin-length to just above the shoulders, and works exceptionally well with thick hair, providing a bold and modern appearance.
Benefits for Thick Hair
Clean and Polished Look The blunt bob’s straight-abob cut provides a sleek and refined appearance, making it an excellent choice for those who prefer a more sophisticated and elegant style. This cut can enhance your hair’s natural shine and thickness, giving it a sleek, healthy look.
Enhanced Volume: While the bl::unt bob may not have layers, the uniform cut can add a sense of Volume and fullness to thick hair. The clean lines of the cut make the hair appear thicker and more substantial, providing a solid visual impact.
maintenanceance The blunt bob requires lmaintenanceance compared to layered cuts. Since it doesn’t involve doesn’t layers, the cut is easier to manage and style, and it remains to look fresh and sharp with minimal upkeep.
Styling Tips
Sleek and Straight For a polished, elegant look, use a flat iron to straighten your hair, emphasizing the clean, blunt edge of the cut. Apply a heat protectant spray before styling. Finish with a shine serum or lightweight stStylingream to enhance the smoothness and gloss.
Glossy Finish: Use a smoothing serum or shine spray to achieve a shiny finish. Apply the product evenly to your hair to create a reflective shine and accentuate the blunt cut’s sharp lines.
Sut’sbtle Waves::For a more relaxed look, you can add subtle waves to the blunt bob. Use a large-barrel curling iron to create loose, gentle waves, then brush through them lightly to soften the appearance. This adds Texture while maintaining the cut’s clean line.
Maintenance
Maintaining a blunt bob involves regular trims every six to eight weeks to keep the edges sharp and the style looking fresh. Since the cut relies on a uniform length, keeping it with trims is important for evenness. Use products that enhance shine and smoothness, such as hydrating shampoos and conditioners, to keep your hair looking healthy and vibrant.
Personal Opinion
In my opinion, the blunt bob is a timeless and sophisticated choice for those with thick hair. Its clean, straight-across cut makes a bold statement and highlights the hair’s natural thickness and health. I appreciate how the blunt bob combines elegance with simplicity, offering a versatile style that can be dressed up or down. This cut is particularly ideal for those who value a polished, modern look without the need for frequent Styling.
In conclusion, the blunt bob is an excellent option for individuals with thick hair who seek a sleek and refined hairstyle. Its uniform cut and clean lines offer both sophistication and Volume, making it a standout choice among bob haircuts. With proper care and maintenance, a blunt bob can keep your hair looking elegant, stylish, and effortlessly chic daily.
11. Angled Bob
Definition and Characteristics
The angled bob is a dynamic and versatile haircut that features a noticeable difference in length from the front to the back. Typically, the hair is cut shorter in the back and gradually lengthens towards the front, creating a sharp, angular shape. This style can range from a subtle angle to a more dramatic slant, offering a contemporary and stylish appearance that works beautifully with thick hair.
Benefits for Thick Hair
Dynamic ShapeShapeangled bob provides a bold, dynamic shape that adds interest and movement to thick hair. The contrast between the shorter back and the longer front creates a visually striking look that enhances the natural Volume of thick hair.
Volume Management By cutting the hair shorter in the back and longer in the front, the angled bob helps manage the bulkiness of thick hair. The shapeShapehe cut allows for a more controlled and balanced appearance, reducing excess Volume. Volume at the back while showcasing the thickness towards the front.
Versatile Styling: The angled bob’Shapepe, all bob,s, or various styling options. Whether you prefer a sleek, straight look or more textured waves, the angled cut provides a stylish foundation that can be adapted to different occasions and preferences.
Styling Tips
Straight and Sleek For a polished look, use a flat iron to straighten your hair, highlighting the angle of the cut. Apply a heat protectant before stylizing. Finish with a shine serum to emphasize the sleStyling and smoothness of the cut.
Soft Waves To add Texture and movement, use a large-barrel curling iron to create a loose, smooth Wrap section of hair around the iron, hold for a few seconds, and release. Gently tousle the waves with your fingers and apply a texturizing spray to enhance the look.
Volume Boost For added Volume, apply a volumizing mousse to damp hair before blow-drying. Use a round brush to lift the roots and create a fuller appearance, especially at the back, where the hair is shorter. Finish with a light-hold hairspray to maintain the Volume and Shape.
Maintenance
Regular trims are essential to maintaining an angled bob. Aim to visit your stylist every six to eight weeks to keep the angles sharp and the Shape consistent. Because the cut involves varying lengths, it’s essential to ensure the transition between the back and front remains smooth and well-defined. Use hair care products that nourish and enhance Texture, such as hydrating shampoos and conditioners, to keep your hair healthy and manageable.
Personal Opinion
The angled bob is an excellent choice for those with thick hair who want a haircut that combines flair and practicality. The angled cut creates a striking shape that showcases the hair’s nature while providing a versatile foundation for various styles. I particularly appreciate how the angled bob allows for multiple looks, from sleek and sophisticated to casual and textured. This cut is perfect for those who want a bold, contemporary style that remains adaptable and stylish.
In conclusion, the angled bob is a fantastic option for individuals with thick hair who seek a distinctive and modern haircut. Its dynamiShapepe and versatility make it a standout choice in bob hairstyles. With proper care and maintenance, an angled bob can keep your hair looking fresh, stylish, and effortlessly chic daily.
12. Curly Bob
Definition and Characteristics
The curly bob is a playful and versatile haircut that combines a classic bob shape with semi-natural or styled curls. This cut can vary from chin length to just above the shoulders and is designed to enhance the natural curl pattern or create defined curls. The curly bob works exceptionally well with thick hair, offering a vibrant, dynamic look that celebrates natural Texture.
Benefits for Thick Hair
Enhanced Volume: The natural curl pattern of thick hair adds significant Volume to the curly bob. The curls create a bouncy and lively appearance, making the hair look fuller and more textured.
Playful and Stylish The curly bob is inherently playful and stylish, making it an excellent choice for those who want to embrace their curls and add a fun, modern twist to the traditional bob. It offers a fresh and youthful look that can be dressed up or down.
Defined Shape Curves help define the shape suspension. The natural movement of curls complements the bob, creating a balanced and flattering silhouette.
Styling Tips
Define Your Curls To enhance your natural curls, use a curl-enhancing cream or mousse on damp hair. Scrunch the product into your hair and let it air dry, or use a diffuser attachment on your blow dryer to dry your curls without disrupting thShapehape.
Create Soft Waves If you prefer looser curls, use a curling iron or wand to create soft, defined waves. Wrap sections of hair around the barrel, hold for a few seconds, and release. Finger-comb the curls to separate them and create a more relaxed look.
Use a root-lifting spray or mousse before styling to add extra Volume to your curly bob. Blow-dry your hair with a diffuser to encourage lift at the roots and enhance the overall Volume and bounce.
Maintenance
Maintaining a curly bob involves regular trims to keep the shape and prevent split ends. Aim for a trim every six to eight weeks to ensure your curls remain healthy and well-defined. Use hydrating and curl-enhancing hair products to keep your curls moisturized and defined. Avoid using heavy styling products that can weigh down your curls, and opt for lightweight, moisturizing treatments instead.
Perinion
The curly bob is a fantastic choice for those with thick hair who want to celebrate their natural curls with a stylish and modern cut. I love how the curly bob adds a playful and dynamic element to the classic bob, enhancing the natural Texture and Volume of thick hair. The cut’s version for a range of looks, from defined curls to soft waves, making it an excellent option for those who want a fresh and vibrant hairstyle—embracing your curls with a curly bob not only shows natural beauty but also adds a fashionable twist to your overall look.
In conclusion, the curly bob is an excellent option for individuals with thick hair who want to highlight their natural curls with a contemporary and stylish cut. Its enhanced Volume and playful style make it a standout choice among bob hairstyles. With proper care maintenanceance, a curly bob can keep your hair looking vibrant and effortlessly chic daily.
13. Bob with Bangs
Definition and Characteristics
The bob with bangs is a stylish variation of the classic bob haircut that incorporates bangs to add an extra dimension to the look. The bob can vary in length, from chin-length to shoulder-length, and can be paired with different styles of bangs, such as blunt, side-swept, or curtain bangs. This cut offers a chic and modern appearance while providing a versatile look that complements a range of face shapes and hair types.
Benefits for Thick Hair
Framing the Face Bangs can help frame the face and accentuate facial features, providing a flattering look that highlights the eyes and cheekbones. For those with thick hair, bangs can add a touch of softness and balance to the overall style.
Volume Control: Adding bangs:: to a bob can help manage the Volume of thick hair by creating a more structured and controlled appearance. Bangs can reduce bulkiness around the face and provide a more balanced and cohesive look.
Versatile StyliStylingb with bangs offers a range of styling options. Depending on the Styling bangs you choose, you can achieve various looks, from sleek and polished to playful and casual. This versatility makes it easy to adapt the style to different occasions and preferences.
Styling Tips
Sleek and Smooth: For an elegant look, use a flattering look, our I,r, and ba,ngs, emphasizing a polished finish. Apply a heat protectant before styling, and use a shine serum or smoothing cream to enhance the sleekness of stylingob and bangs.
Textured Bangs If you prefer a more textured look, use a texturizing or sea salt spray on your bangs. Create subtle waves or tousle the bangs with your fingers to achieve a relaxed, effortless style.
Side-Swept Bangs For side-swept bangs use a round brush while blow-drying to direct the bangs to one side. Apply a light-hold hairspray to keep the bangs in place and maintain their shape throughout the day.
Maintenance
Maintaining a bob with bangs requires regular trims to keep both the bob and bangs fresh and well-defined. Aim for a trim every six to eight weeks to prevent the bangs from becoming too long and loose. Shapeshape. Use hair care products that suit your hair types, such as hydrating shampoos and conditioners, to keep your hair and bangs healthy and manageable.
Personal Opinion
It is a fantastic option for those with thick hair who want to add a stylish and versatile element to their look. Adding bangs can transform a classic bob into a modern and fashionable haircut, offering a range of styling possibilities and a flattering appearance. I particularly appreciate how bangs can frame the face and provide a balanced, cohesive look, making it an excellent choice for those who want to enhance their facial features while maintaining a chic and contemporary hairstyle. This cut is perfect for individuals who want a fresh and dynamic look that is elegant and easy to maintain.
In conclusion, the bob with bangs is an excellent choice for individuals with thick hair who seek a stylish and adaptable haircut. Its ability to frame the face and control volume makes it a standout option in bob hairstyles. With proper caremaintenancenance, a bob with bangs can keep your hair looking chic, fashionable, and effortlessly sophisticated daily.
Maintaining Your Bob Cut
Maintaining a boYoYou are maintaining classic, layered, or textured, which is essential to keeping the style fresh and healthy. Regular upkeep ensures that your bob cut continues to enhance your appearance and remains manageable. Here’s a comprehensive guide to help you maintain your bob cut effectively.
Regular Trims
1. Schedule Regular Appointments:
Frequency: Aim for a trim every six to eight weeks to keep the shape of your bob sharp and prevent split ends.
Consistency: Regular trims help maintain the length and style of your bob, ensuring that the cut remains well-defined and in line with your desired look.
2. Trim the Ends:
Avoid Split Ends: Regularly trimming the ends of your hair helps prevent split ends and keeps your bob looking healthy.
Shape Maintenance: Trimming helps maintain the shape of the bob, whether it is a blunt cut or a layered style.
Hair Care Routine
1. Use the Right Products:
Shampoo and Conditioner: Choose products suitable for your hair type. For example, if you have thick hair, use a moisturizing shampoo and conditioner to keep it hydrated.
Leave-In Treatments: Incorporate leave-in conditioners or serums to provide additional moisture and shine.
2. Avoid Heat Damage:
Heat Protection: Always spray with an alwaysectant before using styling tools like flat irons or curling wands. To prevent heat
Moderation: Li to prevent heat damage heat styling tools to avoid over-drying or damaging your hair.
3. Regular Washing and Conditioning:
Frequency: Wash your hair as needed, depending on your type and lifestyle. Overwashing can strip natural oils, while underwashing may lead to product buildup.
Conditioning: Regularly condition your hair to keep it smooth and manageable. Deep conditioning treatments can help maintain hair health and hydration.
Styling Tips
1. Maintain the Cut:
Styling Tools: Use appropriate tools to maintain the style of your bob. For example, use a flat iron for a sleek look or a curling iron for added Texture.
Products: Use styling products that enhance your bob cut, such as volumizing sprays for a fuller look or smoothing serums for a sleek finish.
2. Adapt to Your Hair Type:
Customization: Customize your styling routine based on your hair type and the specific bob style you have. For instance, curly bobs may need curl-enhancing products, while straight bobs might benefit from smoothing products.
3. Adapt for Different Looks:
Versatility: Experiment with different looks, such as adding waves or using accessories like headbands or clips to refresh your bob style.
Personal Opinion
Maintaining a bob cut requires a balance of regular trims, proper hair care, and intelligent styling choices. The bob cut is inherently versatile, but its true potential is realized when it is kept sharp and the hair is well-nourished. Regular trims are crucial to prevent shape loss, and the style looks as polished as possible. Using the right hair care products and minimizing heat damage ensures your bob cut remains healthy and vibrant. Embracing a consistent maintenance routine enhances the longevity of your bob cut and helps you enjoy the versatility and elegance of this classic hairstyle.
In conclusion, maintaining a bob cut involves a combination of regular trims, proper hair care, and thoughtful styling. By adhering to these practices, you can ensure that your bob cut remains fresh, stylish, and healthy, allowing you to enjoy its benefits and versatility for an extended period.
Personal Opinion: Why Short Messy Hair Ideas Work for Everyone
Short, messy hair ideas offer a universally flattering and versatile approach to hairstyling. Whether you have fine or thick hair, straight or curly, short or messy hairstyles, they bring a fresh and effortless vibe that complements various hair types and personal styles. Here’s why these work so well for everyone:
Embracing Natural Texture
Shot, messy haircuts embrace and celebrate natural Texture, a significant advantage for many people. Instead of spending hours trying to achieve a perfectly polished look, messy styles highlight and work with your hair’s natural chair’s characteristics. This makes styliStylinger and enhances the hair’s inherent hairs, giving it a more organic and dynamic appearance.
Low Maintenance with High Impact
One of the most significant benefits of short, messy haircuts is their low-maintenance nature. Unlike structured cuts that require frequent salon visits to maintain shape style, messy hairstyles are designed to look good even as they grow out. This makes them ideal for those who prefer a fuss-free routine. With minimal effort, you can achieve a fresh and stylish look without needing to manage or perfect it constantly.
Versatility and Adaptability
Short, messy haircuts are incredibly versatile, allowing various styling options that can be adapted to different occasions. Short, messy styles can be easily dressed up or down, whether you want a relaxed, tousled look for a casual day out or a more refined appearance for a special event. Adding a bit of product or changing the parting can completely alter the look, making it a versatile choice for various settings.
Universal Flattery
Short, messy hairstyles are universally flattering because they can be customized to suit any face shape and hair type. The textural elements of messy styles can soften angular features or add definition to round faces. These styles often include layers or tousled sections that can be adjusted to enhance or balance different facial features, ensuring everyone can find a version that suits them best.
Embracing Individuality
One of the most appealing aspects of short, messy hair ideas is their ability to reflect individual personality and style. The “messy” element “allows “for personal expression, letting people showcase their unique flair and preferences. This personal touch makes each short, messy hairstyle distinctive and tailored to the individual wearing it.
Confidence Boost
There’s something. I’m presently confident about a short, messy haircut. These style vibes often exude a sense of self-assuredness and ease. For many, adopting a short, messy look can be a bold statement of confidence, highlighting a willingness to embrace a more relaxed and authentic version of oneself.
In conclusion, short, messy hair ideas work for everyone because they embrace natural Texture, offermaintenancenance with high impact, and provide versatile styling options. These styles are universally flattering and adaptable, allowing individuals to showcase their unique personalities confidently. The ease and practicality of short, messy hairstyles make them a go-to choice for those seeking a fresh, dynamic, and effortlessly stylish look.
FAQ Section
1. What is a short, messy haircut?
A short, messy haircut is a hairstyle in which the hair is cut short and styled to look intentionally tousled and unstructured. This haircut embraces natural Texture and creates a relaxed, effortless appearance. It can include styles like bobs, pixies, or shaggy cuts designed to give a casual, lived-in look.
2. What are the benefits of a short, messy haircut?
Short, messy haircuts offer several benefits, including:
Low Maintenance: They require minimal upkeep, and styliStyling them is ideal for busy individuals.
Versatility: They can be easily adapted for both styling and formal occasions.
Natural Texture: They work well with various hair textures, celebrating natural waves or curls.
Flattering: They can be customized to suit different face shapes and hair types.
3. How do I style a short, messy haircut?
To style a short, messy haircut, follow these steps:
Use Texturizing Products: Apply texturizing or sea salt sprays to enhance Volume. Volumerate a tousled effect.
Dry Naturally or Blow-Dry: Allow your hair to air dry, or use a blow dryer with a diffuser to maintain a natural texture.
Add Layers: Use a curling iron or straightener for added Texture if desired.
Tousle with Fingers: Use your fingers to lift and separate the hair for a more relaxed, messy look.
4. How often should I get a trim for a short, messy haircut?
For a short, messy haircut, aim for a trim every six to eight weeks. Regular trims help maintain the shapes ‘ shape and cut split ends, ensuring the style remains fresh and well-defined.
5. Can a short, messy haircut work for all hair types?
Yes, short, messy haircuts, including those for straight, wavy, and curly hair, can work for all hair types. The key is choosing a style and products that enhance your hair’s natural hair. For example, curl-enhancing products for curly hair or texturizing sprays for straight hair can achieve the desired messy look.
6. What types of bangs work well with a short, messy haircut?
Several types of bangs work well with short, messy haircuts, including:
Blunt Bangs: For a bold and edgy look.
Side-Swept Bangs: For a softer, more versatile style.
Curtain Bangs: For a retro and relaxed feel.
Choppy Bangs: To enhance the messy, textured appearance.
7. How can I add Volume to the Volumeshort, messy haircut?
To add Volume, Volumehort, messy haircut:
Use Volumizing Products: Apply volumizing mousse or root-lifting sprays.
Blow-Dry with a Round Brush: Lift hair at the roots while blow-drying.
Texturize: Use a texturizing spray or dry shampoo to add lift and Texture.
8. Is a short, messy haircut suitable for professional settings?
If styled appropriately, a short, messy haircut suits professional settings. Opt for a more polished version of the dirty look by smoothing out the hair slightly or using styling products to create a controlled yet relaxed appearance. This balance ensures the style remains sophisticated while showcasing a casual, effortless vibe.
9. Can I achieve a short, messy haircut at home, or should I see a professional?
While some people may get a short, messy haircut at home with careful cutting and styling, a professional stylist is generally advisable. A professional can ensure the cut is appropriate for your hair type and face shape, reducing the risk of mistakes and providing the best results.
10. What should I consider before getting a short, messy haircut?
Before getting a short, messy haircut, consider the following:
Face Shape: Choose a style that flatters your face shape.
Hair Texture: Ensure the cut works with your natural Texture.
Lifestyle: Consider how much time you can dedicate to styliStylingmaintenance.
Personal Style: Choose a cut that aligns with your style and preferences.
Long layered hairstyles with curtain bangs are a timeless and versatile choice to enhance your natural beauty and add a touch of modern flair. This combination works well for various hair types and face shapes, making it popular among hairstylists and fashion enthusiasts. Layers introduce movement and volume to your hair, while curtain bangs frame your face beautifully, adding softness and a trendy, effortless vibe. Whether you prefer a sleek, polished look or a more relaxed, tousled style, long layered hair with curtain bangs offers endless possibilities. This article will explore the top 20 long-layered hairstyles with curtain bangs, providing inspiration and practical advice on achieving and maintaining these stunning looks.
Benefits of Long-Layered Hairstyles with Curtain Bangs
Long-layered hairstyles with curtain bangs offer numerous benefits, making them a favored choice for many individuals looking to enhance their appearance. Here are some key advantages:
1. Adds Volume and Movement
Layers are an excellent way to add volume and movement to your hair. Cutting hair at different lengths and layers creates texture and body, making your hair look fuller and more dynamic. This is particularly beneficial for those with thin or fine hair, as it can give the illusion of thicker, more voluminous locks.
2. Frames the Face Beautifully
Curtain bangs are designed to frame the face, drawing attention to your best features. They create a soft, flattering outline around your face, enhancing your natural beauty and balancing your facial proportions. Whether you have a round, oval, square, or heart-shaped face, curtain bangs can be tailored to suit your specific face shape.
3. Versatile Styling Options
One of the significant benefits of long-layered hairstyles with curtain bangs is their versatility. You can easily switch up your look by styling your layers and bangs differently. The options are endless, from straight and sleek to wavy, tousled, or even curled for a romantic look. This versatility allows you to adapt your hairstyle to various occasions and moods.
4. Reduces Weight in Thick Hair
For those with thick hair, layers can significantly reduce the weight, making it more manageable. Removing some of the bulk layers helps prevent your hair from looking heavy and lifeless. This can make styling easier and give your hair a lighter, more airy feel.
5. Easy Maintenance
Curtain bangs are relatively low-maintenance compared to other bang styles. They grow out gracefully, so you can stretch the time between trims. Additionally, long layers require less frequent maintenance than shorter layers, making this style a practical choice for those who prefer low-maintenance hair.
6. Timeless and Trendy
Long-layered hairstyles with curtain bangs have a timeless appeal yet remain trendy and fashionable. This combination effortlessly blends classic elegance with modern style, ensuring your hair looks chic and up-to-date. Whether attending a formal event or going for a casyou’rey out, this hairstyle is versatile enough to suit any setting.
7. Enhances Natural Texture
Long layers can enhance your natural texture if you have naturally wavy or curly hair. Layers help define curls’ cultures, giving them more shape and bounce. Curtain bangs can complement this by adding a playful, youthful touch to your overall look.
8. Customizable for All Hair Types
Long-layered hairstyles with curtain bangs can be customized to suit all hair types, whether straight, wavy, curly, thick, or acceptable. Your hairstylist can adjust the layering technique and the length of the bangs to ensure the style flatters your unique hair texture and density.
By embracing a long layered hairstyle with curtain bangs, you can enjoy a stylish, versatile, and flattering look that enhances your natural beauty while offering numerous practical benefits.
How to Choose the Right Layered Hairstyle for Your Face Shape
Selecting the perfect layered hairstyle with curtain bangs that complement your face shape can significantly affect your overall appearance. Different face shapes can benefit from specific layering techniques and bang styles to enhance their natural features. Here’s a guide to help you choose the right long there’s hairstyle for your face shape:
1. Oval Face Shape
Characteristics: Balanced proportions with a slightly wider forehead and a gentle taper towards the chin.
Recommended Style: Oval faces can pull off almost any hairstyle. Long layers that start below the chin and curtain bangs that part in the middle are particularly flattering. This style emphasizes the face’s natural symmetry and provides a soft, feminine look.
Tips: Experiment with different lengths and styles of bangs, as oval faces are versatile.
2. Round Face Shape
Characteristics: Equal width and height with soft, rounded edges.
Recommended Style: Long layers that begin below the jawline can elongate the face, giving it a slimmer appearance. Longer and slightly angled curtain bangs can create the illusion of length and add definition.
Tips: Avoid blunt bangs or layers that start at the cheeks, as these can make the face appear more expansive.
3. Square Face Shape
Characteristics: A broad forehead, strong jawline, and straight sides.
Recommended Style: Soft, wispy layers that start around the cheekbones help soften the angular features of a square face. Curtain bangs should be feathered and parted slightly off-center to add a touch of softness.
Tips: Avoid blunt cuts and straight-across bangs, as they can accentuate the squareness.
4. Heart Face Shape
Characteristics: A broad forehead and cheekbones with a narrow, pointed chin.
Recommended Style: Long layers that begin just below the collarbone can balance the forehead’s width and the chin’s narrowness. Wispy bangs that taper towards the sides can draw attention to the eyes and cheekbones.
Tips: Avoid heavy, blunt bangs that can emphasize the width of the forehead.
5. Diamond Face Shape
Characteristics: Narrow at the forehead and jawline with wider cheekbones.
Recommended Style: Layers that start at the chin and continue downward can soften the cheekbones and add balance. Longer curtain bangs that sweep to the sides can help create the illusion of a broader forehead and jawline.
Tips: Avoid short layers or blunt bangs that make the cheekbones appear too wide.
6. Oblong Face Shape
Characteristics: Longer than it is wide, with a long, straight cheek line.
Recommended Style: Long layers that add volume to the sides can help create a more balanced look. Long, softly curved curtain bangs can shorten the appearance of the face and add width.
Tips: Avoid extremely long hair without layers, which can further elongate the face.
General Tips for All Face Shapes
Consult a Professional: A hairstylist can provide personalized advice based on your hair texture, density, and growth patterns.
Consider Your Lifestyle: Choose a style that fits your daily routine and maintenance preferences.
Embrace Versatility: Don’t be afraid to experiment with different styles and lengths. Hair grows back, and trying new looks can be fun and refreshing.
By understanding your face shape and choosing the right layered hairstyle with curtain bangs, you can enhance your natural features and achieve a flattering and stylish look.
Styling Tips for Long-Layered Hair with Curtain Bangs
Long layered hair with curtain bangs offers a versatile and chic look that can be styled in numerous ways to suit different occasions and moods. Here are some essential styling tips to help you achieve and maintain beautiful, salon-worthy hair:
1. Blow-Drying for Volume
Technique: To add volume and lift, blow-dry your hair upside down or use a round brush to lift the roots as you dry. Focus on the roots and mid-lengths for maximum volume.
Curtain Bangs: Use a round brush to shape your curtain bangs. Blow-dry them away from your face to create a natural, feathered look.
2. Enhancing Natural Waves
Technique: If you have naturally wavy hair, enhance your waves by applying a sea salt spray or a curl-enhancing mousse to damp hair. Scrunch your hair and let it air dry, or use a diffuser.
Curtain Bangs: To maintain your bangs’ natural wave, let them air dry or use a blow-dryer with a diffuser attachment.
3. Sleek and Straight Look
Technique: Use a flat iron to straighten your layers for a sleek, polished look. Apply a heat protectant spray before styling to prevent damage.
Curtain Bangs: Straighten your curtain bangs with a flat iron, bending the ends outward to create a soft, face-framing effect.
4. Soft, Romantic Curls
Technique: Use a large-barrel curling iron or hot rollers to create loose, romantic curls. Wrap sections of hair around the barrel, holding for a few seconds before releasing. Gently brush through the curls with your fingers for a softer look.
Curtain Bangs: Curl your bangs away from your face using the curling iron, ensuring they blend seamlessly with the rest of your hair.
5. Tousled, Beachy Waves
Technique: Apply a texturizing spray or mousse to damp hair and braid it into two or more sections. Let your hair dry naturally, or use a blow dryer. Once dry, undo the braids and gently tousle your hair with your fingers.
Curtain Bangs: Spritz some texturizing spray on your bangs and tousle them lightly for an effortless, beachy vibe.
6. Half-Up, Half-Down Styles
Technique: For a casual yet chic look, gather the top half of your hair and secure it with a clip or hair tie. Leave the bottom layers loose for a soft, feminine style.
Curtain Bangs: Let your curtain bangs frame your face naturally, enhancing the halfup,, haldand own style.
7. Braids and Twists
Technique: Incorporate braids or twists into your hairstyle for a playful, bohemian look. Try a side braid, a fishtail braid, or twisted sections pinned back.
Curtain Bangs: Let your bangs fall naturally, or incorporate small sections of your bangs into the braids or twists for a cohesive look.
8. High and Low Ponytails
Technique: High ponytails create a fun, youthful look, while low ponytails offer a more elegant, sophisticated style. Use a comb to smooth your hair and secure it with a tie.
Curtain Bangs: Style your bangs to frame your face, adding a touch of softness to the sleek ponytail.
9. Updos and Buns
Technique: Try an elegant updo or a chic bun for formal occasions. Secure your hair with pins and ties, and use hairspray to keep everything in place.
Curtain Bangs: Allow your curtain bangs to fall naturally or pin them back subtly to complement the updo.
10. Maintaining Healthy Hair
Regular Trims: Keep your layers and bangs looking fresh by scheduling regular trims every 6-8 weeks.
Hair Care: Use quality shampoos, conditioners, and treatments suited for your hair type. Regular deep conditioning and occasional hair masks can keep your hair healthy and shiny.
Heat Protection: Always apply a heat protectant before using heat styling tools to prevent damage and maintain the health of your hair.
By following these styling tips, you can make the most of your long layered hair with curtain bangs, achieving a variety of looks that suit different occasions and highlight your unique beauty.
20 Perfect Long Layered Hairstyles with Curtain Bangs
Long-layered hairstyles with curtain bangs offer endless versatility and a modern look that flatters various face shapes and hair types. Here are 20 stunning styles to inspire your next hair transformation:
1. Classic Long Layers with Curtain Bangs
This timeless style features long, flowing layers that add movement and volume. The curtain bangs softly frame the face, creating a balanced and elegant look.
2. Beachy Waves with Curtain Bangs
Enhance your natural waves with this relaxed, beachy style. The layers and bangs blend seamlessly, giving you a carefree, sun-kissed appearance.
3. Straight and Sleek Layers
For a polished, sophisticated look, straighten your long layers. The curtain bangs add a modern twist, making this style perfect for professional and casual settings.
4. Subtle Layers with Wispy Bangs
If you prefer a more understated look, opt for subtle layers that add a touch of volume without being too dramatic. Wispy curtain bangs complete the soft, feminine style.
5. Voluminous Curls with Curtain Bangs
Create bouncy, voluminous curls with long layers and curtain bangs. This style adds a playful, glamorous touch to your look.
6. Boho Chic Layers
Embrace a bohemian vibe with tousled, layered hair and curtain bangs. This laid-back style is perfect for festivals or casual outings.
7. Romantic Soft Waves
Achieve a romantic, ethereal look with soft, cascading waves and curtain bangs. This style is ideal for special occasions or a date night.
8. Edgy Shag Layers
For an edgier appearance, try shaggy layers with curtain bangs. This bold, textured style adds a rock-and-roll flair to your look.
9. Layered Lob with Curtain Bangs
A layered long bob (lob) with curtain bangs offers a modern, chic look. This versatile style is easy to maintain, making it a popular choice.
10. Textured Layers with Blunt Bangs
Combine textured layers with blunt curtain bangs for a unique, fashion-forward look. This style adds depth and dimension to your hair.
11. Long Layers with Side-Swept Bangs
Pair long layers with side-swept curtain bangs for a classic, elegant style. This look is flattering for all face shapes and can be dressed up or down.
12. Curly Layers with Curtain Bangs
Enhance your natural curls with layered hair and curtain bangs. This style adds shape and volume to your curls, making them more manageable and defined.
13. Sleek Ponytail with Curtain Bangs
Create a sleek, high ponytail with long layers and curtain bangs. This sophisticated style is perfect for both formal and casual occasions.
14. Braided Crown with Curtain Bangs
Incorporate braids into your long layered hair for a romantic, boho look. A braided crown paired with curtain bangs adds a touch of elegance and whimsy.
15. Messy Bun with Curtain Bangs
Try a messy bun with long layers and curtain bangs for a chic, effortless style. This look is perfect for busy days or casual outings.
16. Layered Hair with Highlights
Add dimension to your long layers with strategically placed highlights. Curtain bangs further enhance the look, giving your hair a sun-kissed glow.
17. Vintage Waves with Curtain Bangs
Channel a retro vibe with vintage waves and curtain bangs. This classic, glamorous style is perfect for special occasions or a night out.
18. Low Ponytail with Layers and Bangs
A low ponytail with layered hair and curtain bangs offers a sleek, sophisticated look. This style is easy to achieve and versatile for any setting.
19. Half-Up, Half-Down Style
Create a half-up, half-down style with long layers and curtain bangs for a feminine, romantic look. This versatile style can be dressed up or down.
20. Layered Hair with Balayage
Enhance your long layers with a balayage technique. This coloring method adds natural-looking highlights that blend beautifully with curtain bangs.
Unique and Insightful Personal Opinion
As a stylist, I’ve seen firsthand how transformative long layereI’veirstyles with curtain bangs can be. They offer a perfect blend of modern chic and timeless elegance, making them suitable for various occasions and personal styles. The versatility of this combination allows for endless experimentation, whether aiming for a casual, beachy look or a sophisticated, sleek appearance. One of the standout benefits is how this style can enhance and complement natural features, creating a balanced and flattering frame for any face shape. It’s a go-to choice for anyone looking to refresh its look with minimal effort but maximum impact.
By exploring these 20 perfect long-layered hairstyles with curtain bangs, you can find inspiration to enhance your natural beauty and achieve a trendy and timeless look.
Personal Insight that’s Layered Hairstyles with Curtain Bangs
As someone deeply passionate about hairstyling and trends, I’ve always found long-layered hairstyles with cursive bangs to be an exquisite blend of sophistication and modern chic. This combination is not just a fleeting trend but a timeless style that continues to evolve and remain relevant.
Versatility and Adaptability
One of the most appealing aspects of long-layered hairstyles with curtain bangs is their incredible versatility. This style adapts beautifully to various hair textures, from straight to wavy to curly. It allows individuals to experiment with different looks effortlessly. Whether attending a formal event or enjoying a casual day out, this hairstyle can be easily adjusted to suit the occasion.
Flattering for All Face Shapes
Curtain bangs are particularly flattering because they frame the face softly, highlighting your best features. Paired with long layers, they create a balanced look that can enhance any face shape. For those with round faces, the layers add length and definition, while those with square faces benefit from the softening effect of the curtain bangs.
Low Maintenance with High Impact
Another reason this style is so beloved is its low-maintenance nature. Long layers and curtain bangs grow out gracefully, requiring fewer trips to the salon for trims. They also offer the flexibility to style your hair in multiple ways without spending hours in front of the mirror. A quick blow-dry or a few minutes with a curling iron can transform your look completely.
Personal Experience
In my own experience, adopting a long layered hairstyle with curtain bangs was a game-changer. It gave my hair a much-needed volume boost and added a youthful, playful element to my appearance. The layers introduced movement and texture, making my hair look fuller and more dynamic. The curtain bangs, meanwhile, provided a soft, face-framing effect that drew attention to my eyes and cheekbones.
Enhancing Natural Beauty
This hairstyle enhances natural beauty without appearing overly styled or artificial. It celebrates the natural flow and texture of your hair, making it an excellent choice for those who prefer a more organic look. The layers add depth and dimension, while the curtain bangs provide a touch of elegance.
Professional Perspective
From a professional perspective, recommending this hairstyle to clients has consistently resulted in positive feedback. Clients love how it rejuvenates their look and provides multiple styling options. It’s a style that transcends age, making it a go-to for young adults and more mature individuals seeking a fresh, contemporary look.
Conclusion
Long-layered hairstyles with curtain bangs are more than just a trend—they are a versatile, timeless style that complements various hair types and face shapes. They offer a perfect balance of ease and elegance, making them a popular choice for those looking to refresh their look with minimal effort but maximum impact. Whether you’re aiming for a casual, laid-back vibe or a poyou’s sophisticated appearance, this hairstyle provides endless possibilities to express your unique style.
Frequently Asked Questions
1. What face shapes suit long layered hairstyles with curtain bangs?
Long-layered hairstyles with curtain bangs are versatile and suit most face shapes. They are particularly flattering for oval, round, and square faces. The layers add dimension and movement, while the curtain bangs frame the face, softening angular features and balancing proportions.
2. How do I maintain my long layered hair with curtain bangs?
Regular trims every 6-8 weeks are essential to maintaining the shape and health of your long layered hair with curtain bangs. Use a good-quality shampoo and conditioner suited for your hair type. Incorporate a weekly deep conditioning treatment or hair mask to keep your hair hydrated and healthy. Also, heat-protectant products should be used when styling with heat tools.
3. Can curtain bangs work with curly or wavy hair?
Absolutely! Curtain bangs can look fantastic with curly or wavy hair. The key is to work with your natural texture and ensure the bangs are cut to complement your curls or waves. Styling products like curl-enhancing mousse or sea salt spray can help define and control your bangs.
4. How do I style curtain bangs to keep them looking fresh?
To keep curtain bangs looking fresh, blow-dry them using a round brush to create volume and shape. You can also use a straightener to smooth them out, bending the ends slightly outward for a natural, feathered effect. Let them air dry for a more relaxed look, and use some texturizing spray.
5. Can I pull my hair back with curtain bangs?
Yes, you can easily pull your hair back with curtain bangs. Whether you opt for a ponytail, bun, or updo, curtaiyou’res will add a stylish touch by framing your face. You can leave them loose or subtly pin them back to change your look.
6. Are long-layered hairstyles with curtain bangs suitable for thin hair?
Long-layered hairstyles with curtain bangs can be great for thin hair. The layers add volume and movement, making the hair appear fuller. Curtain bangs also help by adding dimension to the front, drawing attention to the face and away from any thin areas.
7. How do I choose the correct length for my curtain bangs?
The length of your curtain bangs should complement your face shape and personal style. Generally, curtain bangs are cut to start from the cheekbones and gradually get longer towards the sides. Consulting with a hairstylist can help you determine the best length that flatters your face.
8. What products should I use for styling long layered hair with curtain bangs?
Essential styling products include a heat protectant spray, a lightweight mousse or volumizing spray for added body, and a texturizing spray for definition. A good-quality round brush and a hairdryer are also useful for styling your curtain bangs.
9. Can I achieve curtain bangs without cutting my hair?
If you’re not ready to commit to cutting your hair, you can achieve a similar look by using clip-in bangs. These can be styled and blended with your natural hair to give the appearance of curtain bangs without permanent change.
10. How often should I wash my long layered hair with curtain bangs?
Washing frequency depends on your hair type and personal preference. Typically, washing 2-3 times a week is sufficient to keep your hair clean without stripping it of natural oils. Use dry shampoo in between washes to keep your hair fresh and voluminous.
Addressing these common questions will help you better understand how to choose, style, and maintain long layered hairstyles with curtain bangs, ensuring a beautiful and manageable look.
Our sense of style evolves as we age, including our hairstyle choices. A well-chosen hairstyle can significantly enhance our appearance, boost our confidence, and reflect our personality. Finding the right balance between trendy and age-appropriate for older women can sometimes be challenging. This is where medium-length hairstyles come into play. They offer a perfect blend of versatility, elegance, and youthful energy.
This comprehensive guide will explore 20 youthful medium-length hairstyles for older women. Whether you’re want to you’re your look or try something completely new, these styles are designed to inspire and suit various preferences and hair types. Embrace the opportunity to showcase your beauty and vitality with these stylish and manageable haircuts.
The Benefits of Medium-Length Hairstyles
Medium-length hairstyles offer many benefits, making them an excellent choice for older women. Striking a balance between short and long hair, these styles are versatile, easy to manage, and suitable for various hair textures and face shapes. Here are some key advantages of opting for medium-length hairstyles:
Versatility and Ease of Styling
One of the most significant benefits of medium-length hair is its versatility. This length allows various styling options, from elegant updos to relaxed waves. Whether you prefer a polished look for a formal event or a casual, everyday style, medium-length hair can be easily adapted to suit any occasion. Additionally, this length is manageable enough to experiment with different styles without the hassle of maintaining long hair.
Balance Between Short and Long Hair
Medium-length hairstyles provide the perfect middle ground for those who find short hair too limiting and long hair too cumbersome. This length offers enough hair to play with without the excessive weight and maintenance that often come with longer locks. It’s an ideal choice for women who want a stylish and practical option that doesn’t require constant upkeep.
Suitable for Various Hair Textures and Face Shapes
Medium-length hairstyles are incredibly adaptable, making them suitable for various hair textures and face shapes. Whether your hair is straight, wavy, curly, or coilethere’se’s a medium-lthere’style that can enhance your natural texture and complement your features. This versatility ensures you can find a flattering hairstyle highlighting your unique beauty.
Youthful and Fresh Appearance
Medium-length haircuts can take years off your appearance, offering a youthful and fresh look. These styles can add volume, movement, and dimension to your hair, making it appear fuller and healthier. Older women can effortlessly achieve a more vibrant and contemporary look by opting for modern and trendy medium-length cuts.
Easy Maintenance and Care
Maintaining medium-length hair is relatively straightforward compared to longer styles. Regular trims are necessary to keep the ends healthy, but overall maintenance is minimal. With the right products and care routine, medium-length hair can remain in excellent condition, reducing the time and effort required for daily styling.
In summary, medium-length hairstyles offer a perfect blend of versatility, manageability, and youthful appeal. They are an excellent choice for older women looking to refresh their look without the complications of longer hair. Nexwe’ll’ll explore somewe’lldy cuts and styles that can bring out the best in your medium-length locks.
Trendy Cuts and Styles
Finding the perfect medium-length hairstyle can transform your look and boost your confidence. Here are some of the trendiest cuts and styles that are particularly flattering for older women. Each style has its unique charm and benefits; there is something there.
Layered Bob
Description: The layered bob is a classic, timeless hairstyle that works beautifully for medium-length hair. It features layers of varying lengths, which add movement and texture to the hair.
WIt’st’s Flattering: TIt’sstyle frames the face nicely and can make fine hair appear thicker. The layers provide volume and bounce, essential for a youthful look.
Styling Tips:
Use a volumizing mousse to enhance the layers.
Blow-dry with a round brush to create smooth, defined layers.
Add a light hairspray to maintain the shape throughout the day.
Shaggy Lob
Description: The shaggy lob (long bob) is a modern and edgy take on the traditional bob. It combines the length of a lob with the tousled, textured layers of a shag cut.
Benefits: This style adds a casual, effortless vibe to your looIt’st’s perfect for wIt’s who want a low-maintenance yet stylish haircut.
Best Face Shapes: The shaggy lob suits most face shapes, especially oval, round, and square.
Styling Tips:
Use a texturizing spray to enhance the shaggy layers.
Let your hair air dry, or use a diffuser for a natural finish.
Add some waves with a curling wand for extra texture.
Curly Shoulder-Length
Description: For women with natural curls, a shoulder-length cut can enhance the beauty of your curls. This style keeps the hair manageable while allowing the curls to shine.
How Curls Add Volume and Vibrancy: Curls naturally add volume and movement to the hair, creating a lively and youthful appearance. The shoulder-length cut helps define the curls and prevents them from becoming too heavy.
Maintenance Tips:
Use a moisturizing shampoo and conditioner to keep curls hydrated.
Apply a curl-enhancing cream to define and control Frizz.
Avoid over-washing to maintain the natural oils that keep curls healthy.
Sleek Straight Cut
Description: A sleek, straight, medium-length cut is a sophisticated and polished style. This look is all about smooth, straight hair that falls just below the shoulders.
Modern and Sophisticated Look: This style exudes elegance and is perfect for professional settings or formal occasions. It provides a clean, neat appearance.
Tools and Products to Achieve This Style:
Use a smoothing serum to eliminate Frizz and add shine.
Straighten your hair with a flat iron for a sleek finish.
Finish with a light-hold hairspray to keep hair in place without stiffness.
Wavy Lob
Description: The wavy lob is a versatile and relaxed style that combines the length of a lob with soft, natural waves. This look is both chic and effortless.
Natural and Effortless Style: Wavy lobs are casual yet stylish, making them ideal for everyday wear. The waves add texture and dimension to the hair.
How to Create and Maintain Waves:
Use a sea salt spray on damp hair to enhance natural waves.
Scrunch your hair as it dries to encourage waves.
For more defined waves, use a curling wand and then brush through for a softer look.
Each trendy cut and style offers a unique way to embrace medium-length hair. Whether you prefer a sleek, polished look or a more relaxed, tousled style, there’s a medium-length haircut that can enhance your beauty and reflect your personality. Nexwe’ll delve into the latest hair color trends that complement these youthful styles.
Hair Color Trends for Medium-Length Hair
Choosing the right hair color can significantly enhance your medium-length hairstyle, adding depth, dimension, and a youthful glow. Here are some of the most popular hair color trends for medium-length hair that can complement your look and make you stand out.
Balayage
Description: Balayage is a hand-painting technique that creates a natural, sun-kissed effect. The highlights are strategically placed to blend seamlessly with your base color, giving your hair a multidimensional look.
Benefits:
Low maintenance since it grows out naturally.
Adds depth and dimension to the hair.
Works well with various hair colors and textures.
Tips for Balayage:
Choose a shade a few tones lighter than your natural color for a subtle effect.
Regular touch-ups every 3-4 months will keep the color fresh.
Use color-safe shampoos and conditioners to maintain the vibrancy.
Ombre
Description: Ombre gradually transitions from a darker root to a lighter end. This trend creates a striking contrast and adds a bold, youthful touch to your hair.
Benefits:
Minimal upkeep since roots are naturally darker.
It creates visual interest and can make the hair appear thicker.
Suitable for various base colors.
Tips for Ombre:
Ensure the transition between colors is smooth and gradual for a more natural look.
Consider using deep conditioning treatments to keep the ends healthy and prevent dryness.
Refresh the color every 4-6 months to maintain the gradient effect.
Highlights and Lowlights
Description: Adding highlights and lowlights is a versatile way to enhance your medium-length hair. Highlights are lighter strands, while lowlights are darker strands that add contrast and depth.
Benefits:
It can be customized to suit any base color.
Adds volume and dimension to the hair.
Creates a more dynamic and vibrant look.
Tips for Highlights and Lowlights:
Opt for shades that complement your natural color for a harmonious effect.
Mix both highlights and lowlights for a more balanced and natural appearance.
Maintain the color with regular salon visits every 6-8 weeks.
Silver and Gray
Description: Embracing natural gray or opting for silver hues has become trendy and bold. This color trend exudes confidence and elegance.
Benefits:
Enhances natural beauty and embraces aging gracefully.
Silver tones can add a modern and edgy twist.
It requires less frequent touch-ups than other colors.
Tips for Silver and Gray:
Use purple shampoos to neutralize any yellow tones.
Regular deep conditioning treatments to keep the hair soft and shiny.
Consider a gloss treatment to add extra shine and enhance the color.
Pastel Shades
Description: Pastel shades like pink, lavender, and blue are fun and playful choices that can add a unique and youthful touch to your medium-length hair.
Benefits:
Allows for creative expression and individuality.
It can be customized to be as bold or subtle as you like.
It adds a trendy and modern flair.
Tips for Pastel Shades:
Pastel colors may require pre-lightening, so consult a professional colorist.
Use color-depositing shampoos to maintain the vibrancy.
Regular touch-ups every 4-6 weeks to keep the color looking fresh.
These hair color trends can complement your medium-length hairstyle, enhancing your overall look and adding a youthful vibrancy. Whether you prefer natural highlights, bold ombre, or playful pastelthere’se’s a color trthere’st can elevate your style. Nexwe’ll cover some tips for maintaining your medium-length hairstyle to ensure it looks its best.
Tips for Maintaining Medium-Length Hairstyles
Maintaining your medium-length hairstyle is essential to keep it looking fresh, vibrant, and healthy. Here are some practical tips to ensure your hair remains in excellent condition and your style stays on point.
Regular Trims
It’s essential to use ReIt’sr trims to prevent split ends and maintain the shape of your hairstyle. Even you’re’re growing youyou’re out, trimming the ends every 6-8 weeks keeps your hair healthy and looking its best.
Tips for Trims:
Schedule trims with your stylist every 6-8 weeks.
Ask your stylist to focus on removing damaged ends without taking off too much length.
Consider”a “dust”ng” trim, wh”re only”the very tips are cut to maintain length while getting rid of split ends.
Proper Washing Routine
What’s Important: The right shampoo and conditioner for your hair type helps maintain its health and appearance. Overwashing can strip natural oils, while underwashing can lead to buildup.
Tips for Washing:
Use a sulfate-free shampoo to avoid stripping natural oils.
Condition from the mid-lengths to the ends to prevent weighing down your hair.
Wash your hair 2-3 times a week, depending on your hair type and texture.
Heat Protection
It’s important to note that heat Styling can damage hair, leading to dryness and split ends. Heat protection produces hair from high temperatures to keep it healthy.
Tips for Heat Protection:
Always apply a heat protectant spray or serum before using heat tools.
Use styling tools with adjustable temperature settings and keep them at a moderate heat level.
Limit heat tools to a few times a week to minimize damage.
Deep Conditioning Treatments
Conditioning treatments nourish hair, providing essential moisture and nutrients. They can revive dull, dry hair and keep it looking shiny and healthy.
Tips for Deep Conditioning:
Use a deep conditioning mask once a week.
Leave the treatment in for at least 15-20 minutes for maximum absorption.
Look for masks with ingredients like argan oil, keratin, and shea butter.
Protecting Hair While Sleeping
It’s important to note that Frizz from your pillowcase can cause hair to fade. By protecting your hair while you sleep, Frizz Frizz keeps it smooth and tangle-free.
Tips for Sleeping:
Use a silk or satin pillowcase to reduce friction.
Tie your hair in a loose braid or ponytail to prevent tangling.
Consider wearing a silk or satin bonnet or scarf to protect your hair.
Using the Right Products
WIt’st’s Important: ChIt’sng products suited to your hair type and style helps maintain the health and appearance of your hair. The right products can enhance your hairstyle and make daily styling easier.
Tips for Product Use:
Invest in a good quality leave-in conditioner to keep your hair hydrated.
Use styling creams or gels suitable for your hair type and desired look.
Avoid products with harsh chemicals that can damage your hair over time.
Balanced Diet and Hydration
WIt’st’s Important: A It’sthy diet and adequate hydration play a crucial role in maintaining strong, healthy hair. Nutrients from your diet support hair growth and overall hair health.
Tips for Diet and Hydration:
Include protein-rich foods like eggs, nuts, and fish in your diet.
Consume vitamins and minerals such as biotin, vitamin E, and zinc.
Drink plenty of water to keep your hair and scalp hydrated.
Professional Treatments
WIt’st’s Important: PrIt’ssional treatments can address specific hair concerns and provide deeper care than at-home products. Treatments like keratin or deep conditioning at the salon can rejuvenate and strengthen your hair.
Tips for Professional Care:
Schedule professional treatments like keratin or Olaplex every few months.
Discuss your hair concerns with your stylist to choose the best treatment.
Follow up with recommended at-home care to maintain the benefits of professional treatments.
Following these tips ensures your medium-length hairstyle remains healthy, stylish, and easy to manage. Regular care and the right products will keep your hair looking its best, allowing you to enjoy the full benefits of your chosen style. Next we will share some insights and opinions on why medium-length hairstyles are a great choice for older women.
Personal Opinion: Embracing Youthful Hairstyles
Embracing a youthful hairstyle is about more than just following the latest trends. It’s a way to express your personality, confidence, and vitality. Medium-length hairstyles, in particular, offer a perfect balance between manageability and versatility, making them an excellent choice for older women. That’s why I believe medium-length hairstyles are a fantastic option for maintaining a youthful and vibrant look.
Confidence Boost
One of the most empowering aspects of a new hairstyle is the boost in confidence it can provide. Medium-length hairstyles offer many styling possibilities, from sleek and polished to fun and tousled. This versatility allows you to experiment with different looks and find what makes you feel most confident.
When you feel good about your hair, it reflects in your overall demeanor. A fresh, stylish haircut can rejuvenate you and make you ready to take on the world. It’s a subtle yet effective way to enhance self-esteem and present your best self.
Adaptability and Versatility
Medium-length hair is incredibly adaptable, offering numerous styling options for any occasion. Whether you prefer a sophisticated updo for a formal event, loose waves for a casual day out, or a sleek bob for the office, medium-length hair can accommodate it all. This flexibility means you can change your look as often as you like without the commitment of long hair or the limitations of a shorter cut.
Low Maintenance with High Impact
As we age, ohair’sr’s texture andhair’sty may change. Medium-length hairstyles are a practical choice because they balance the maintenance demands of long hair and the limited styling options of short hairWhair withmal effort, yououyouachieve a high-impact loot look the proper cut and products.
For instance, a layered bob can add volume and movement to fine hair, while a shaggy lob offers a trendy, effortless style that requires little upkeep. This practicality makes medium-length hairstyles ideal for women who want to look polished without spending hours on their hair.
Age-Appropriate Yet Modern
Medium-length hairstyles are timeless and age-appropriate while still being modern and chic. They can be tailored to suit any face shape and hair type, making them universally flattering. Styles like the wavy lob or the layered bob are contemporary choices that don’t feel overly uncomfortable or out of place for older women.
Choosing a current and flattering hairstyle can take years off your appearance, giving you a refreshed and youthful look that complements your features and feels authentic to your taste.
Embracing Change
Trying a new hairstyle can be an excellent way to embrace change and stay current with evolving beauty standards. It’s an opportunity to break away from a long-standing style and experiment with something new and exciting. Embracing change in your hairstyle can symbolize a broader willingness to adapt and grow, which is a youthful quality.
Celebrating Individuality
Finally, a youthful hairstyle allows you to celebrate your individuality. It’s a form of self-expression that lets you showcase your unique personality. Whether you opt for bold colors, playful textures, or classic cuts, your hairstyle can speak volumes about who you are and how you see yourself.
In conclusion, medium-length hairstyles offer a perfect blend of style, versatility, and practicality, making them an excellent choice for older women seeking a youthful and vibrant look. By embracing these hairstyles, you can boost your confidence, celebrate your individuality, and enjoy medium-length hair’s adaptability and ease. Next, we will answer some some frequently asked key questions about medium-length hairstyles for older women.
Frequently Asked Questions (FAQ)
1. What is the best medium-length hairstyle for fine hair?
Answer: Layered cuts like a shaggy lob or a layered bob are ideal for fine hair. These styles add volume and movement, making the hair appear fuller. Incorporating soft waves can also enhance texture and give the illusion of thicker hair.
2. How often should I trim my medium-length hair to keep it healthy?
Answer: Regular trims every 6-8 weeks are recommended to prevent split ends and maintain the shape of your hairstyle. This routine helps keep your hair looking fresh and healthy, promoting better growth and overall appearance.
3. Can older women wear trendy hair colors like pastel shades or bold highlights?
Answer: Absolutely! Age should never limit your hair color choices. Trendy colors like pastel shades or bold highlights can add a youthful and modern touch to your look. Ensure that the color complements your skin tone, and consult a professional colorist for the best results.
4. What are some easy, low-maintenance, medium-length hairstyles for older women?
Answer: Low-maintenance options include the classic bob, the wavy lob, and the blunt cut. These styles require minimal daily styling and can look polished with simple blow-drying or air-drying techniques. Adding layers can also reduce the need for frequent trims and styling.
5. How can I protect my medium-length hair from heat damage?
Answer: Always use a heat protectant spray or serum before styling with heat tools to protect your hair from heat damage. Keep the temperature on your styling tools moderate and limit their use to a few times a week. Regular deep conditioning treatments can also help maintain hair health.
6. What products should I use to keep my medium-length hair looking its best?
Answer: Use a sulfate-free shampoo and conditioner suited to your hair type. Incorporate a leave-in conditioner for added moisture and a heat protectant if you use styling tools. A volumizing mousse or lightweight styling cream can enhance your hairstyle without weighing it down.
7. Are medium-length hairstyles suitable for all face shapes?
Answer: Yes, medium-length hairstyles are versatile and can be tailored to suit any face shape. For example, face-framing layers can soften angular features, while a side-swept bang can balance a round face. Consulting with a hairstylist can help you find the best cut for your face shape.
8. How do I choose the right hair color for my medium-length hairstyle?
Answer: When choosing a hair color, consider your skin tone, eye color, and natural hair color. Warmer tones like caramel and honey complement warmer skin tones, while more fabulous shades like ash blonde and platinum suit cooler skin tones. Highlights, lowlights, and balayage can add dimension and depth.
9. Can medium-length hairstyles help me look younger?
Answer: Yes, medium-length hairstyles can create a youthful appearance by adding movement, volume, and texture to your hair. Styles like the layered bob, wavy lob, and soft curls can soften facial features and make you look more vibrant and refreshed.
10. How do I style my medium-length hair for special occasions?
Answer: For special occasions, consider elegant updos, soft curls, or sleek, straight styles. Accessories like hairpins, clips, and headbands can add a touch of glamour. Using a curling iron or straightener, you can create versatile looks that suit the occasion, whether formal or cast.
Medium-length hairstyles offer endless possibilities for older women, combining practicality with style. By following these tips and exploring different cuts, colors, and maintenance routines, you can find the perfect look that enhances your natural beauty and suits your lifestyle.
Conclusion
Medium-length hairstyles are an excellent choice for older women seeking a youthful, versatile, and manageable look. These styles provide the perfect balance between the ease of short hair and the styling options of long hair, making them a practical and stylish choice.
Key Takeaways:
Versatility and Style: Medium-length hairstyles offer endless styling possibilities, from chic bobs to trendy lobs and layered cuts. They can be tailored to suit any face shape, hair type, and personal preference.
Maintenance and Health: Regular trims, proper washing routines, and the use of quality products are essential to maintaining the health and appearance of medium-length hair. Deep conditioning treatments and heat protection can further enhance yohair’sr’s vitality.
Mhair’sand Age-Appropriate: These hairstyles are timeless and modern, providing a fresh and youthful appearance without feeling out of place. They allow for a seamless blend of classic and contemporary elements.
Self-Expression: Embracing a new hairstyle can be a powerful form of self-expression, boosting confidence and celebrating individuality. Whether you choose bold colors, playful textures, or elegant cuts, your hairstyle can reflect your personality and style.
Adaptability: Medium-length hair is adaptable to various occasions and lifestyles. From everyday wear to special events, these hairstyles can be easily styled to suit different settings, making them a versatile choice for any woman.
By choosing a medium-length hairstyle, you can enjoy a fresh, youthful look that is stylish and easy to maintain. The proper cut and care routine will keep your hair healthy, vibrant, and full of life, allowing you to feel confident and beautiful at any age.
Remember, the key to a great hairstyle is finding what makes you feel comfortable and confidenDon’tn’t be afraid toDon’triment with different styles and colors to discover what works best for you. With the right approach, medium-length hairstyles can help you embrace your beauty and showcase your unique style to the world.
Teaching evolution in schools has long been debated, often sparking discussions that bridge science, education, and personal beliefs. As a cornerstone of modern biological sciences, evolution provides an essential framework for understanding the diversity of life on Earth. Despite its scientific significance, the topic remains controversial, particularly when it intersects with religious views and cultural perspectives.
In this article, we will explore the pros and cons of teaching evolution in schools, aiming to provide a balanced view highlighting both educational benefits and potential challenges. We will explore how teaching evolution can enhance scientific literacy, promote critical thinking, and prepare students for future academic and career pursuits. Simultaneously, we will address the concerns and opposition that arise, particularly from communities with strong religious convictions.
This article seeks to present a comprehensive understanding of the topic by examining legal and educational implications, offering practical advice for educators, and providing a unique personal perspective. Our goal is to foster an informed discussion that respects diverse viewpoints while emphasizing the importance of scientific education. Whether you are an educator, parent, or simply someone interested in the intersection of science and belief, this article aims to offer valuable insights into teaching evolution in schools.
The Importance of Teaching Evolution in Schools
Understanding Evolution
Evolution is the process through which species of organisms change over time through variations in their genetic makeup. It is a fundamental concept in biology that explains the diversity of life on Earth. Understanding evolution provides students with a framework for interpreting biological data, understanding the relationships between different organisms, and appreciating the dynamic nature of life. By learning about evolution, students gain insight into how species adapt to their environments, the origins of genetic diversity, and the mechanisms that drive evolutionary change.
Evolution as a Scientific Foundation
Teaching evolution is crucial because it serves as the backbone of biological sciences. Without a solid understanding of evolution, students miss out on a comprehensive education in biology. Evolutionary theory unifies various biological concepts, from genetics and ecology to physiology and palaeontology. It helps students understand how different biological systems are interconnected and how they have evolved. This foundational knowledge is essential for advanced studies in biology and related fields.
Preparing Students for Advanced Education and Careers
A firm grasp of evolutionary principles is vital for students who aspire to pursue higher education and careers in science, medicine, environmental studies, and numerous other fields. Many scientific disciplines, including genetics, anthropology, and ecology, rely heavily on evolutionary concepts. Students well-versed in evolution are better equipped to understand complex scientific literature, conduct research, and contribute to scientific advancements. Moreover, medical fields, particularly those related to genetics and epidemiology, benefit significantly from understanding evolutionary processes, as these principles help explain disease mechanisms and the development of treatments.
Promoting Critical Thinking Skills
Teaching evolution encourages critical thinking and scientific inquiry. It challenges students to analyze evidence, evaluate competing hypotheses, and understand the scientific method. These skills are crucial for scientific pursuits and valuable in everyday life. By learning to think critically, students can make informed decisions, solve problems effectively, and approach complex issues with a reasoned and evidence-based mindset.
Supporting a Comprehensive Understanding of Life
Evolutionary theory provides a holistic view of life, connecting various aspects of biology into a cohesive whole. It explains the origins of species, the development of complex traits, and the interactions between organisms and their environments. This comprehensive understanding helps students appreciate the richness and diversity of life on Earth. It also fosters a sense of curiosity and wonder about the natural world, encouraging lifelong learning and a deeper appreciation for science.
In conclusion, teaching evolution in schools is essential for providing students with a thorough understanding of biological sciences, promoting critical thinking skills, and preparing them for future academic and career opportunities. By integrating evolution into the curriculum, educators can help students build a solid foundation in science that will serve them well throughout their lives.
Pros of Teaching Evolution in Schools
Enhancing Scientific Literacy
One of the most significant advantages of teaching evolution in schools is the enhancement of scientific literacy. Evolution provides a foundational understanding of biology, crucial for grasping more advanced scientific concepts. Students who learn about evolution are better equipped to understand genetics, ecology, and physiology. This comprehensive knowledge fosters an appreciation for the scientific process and helps students become informed citizens capable of engaging with scientific issues.
Promoting Critical Thinking Skills
Teaching evolution encourages students to develop critical thinking skills. Understanding evolutionary theory requires students to analyze evidence, evaluate different hypotheses, and understand the scientific method. These skills are transferable to other areas of study and everyday life. By learning to question, analyze, and synthesize information, students become better problem solvers and more adept at making informed decisions. Critical thinking is a valuable skill in any career and is essential for navigating an increasingly complex world.
Preparing Students for Higher Education and Careers
A solid understanding of evolution is crucial for students pursuing higher education and careers in the sciences. Many fields, including biology, medicine, environmental science, and anthropology, rely heavily on evolutionary principles. Knowledge of evolution is essential for understanding advanced topics such as genetic mutations, species interactions, and disease mechanisms. Students who are well-versed in evolution are better prepared for college-level coursework and are more competitive in the job market. This preparation is vital for careers in research, healthcare, conservation, and many other fields.
Supporting a Comprehensive Understanding of Life
Evolutionary theory provides a holistic understanding of life on Earth. It explains the origins of species, the development of complex traits, and the interactions between organisms and their environments. By learning about evolution, students gain a deeper appreciation for the diversity and complexity of life. This comprehensive understanding helps students appreciate biological systems’ interconnectedness and biodiversity’s importance. It also fosters a sense of wonder and curiosity about the natural world, encouraging lifelong learning and scientific exploration.
Encouraging Open-mindedness and Respect for Evidence
Teaching evolution promotes open-mindedness and respect for evidence-based reasoning. Students learn to consider multiple perspectives and to base their conclusions on empirical evidence. This approach fosters a culture of intellectual honesty and scientific integrity. By valuing evidence over ideology, students become more open to new ideas and respectful of differing viewpoints. This mindset is crucial for personal growth and contributing to a tolerant and informed society.
Addressing Misconceptions and Enhancing Public Understanding
There are many misconceptions about evolution, and teaching it in schools helps to correct these misunderstandings. By providing accurate information, educators can dispel myths and clarify the scientific basis of evolutionary theory. This education is essential for enhancing public understanding of science and combating misinformation. An informed public is better equipped to make decisions about public health, environmental policy, and scientific research.
In conclusion, the benefits of teaching evolution in schools are vast and far-reaching. The advantages are clear, from enhancing scientific literacy and critical thinking skills to preparing students for higher education and promoting open-mindedness. By integrating evolution into the curriculum, educators can provide students with the knowledge and skills they need to succeed in a rapidly changing world.
Cons of Teaching Evolution in Schools
Conflict with Religious Beliefs
One of the most significant challenges of teaching evolution in schools is the potential conflict with religious beliefs. Many spiritual traditions have creation stories that differ from the scientific explanation of evolution. For some students and their families, learning about evolution can be seen as contradictory to their faith. This conflict can lead to discomfort, resistance, and even opposition from parents, students, and religious communities. Educators must navigate these sensitivities carefully to respect students’ beliefs while providing a comprehensive science education.
Potential for Misunderstanding and Controversy
The topic of students’ tension can be controversial and misunderstood. Some individuals may view the teaching of evolution as an attempt to undermine religious teachings or as promoting atheism. This misunderstanding can lead to heated debates and create a contentious classroom environment. Teachers may find themselves in difficult positions, needing to address misconceptions and diffuse tension while maintaining an objective and respectful stance. The controversy can distract from other important educational goals and create a challenging learning atmosphere.
Parental and Community Opposition
In some communities, there is strong opposition to teaching evolution in schools. Parents may demand that evolution be excluded from the curriculum or that alternative theories, such as creationism or intelligent design, be taught alongside it. This opposition can result in school board disputes, legal battles, and changes in school policies. Teachers may face pressure from parents and community members, potentially compromising scientific integrity in education. Balancing these demands while adhering to educational standards can significantly challenge schools and educators.
Risk of Alienating Students
Teaching evolution can sometimes alienate students who hold strong religious beliefs. If not approached sensitively, discussions about evolution can make these students feel marginalized or disrespected. This alienation can affect their engagement and performance in science classes. Educators must create an inclusive environment where all students feel respected and valued, regardless of their personal beliefs. Finding ways to teach evolution that acknowledge and respect diverse viewpoints is essential to avoid alienation.
Complexity of the Subject Matter
Evolution is a complex scientific theory that requires understanding various biological concepts, such as genetics, natural selection, and ecological interactions. Some students may find these concepts difficult to grasp, leading to confusion and frustration. Effective teaching of evolution requires skilled educators who can present the material in an accessible and engaging manner. Without adequate teacher preparation and resources, the complexity of the subject matter can pose a significant barrier to effective learning.
Legal and Policy Challenges
The teaching of evolution has been the subject of numerous legal battles and policy debates. In some regions, attempts have been made to introduce legislation restricting the teaching of evolution or mandating the inclusion of alternative theories. These legal and policy challenges can create an uncertain and unstable environment for educators and students. Schools may face legal risks and conflicts with state and federal education standards. Navigating these legal and policy challenges requires careful attention and, often, legal expertise.
In conclusion, while teaching evolution in schools offers many educational benefits, it also presents several challenges. Conflicts with religious beliefs, the potential for misunderstanding and controversy, parental and community opposition, the risk of alienating students, the complexity of the subject matter, and legal and policy challenges must be considered. Addressing these cons requires sensitivity, respect, and a commitment to providing a balanced and comprehensive education. By understanding and preparing for these challenges, educators can more effectively teach evolution and foster a respectful and inclusive learning environment.
Balancing Evolution and Religious Beliefs
Strategies for Respectful Inclusion
Balancing the teaching of evolution with respect for religious beliefs is crucial in creating an inclusive educational environment. Here are some strategies that can help achieve this balance:
Acknowledging Diverse Worldviews: Recognize and respect the diversity of students’ backgrounds and beliefs. Begin discussions by acknowledging that people come from various cultural and religious perspectives and that education aims to explore scientific theories without dismissing personal beliefs.
Creating a Safe Space for Dialogue: Encourage open dialogue where students feel safe to express their views. Create an atmosphere of mutual respect and understanding, where questions and discussions about evolution and religion are welcomed without judgment.
Clarifying the Scope of Science Education: Emphasize that science education focuses on empirical evidence and the scientific method. Make it clear that the goal is not to challenge or replace religious beliefs but to provide an understanding of scientific theories based on observable data.
Using Inclusive Language: Avoid language perceived as dismissive or confrontational towards religious beliefs. Instead of presenting evolution as the only perspective, frame it as the scientific consensus supported by extensive research and evidence.
Teaching About Different Worldviews
Incorporating lessons about different worldviews can enrich students’ understanding and promote respect for diversity. Here’s how educators can integrate this approach:
Comparative Lessons introduce students to various cultural and religious events regarding the origin of life. This comparative approach can help students appreciate the richness of different perspectives and understand why evolution is taught in science classes.
Historical Context: Teach the history of the scientific discovery of evolution, including the debates and discussions that have shaped its acceptance. Highlight how scientific theories evolve and how they coexist with diverse belief systems.
Critical Thinking Exercises: Encourage students to think critically about scientific theories and religious beliefs. Use exercises that allow students to explore how different worldviews address similar questions about life, existence, and the natural world.
Guest Speakers and Panels: Invite guest speakers from various religious and scientific backgrounds to discuss their perspectives. Panels can provide a balanced view and demonstrate how people navigate the relationship between science and religion in their own lives.
Addressing Concerns and Misconceptions
Educators often encounter misconceptions about evolution and its relationship with religion. Here are some practical ways to address these concerns:
Debunking Myths: Clarify common misconceptions about evolution, such as the idea that it is “just a theory” or that it conflicts inherently with all religious beliefs. Use factual information and scientific evidence t” address thes” myths.
Highlighting Compatibility: Many religious individuals and organizations accept evolutionary theory. Please share examples of religious groups and leaders who see no conflict between their faith and accepting evolution, demonstrating that science and religion coexist.
Empathy and Understanding: Approach sensitive topics with empathy. Understand that many students’ beliefs are profoundly personal and integral to their identity. Showing empathy can help build trust and open-mindedness.
Legal and Policy Framework
Navigating the legal and policy aspects of teaching evolution and religious beliefs is critical:
Adhering to Education Standards: Ensure that the curriculum aligns with state and federal education standards, which typically mandate teaching evolution as a fundamental scientific theory.
Staying Informed on Legal Precedents: Be aware of critical legal cases and precedents that affect the teaching of evolution, such as the Supreme Court ruling in Edwards v. Aguillard (1987), which struck down a law requiring the teaching of creationism alongside evolution.
Developing Clear Policies: Schools should develop clear policies that outline how evolution and religious beliefs will be addressed in the classroom. These policies should balance scientific integrity with respect for students’ religious beliefs.
In conclusion, balancing the teaching of evolution with respect for religious beliefs requires students to develop strategies, use inclusive teaching methods, and clearly understand legal frameworks. By fostering an environment of respect, open dialogue, and critical thinking, educators can help students navigate the intersection of science and belief, preparing them for a diverse and complex world.
Legal and Educational Implications
Policies and Regulations
A complex web of policies and regulations at the local, state, and federal levels governs the teaching of evolution in schools. These policies ensure students receive a sound science education while considering community values and beliefs.
Federal Education Standards: At the federal level, the Next Generation Science Standards (NGSS) emphasize teaching evolution as a vital component of compobiological sciences. These standards guide curriculum development and ensure consistency in science education across the United States.
State Education Policies: Each state has policies that dictate how evolution should be taught. Some states have specific guidelines that mandate the inclusion of evolution in the science curriculum, while others may allow more flexibility. Educators must be familiar with their state’s policies to ensure compliance and understand the expectations for teaching evolution.
Local School District Regulastate’s Local school districts often have additional regulations and policies regarding the teaching of evolution. These can vary significantly depending on the community’s values and beliefs. It is essential for educators to engage with local school boards and understand the district’s community’s evolution to navigate any potential conflicts.
Case Studies and Legal Precedents
Several landmark legal districts shaped the landscape of teaching evolution in schools. Understanding these cases is crucial for educators to navigate the legal implications of teaching evolution.
Scopes’ “Monkey” Trial (1925): This famous trial challenged a Tennessee law that prohibited the teaching of evolution in public schools. The case brought national attention to the issue and highlighted the conflict between science and religion in education. Although the teacher, John Scopes, was found guilty, the trial sparked a nationwide debate and set the stage for future legal battles.
Epperson v. Arkansas (1968): In this case, the Supreme Court struck down an Arkansas law that banned the teaching of evolution. The CouCourtled that the law violated the Establishment Clause of the First Amendment by promoting a specific religious view. This decision reinforced the principle that public schools must remain neutral regarding religious beliefs.
Edwards v. Aguillard (1987): The Supreme Court ruled against a Louisiana law requiring that “creation science” be taught alongside evolution. The CouCourtld that the law was intended to promote a particular religious “belief, thus violating the Establishment Clause. This ruling clarified that public schools cannot endorse religious views through their science curriculum.
Kitzmiller v. Dover Area School District (2005): This case addressed the introduction of “intelligent design” as an alternative to evolution in a Pennsylvania school district. The court ruled that intelligent design” is not a scientific theory but a religious view. The decision emphasized that teaching intelligent design in public schools violates the Establishment Clause.
Implications for Educators
Understanding the legal context of teaching evolution is essential for educators to navigate potential challenges and ensure compliance with educational standards.
Legal Compliance: Educators must ensure that their teaching methods and materials comply with federal, state, and local regulations. This includes adhering to curriculum standards that mandate the teaching of evolution and avoiding promoting religious views.
Professional Development: Continuous professional development is crucial for educators to stay informed about legal precedents and best practices for teaching evolution. Training can help teachers addreffectively answerdent questions and concerns eff,nengagessroom discussions, and handle potential conflicts with sensitivity and respect.
Community Engagement: Building positive relationships with parents and the community is essential for addressing concerns about the teaching of evolution. Educators should communicate the educational value of teaching evolution and the legal requirements that guide science education. Engaging with the community through informational sessions and open dialogues can help build trust and understanding.
Educational Resources: Providing educators with high-quality resources and support is vital for effectively teaching evolution. Access to up-to-date textbooks, scientific literature, and professional networks can enhance teachers’ ability to deliver accurate and engaging lessons on evolution.
In conclusion, the legal and educational implicationteachers’hing evolution in schools are multifaceted and require careful consideration. By understanding and adhering to legal standards, engaging with the community, and utilizing professional development and resources, educators can navigate these challenges and provide students with a robust science education that respects diverse viewpoints.
Personal Insight: The Intersection of Science and Belief
Navigating the intersection of science and belief, mainly when teaching evolution in schools, is a complex yet profoundly important task. As an educator and someone deeply invested in both scientific literacy and cultural sensitivity, I have found this topic to be one of the most rewarding and challenging aspects of my career.
Bridging Two Worlds
Teaching evolution often feels like walking a tightrope between two worlds. On one side, there’s the rigorous, evidence-based framework of science, which explains the diversity of life through mechanisms like selection and genetic drift. On the other hand, there are deeply held religious beliefs that many students and their families cherish, which provide meaning and context to their lives.
Acknowledging this duality is crucial. Science and religion need not be seen as mutually exclusive; instead, they can be viewed as different ways of understanding the world. Science asks how and seeks to uncover the mechanisms behind natural phenomena. Religion often addresses the why, providing purpose and moral guidance. By respecting both perspectives, we can create a more inclusive and enriching educational environment.
Promoting Critical Thinking and Respect
Critical thinking is one of the most valuable skills we can teach our students. As a scientific theory, evolution provides an excellent opportunity to practice this. By analyzing fossil records, genetic data, and ecological patterns, students learn to evaluate evidence and construct reasoned arguments. This process helps them understand evolution and the broader scientific method.
However, critical thinking does not mean dismissing beliefs. It’s about examining evidence, asking questions, and understanding different viewpoints. In my classroom, I encourage respect. It’s a dialogue where students can express their beliefs and question the evidence for evolution. This approach deepens their understanding and fosters a culture of respect and empathy.
Evolution and Intelligent Design: Complementary, Not Contradictory
Many students come to class with prior knowledge or beliefs about intelligent design or creationism. Instead of viewing these concepts as obstacles, I see them as starting points for deeper discussion. For instance, we might explore how different cultures and religions understand the origins of life. This comparative approach helps students see the richness of human thought and the variety of ways people seek to understand their existence.
From a scientific standpoint, I emphasize that evolution and intelligent design address different questions. Evolution provides a well-supported explanation for the diversity of life through natural processes. Innovative design, while not a scientific theory, reflects a philosophical or theological perspective on life’s origins. By understanding the distinction, students can appreciate the role of science in answering empirical questions and recognizing the value of personal belief systems.
The Role of Educators
Educators guide students through these complex topics with sensitivity and integrity. We must provide accurate scientific information while respecting students’ beliefs. This balance is not always easy, but it is essential for fostering an inclusive learning environment.
One student strategy I’ve used is incorporating historical and philosophical contexts into lessons on evolution. For example, discussing Charles Darwin’s life and the societal impacts of his work helps students see evolution as part of a broader scientific and cultural Darwin’ se. This contextual approach makes the science more relatable and less abstract.
The Value of Diverse Perspectives
Embracing diverse perspectives enriches our understanding of evolution and its implications. In my experience, students benefit significantly from hearing multiple viewpoints, including those of scientists, theologians, and cultural leaders. Guest speakers, panel discussions, and interdisciplinary projects can bring these perspectives to life, making the evolution study more dynamic and engaging.
Conclusion: A Journey of Understanding
In conclusion, teaching evolution in schools is not just about imparting scientific knowledge; it’s about fostering a journey of understanding. It’s about helping students navigate the complex landscape of evidence, bits, critical thinking, and respect. By embracing science and belief, we can prepare our students to become thoughtful, informed, and empathetic individuals.
This journey is challenging but also deeply rewarding. One of the greatest joys of teaching is seeing students develop a nuanced understanding of evolution and its place in the broader human quest for knowledge. Bridging the gap between science and belief can create a more inclusive and enlightened society.
Practical Advice for Educators
Teaching evolution in schools presents unique challenges and opportunities. As educators, we must equip ourselves with strategies that foster understanding, respect diverse viewpoints, and engage students effectively. Here are some practical tips for teaching evolution:
Tips for Effective Teaching of Evolution
Use Clear and Engaging Materials:
Utilize various resources, including textbooks, scientific articles, documentaries, and interactive models. Visual aids such as diagrams, charts, and evolutionary trees can help students grasp complex concepts.
Incorporate technology using apps and websites offering virtual labs and simulations to explore evolutionary processes.
Build a Strong Foundation:
Start with basic concepts such as genetics, natural selection, and adaptation. Ensure that students understand these foundational ideas before moving on to more complex topics like speciation and evolutionary history.
Use relatable examples from everyday life, such as antibiotic resistance in bacteria or the breeding of domesticated animals, to illustrate evolutionary principles.
Encourage Inquiry and Exploration:
Promote a classroom environment where students feel comfortable asking questions and exploring ideas. Use inquiry-based learning methods to encourage students to investigate evolutionary concepts through hands-on activities and experiments.
Organize field trips to natural history museums, zoos, or botanical gardens to provide real-world examples of evolution.
Address Common Misconceptions:
Identify and address common misconceptions about evolution early in the course. Clarify that a vast body of evidence supports evolution and explains the difference between scientific theories and personal beliefs.
Use analogies and simplified explanations to help students understand complex ideas. For example, compare genetic variation to a shuffled,, shuffleards, where different hands represent different traits.
Addressing Common Misconceptions
Evolution is “Just a Theory”:
Explain that, in scientific terms, a theory is a well-substantiated explanation based on evidence. Emphasize “hat evolution”, like the theory of gravity, is supported by extensive research and observations.
Humans Evolved from Monkeys:
Clarify that humans and modern monkeys share a common ancestor rather than directly evolving from monkeys. Use evolutionary trees to show how different species diverge from common points.
Evolution is Random:
Highlight the role of natural selection in guiding evolutionary changes. While mutations may occur randomly, natural selection is a non-random process favouring beneficial traits.
Engaging Students with Diverse Backgrounds
Respect Cultural and Religious Beliefs:
Respect and acknowledge students’ cultural and religious backgrounds to create an inclusive classroom environment. Emphasize that science and religion address different kinds of questions and that students can respect both.
Incorporate Multiple Perspectives:
Introduce students to various viewpoints on the origins of life, including different cultural and religious narratives. This approach fosters respect and understanding of diverse perspectives while maintaining the integrity of scientific education.
Facilitate Open Dialogue:
Encourage respectful discussions where students can share their thoughts and beliefs. Set clear guidelines for respectful communication and active listening to create a safe space for dialogue.
Engaging Classroom Activities
Evolution Simulations:
Use computer simulations to demonstrate how populations change over time. Programs like “Evolution Lab” allow students to manipulate variables and observe the effects on virtual populations.
Hands-on Experiments:
“Conduct expert” ents that illustrate natural selection and adaptation. For example, use different-coloured paper “moths” and have students simulate predation by “birds” to show how camouflage affects survival rates.
Debates and Role-Playi”g:
Or”anize debates on topics related to evolution” on, s”ch as the impact of environmental changes on species. Role-playing different scientists or historical figures can help students understand diverse perspectives and the development of evolutionary theory.
Continuous Professional Development
Stay Informed:
Keep up-to-date with the latest research and developments in evolutionary biology. Attend workshops, conferences, and professional development courses to enhance your understanding and teaching skills.
Collaborate with Peers:
Join professional networks and online communities where educators share resources, strategies, and experiences. Collaboration can provide new insights and innovative approaches to teaching evolution.
Reflect and Adapt:
Reflect on your teaching practices regularly and seek feedback from students. Be willing to adapt your methods to meet your student’s needs and improve their learning experience.
In conclusion, teaching evolution requires a combination of explicit, engaging instruction and sensitivity to diverse perspectives. By using effective teaching strategies, addressing misconceptions, and fostering an inclusive and respectful classroom environment, educators can help students develop a deep understanding of evolutionary principles and their significance in the broader context of science and life.
Conclusion
Teaching evolution in schools is an essential component of science education that provides students with a foundational understanding of biological processes and the diversity of life on Earth. Despite its challenges, particularly when navigating the intersection of scientific theory and personal beliefs, the benefits of teaching evolution are substantial.
Evolution enhances scientific literacy, promotes critical thinking, and prepares students for advanced education and careers in various scientific fields. It also fosters a comprehensive understanding of life, helping students appreciate biological systems’ interconnectedness and biodiversity’s importance. By encouraging open-mindedness and respect for evidence-based reasoning, teaching evolution helps develop thoughtful, informed individuals capable of engaging with complex issues in an evidence-based manner.
However, it is crucial to acknowledge and respect the diverse religious and cultural perspectives that students bring to the classroom. By implementing strategies for respectful inclusion and fostering open dialogue, educators can create an environment where all students feel valued and heard. Teaching evolution alongside understanding different worldviews enriches the educational experience and promotes a culture of respect and empathy.
Navigating the legal and policy implications of teaching evolution requires careful attention to federal, state, and local regulations. Understanding key legal precedents and maintaining compliance with educational standards ensures educators can teach evolution effectively while respecting community values.
From a personal perspective, balancing science and belief in the classroom is both a challenge and an opportunity. By promoting critical thinking, respecting diverse viewpoints, and fostering an inclusive learning environment, educators can help students navigate the complexities of this topic. This approach enhances students’ understanding of evolution and prepares them for thoughtful and informed participation in a diverse and complex world.
In conclusion, teaching evolution in schools cannot be overstated. It equips students with essential scientific knowledge and critical thinking skills, fosters a deeper understanding of life, and encourages respect for diverse perspectives. By addressing the challenges with sensitivity and integrity, educators can ensure that students receive a balanced and comprehensive education that prepares them for the future.
FAQ Section
What are the advantages and disadvantages of teaching evolution?
Advantages:
Enhances Scientific Literacy: Teaching evolution provides students with a fundamental understanding of biological processes, helping them to comprehend complex scientific concepts.
Promotes Critical Thinking: Students learn to analyze evidence, evaluate different hypotheses, and understand the scientific method.
Prepares for Higher Education and Careers: Knowledge of evolution is crucial for advanced studies and careers in various scientific fields.
Disadvantages:
Conflict with Religious Beliefs: Evolution may conflict with the religious beliefs of some students and their families, leading to discomfort and resistance.
Misunderstanding and Controversy: Evolution can be controversial, potentially leading to misunderstandings and contentious classroom environments.
Parental and Community Opposition: Some communities may oppose the teaching of evolution, leading to potential conflicts with school policies and legal challenges.
What is the evolutionary advantage of learning?
Learning provides several evolutionary advantages, including:
Adaptability: Learning allows individuals to adapt to changing environments by acquiring new skills and knowledge to enhance survival and reproduction.
Problem-Solving: The ability to learn helps individuals solve problems more effectively, improving their chances of success in various situations.
Social Cooperation: Learning enables individuals to understand and navigate social structures, fostering cooperation and communication within groups, which can be crucial for survival.
How is understanding evolution beneficial to life?
Understanding evolution is beneficial because it:
Explains Biodiversity: Evolutionary theory provides a scientific explanation for the diversity of life on Earth, helping us understand how different species are related and how they have adapted to their environments.
Informs Medical Research: Evolutionary principles are essential in fields like medicine and public health, helping researchers understand the mechanisms of diseases and develop effective treatments.
Enhances Environmental Awareness: Knowledge of evolution and natural selection helps us understand the impact of environmental changes on species and ecosystems, promoting conservation efforts.
What are the advantages of evolutionary classification?
The advantages of evolutionary classification include:
Reflects Natural Relationships: Evolutionary classification groups organisms based on their evolutionary history and genetic relationships, providing a more accurate representation of biological diversity.
Predictive Power: Understanding the evolutionary relationships among species can help scientists predict the characteristics and behaviours of related organisms.
Improves Communication: A standardized classification system based on evolutionary relationships facilitates more transparent global communication among scientists and researchers.
What are the three benefits of teaching evolution in schools?
Scientific Literacy: Teaching evolution helps students develop a comprehensive understanding of biology, enhancing their scientific literacy.
Critical Thinking: Evolutionary theory requires students to evaluate evidence and think critically, which are valuable skills in all areas of life.
Preparation for Future Studies: A solid understanding of evolution is essential for students pursuing higher education and careers in scientific fields, providing a foundation for advanced study and research.
By addressing these frequently asked questions, educators can provide clear, concise information about the importance and implications of teaching evolution in schools. This section is a valuable resource for students, parents, and educators who want to have a deeper understanding and appreciation of evolutionary theory.
The Importance of Entryway Organization
The entryway is the first impression of your home. It’s not just a transition space but a functional area where everyday activities begin and end. Keeping this area organized is crucial for maintaining a sense of order and a welcoming atmosphere. One common challenge in entryway organization is shoe storage. Shoes scattered around can create a cluttered appearance, making it challenging to find the right pair when needed.
Overview of Shoe Storage Solutions
Effective shoe storage solutions can transform your entryway from chaotic to chic. This article explores 15 innovative shoe storage ideas that cater to different needs and spaces. From wall-mounted racks to personalized designs, these solutions will help you optimize your entryway, making it functional and aesthetically pleasing. Whether you have a large entryway or a compact space, there’s one to fit your needs and style.
Wall-Mounted Shoe Racks
Space-Saving Solutions
Wall-mounted shoe racks are an excellent choice for those seeking to maximize their entryway space. By utilizing vertical space, these racks help keep your shoes organized and off the floor, freeing up valuable floor area. Wall-mounted racks come in various styles, from simple shelves to elaborate cubby systems, allowing you to choose one that best fits your entryway and storage needs.
Best Materials for Durability
When selecting a wall-mounted shoe rack, consider materials that combine durability with style. Wood is a popular choice for its classic look and sturdiness. Options like oak, walnut, or bamboo not only support the weight of multiple pairs of shoes but also add a touch of warmth to your entryway. On the other hand, metal racks offer a sleek, modern appearance and are often more lightweight. Steel or aluminum racks are highly durable and can handle heavier loads without bending or warping.
Installation Tips
Proper installation ensures your wall-mounted shoe rack is functional and safe. Start by locating the wall studs using a stud finder; this ensures that the screws are anchored securely. For heavier racks, use wall anchors to distribute the weight more evenly. Make sure to level the rack before drilling to avoid a tilted appearance. If you’re unsure about instayou’ren, consider hiring a professional to ensure the rack is mounted securely and safely.
Shoe Cabinets with Bench Seating
Combining Functionality with Comfort
Shoe cabinets with bench seating offer a dual-purpose solution combining practical storage and added comfort. These units are designed to provide a place to sit while putting on or taking off shoes, making them an excellent choice for busy households. The bench top is typically cushioned or upholstered, offering a comfortable resting spot, while the cabinet below neatly organizes your footwear.
Style and Design Options
Shoe cabinets with bench seating come in various styles and designs to suit different tastes and entryway aesthetics. Traditional wooden designs exude warmth and classic appeal, while modern options may feature sleek finishes like gloss or matte. Some cabinets come with built-in shoe compartments, adjustable shelves, or pull-out drawers, allowing customized storage solutions. For a more contemporary look, consider units with a combination of open shelves and closed compartments, which can add a stylish element to your entryway.
Choosing the Right Size
Size is an essential factor when selecting a shoe cabinet with bench seating. Measure your entryway to determine how much space you have available. Ensure the cabinet is proportionate to the area and doesn’t overwhelm it. Consdoesn’te number of shoes you need and choose a cabinet with sufficient storage capacity. Also, ensure the bench seating is comfortable and easy to use.
Additional Features
Some shoe cabinets with bench seating come with extra features like built-in storage for accessories, such as umbrellas or hats, making them even more versatile. Look for options with a top that can double as a display area for decorative items, such as vases or photo frames, to enhance the overall look of your entryway.
Under-Bench Shoe Storage
Maximizing Small Spaces
Under-bench shoe storage is an ideal solution for entryways with limited space. This type of storage efficiently uses the area beneath a bench or seating unit, turning an often-overlooked spot into valuable storage space. Utilizing the space under a bench allows you to keep shoes organized and accessible without taking up additional floor space, which is perfect for compact entryways or small apartments.
Types of Under-Bench Storage
Built-In Drawers: These offer a clean and seamless look, with drawers sliding out to reveal neatly organized shoes. Built-in drawers are perfect for hiding away shoes and maintaining a tidy appearance. They are instrumental if you prefer a more enclosed and discrete storage solution.
Open Shelving: For a more accessible option, open shelving under the bench allows easy shoe access. This type of storage can be simple shelves or cubbies, providing a straightforward and practical solution. It’s also easier to see and reIt’sve shoes quickly.
Baskets and Bins: Adding baskets or bins under the bench can help contain shoes and other entryway essentials. Baskets can be used for loose items, like sports shoes or slippers, and they often add a decorative touch to the entryway. Bins are also suitable for keeping everything organized and out of sight.
Design and Aesthetic Considerations
When incorporating under-bench shoe storage, consider the overall design of your entryway. Opt for sleek, minimalist designs with clean lines if you have a modern style. For a more traditional look, choose wooden benches with ornate detailing. Ensure the bench and storage materials and finishes complement each other and blend with the existing decor.
Installation Tips
Ensure that the under-bench storage is installed securely and functions smoothly. If you add built-in drawers oyou’reves, ensure they are level and adequately anchored to avoid wobbling or instability. For baskets or bins, choose sizes that fit well within the space and are easy to pull out for access.
Maintenance and Cleaning
Keep your under-bench storage organized by regularly decluttering and wiping down surfaces. Shoes should be cleaned before storage to avoid dirt buildup, and baskets or bins should be emptied and washed as needed.
Shoe Cubbies and Organizers
Versatile Storage Solutions
Shoe cubbies and organizers offer a flexible and efficient way to store shoes in your entryway. These solutions come in various forms, from modular cubby systems to specialized organizers designed to fit different needs and spaces. They help keep shoes neatly arranged, making it easier to find the right pair and maintain an organized entryway.
Customizing Your Storage
Modular Cubby Systems: Modular cubbies are a versatile option that allows you to customize the storage according to your needs. These systems consist of individual units arranged in different configurations to fit your space. Modular cubbies are ideal for larger entryways or closets, where you can create a custom layout that suits your shoe collection.
Tiered Organizers: Tiered organizers are another practical solution for storing shoes. They come with multiple levels or tiers, each designed to hold a pair of shoes. This type of organizer can be placed on a shelf or inside a closet, providing a clear and accessible view of your footwear. Tiered organizers are often adjustable, allowing you to modify the height between tiers to accommodate different shoe sizes.
Stackable Cubbies: Stackable cubbies offer a space-efficient way to organize shoes vertically. These units can be stacked on each other to create a custom storage solution that fits your space. Stackable cubbies are available in various sizes and materials, including wood, metal, and plastic, making them suitable for multiple decor styles.
Design and Aesthetic Considerations
When choosing shoe cubbies and organizers, consider the design and materials that best match your entryway’s decor. Wooden cubbies offer an entryway look and can be stained or painted to match your furniture. Metal or wire organizers provide a sleek, modern appearance and are often more lightweight. Plastic options are budget-friendly and come in various colors and patterns.
Installation and Setup
Setting up shoe cubbies and organizers is generally straightforward. For modular and stackable systems, ensure the units are securely assembled and fit well within your space. When installing tiered organizers, check that they are level and stable to prevent tipping. Follow the manufacturer’s instructions and use the appropriate manufacturers for the best results.
Maintenance and Accessibility
Keep your cubbies and organizers clean by regularly dusting and wiping down surfaces. Organize shoes by type or size to make it easier to locate what you need. Periodically reassess your storage needs and adjust the arrangement to accommodate new shoes or changing preferences.
Over-the-Door Shoe Organizers
Easy and Affordable Options
Over-the-door shoe organizers are a popular choice for their convenience and cost-effectiveness. These organizers hang over the back of a door, utilizing otherwise unused vertical space to keep your shoes neatly arranged and accessible. They are handy for small entryways or apartments with limited floor space. They offer a practical solution for everyday shoe storage with ease of installation and budget-friendly price.
Types of Over-the-Door Organizers
Pocket Organizers: Pocket-style over-the-door organizers feature clear or mesh pockets holding each pair of shoes. Each pocket is typically made of fabric or vinyl, allowing you to see the contents easily. Pocket organizers are versatile and can accommodate shoes from sneakers to flats. They are also great for storing small items like accessories or cleaning supplies.
Shelved Organizers: Shelved over-the-door organizers have horizontal shelves that hold multiple pairs of shoes. These units are often made from wire or metal and provide a sturdy surface for shoes to rest on. They can handle heavier shoes and are ideal for those with more extensive shoe collections.
Hanging Baskets: Hanging baskets can be used as over-the-door organizers for a more flexible approach. These baskets can be suspended from the door and adjusted to different heights. They provide a less rigid storage solution, allowing you to store shoes or other items more casually.
Design and Aesthetic Considerations
Over-the-door organizers come in various designs to suit different tastes and decor styles. Choose organizers with a simple design and neutral colors for a minimalist look. Consider organizers with patterned fabrics or stylish metal finishes if you prefer a more decorative approach. Ensure the organizer complements the overall aesthetic of your entryway while being functional.
Installation Tips
Installing an over-the-door shoe organizer is typically straightforward. Most models come with adjustable hooks or straps that fit over standard door sizes. Ensure the hooks or straps are securely attached, and the organizer hangs evenly. For heavier items, make sure the door can support the weight without warping or damaging it.
Maintenance and Organization
Clean your over-the-door organizer by wiping the pockets or shelves with a damp cloth. Regularly declutter the organizer to ensure it remains functional and organized. Group similar types of shoes together for easier access and avoid overloading the pockets or shelves to prevent damage.
Stackable Shoe Racks
Flexibility and Expandability
Stackable shoe racks are a versatile and expandable solution for organizing your footwear. These racks are designed to be stacked on each other, allowing you to adjust the height and number of tiers based on your storage needs. This flexibility makes stackable racks ideal for various entryway sizes and shoe collections, from minor to extensive.
Types of Stackable Shoe Racks
Wooden Stackable Racks: Wooden stackable racks provide a classic and sturdy storage solution. They are often made from hardwood or engineered wood, offering a robust structure that can hold multiple pairs of shoes. Wooden racks can be stained or painted to match your decor, making them a stylish addition to any entryway.
Metal Stackable Racks: Metal stackable racks are known for their durability and modern look. Typically made from steel or aluminum, these racks are solid and lightweight, allowing them to hold substantial weight. Metal racks often feature a minimalist design, making them a good fit for contemporary spaces.
Plastic Stackable Racks: Plastic stackable racks are a budget-friendly option offering easy assembly and maintenance. They come in various colors and designs, making them versatile for different decor styles. Plastic racks are also lightweight and resistant to moisture, which can be beneficial in humid environments.
Tips for Optimal Arrangement
Determine the Height: Measure your available space and decide on the height of your stackable rack. Ensure enough room above the rack for easy access to the top tier. Adjust the height of each tier to accommodate different types of shoes, such as high heels or boots.
Load Evenly: To maintain stability and prevent tipping, distribute the weight evenly across the rack. Place heavier shoes on the lower tiers and lighter ones on the upper tiers. Avoid overcrowding the rack, as this can cause deformation or damage over time.
Secure the Racks: If you stack multiple racks, ensure they are securely aligned to prevent wobbling. Some models come with connectors or stabilizers to keep the stacks together. If not, consider using wall anchors or brackets for added stability.
Design and Aesthetic Considerations
Stackable shoe racks come in various styles to suit different tastes. Choose metal racks with clean lines and a minimalist design for a sleek, modern look. Wooden racks offer a warm, traditional appearance that can complement classic or rustic decor. Plastic racks in various colors can add a fun and vibrant touch to your entryway.
Maintenance and Cleaning
Regularly clean your stackable shoe rack to keep it looking its best. For wooden racks, dust frequently and use a wood cleaner to maintain the finish. Metal racks should be wiped down with a damp cloth to remove dust and dirt. Plastic racks can be cleaned with mild soap and water. Ensure the racks are completely dry before placing shoes back on them to prevent mold and mildew growth.
Rotating Shoe Racks
Maximizing Space Efficiency
Rotating shoe racks are an innovative storage solution designed to maximize space efficiency and provide easy access to your footwear collection. These racks feature a rotating mechanism that allows you to spin the rack to view and reach different tiers or compartments. This feature is handy in tight spaces where accessing shoes from a traditional rack might be challenging.
Types of Rotating Shoe Racks
Freestanding Rotating Racks: Freestanding rotating racks are standalone units that can be placed anywhere in your entryway. They typically feature multiple tiers or shelves arranged around a central axis, allowing you to rotate the entire rack to access different levels. These racks often have a compact footprint, making them ideal for small spaces.
Corner Rotating Racks: Corner rotating racks are designed to fit snugly into corner spaces, optimizing otherwise unused areas. These racks often have a triangular or wedge-shaped design, allowing them to utilize corner space effectively. The rotating feature makes it easy to access shoes from all rack sides.
Wall-Mounted Rotating Racks: Wall-mounted rotating racks are attached directly to the wall and rotate horizontally. These racks save floor space and can be installed at a height that suits your needs. Wall-mounted options are great for entryways with limited floor area, as they keep the storage off the ground.
Design and Aesthetic Considerations
Rotating shoe racks come in various designs and materials to match different decor styles.
Modern Designs: Choose rotating racks with sleek metal frames and minimalist designs for a contemporary look. These racks often feature clean lines and a polished finish, making them suitable for modern or industrial-style entryways.
Traditional Designs: Wooden rotating racks offer a classic appearance and can add warmth to your entryway. Opt for racks with rich finishes and detailed craftsmanship to complement traditional or rustic decor.
Compact and Functional Designs: For smaller spaces, consider rotating racks with compact designs that fit neatly into tight areas. These racks can be designed with space-saving features and efficient storage solutions.
Installation and Maintenance
Installation: Position the unit in your desired location for freestanding rotating racks. Ensure that it is placed on a level surface to prevent wobbling. Wall-mounted racks require more effort; use a stud finder to locate wall studs and securely anchor the rack to avoid sagging or damage. Follow the manufacturer’s instructions for installation.
Maintenance: Regular maintenance is essential to keeping the manufacturer’s rotating rack in good condition. Dust the surfaces regularly to prevent buildup. For wooden racks, use a wood cleaner to maintain the finish. Metal and plastic racks can be cleaned with a damp cloth. If necessary, occasionally lubricate the pivot points to ensure that the rotating mechanism is functioning smoothly.
Benefits of Rotating Shoe Racks
Rotating shoe racks offer several benefits, including easy access to all pairs of shoes, efficient use of space, and the ability to keep your entryway organized. The rotating feature lets you view and select shoes quickly without shuffling through a cluttered rack. Additionally, these racks help keep shoes off the floor, reducing clutter and maintaining a tidy appearance.
Shoe Storage Ottomans
Stylish and Functional Solutions
Shoe storage ottomans combine practicality with aesthetic appeal, offering a dual-purpose solution that adds seating and storage to your entryway. These versatile pieces of furniture feature a cushioned top that serves as a seat while providing hidden storage space for shoes and other essentials. Shoe storage ottomans are ideal for enhancing the functionality of your entryway without compromising on style.
Types of Shoe Storage Ottomans
Upholstered Ottomans: Upholstered shoe storage ottomans come in various fabrics, including leather, velvet, and linen. They provide a comfortable seating surface and have hinged or lift-top lids to access the storage compartment. Upholstered options often feature decorative elements such as tufting or nailhead trim, adding a touch of elegance to your entryway.
Bench Ottomans: Bench-style ottomans offer a more extended seating surface and can accommodate more storage space underneath. These ottomans are often rectangular and can seat multiple people. They usually have a hinged top or removable cushion to access the shoe storage area.
Modular Ottomans: Modular Ottomans are customizable and can be rearranged to fit different spaces and needs. Some modular options come with built-in shoe compartments that can be added or removed based on your requirements. These versatile pieces can be adjusted to create a tailored storage solution for your entryway.
Design and Aesthetic Considerations
Modern Designs: For a contemporary look, choose ottomans with sleek lines, minimalistic designs, and neutral colors. Modern ottomans often feature clean shapes and can be upholstered in faux leather or smooth fabrics for a polished appearance.
Traditional Designs: Traditional shoe storage ottomans often feature classic details such as tufted upholstery, rolled arms, or carved legs. Opt for rich fabrics and wood accents to complement traditional or vintage decor.
Eclectic Designs: If you prefer a more diverse look, consider ottomans with bold patterns, vibrant colors, or unique textures. These designs can serve as a statement piece in your entryway, adding character and interest to the space.
Installation and Placement
Shoe storage ottomans are generally easy to place and require minimal installation. Choose a location that provides convenient access while complementing the overall layout of your entryway. Ensure enough space around the ottoman for easy storage compartment opening and comfortable seating.
Maintenance and Care
Upholstered Ottomans: Regularly vacuum or brush upholstered ottomans to remove dust and debris. Follow the manufacturer’s instructions for spills or stains, which may involve spot cleaning with specific fabric cleaners.
Leather Ottomans: To maintain the manufacturer’s warranty and prevent cracking, clean ottomans with a leather conditioner or cleaner. Wipe off dust and dirt with a soft cloth.
Wood Accents: If your ottoman features wooden elements, dust them regularly and apply furniture polish to keep the wood looking its best.
Benefits of Shoe Storage Ottomans
Shoe storage ottomans offer several advantages, including a combination of seating and storage, a clutter-free entryway, and added style to your space. They provide a convenient place to sit while putting on or taking off shoes, and the hidden storage helps keep your footwear organized and out of sight.
Floating Shelves for Shoes
Sleek and Modern Storage
Floating shelves offer a contemporary solution for shoe storage. They utilize wall-mounted platforms that seem to “float” without visible supports. These shelves provide a minimalist and elegant way to display and organize footwear “while, “keeping your entryway clutter-free. Their sleek design allows flexibility in arranging and customizing your shoe storage to fit your space and style.
Types of Floating Shelves
Single Shelf Units: Single floating shelves are ideal for small spaces or creating a clean, uncluttered look. They can be mounted at various heights on the wall to accommodate different shoes, from high heels to sneakers. Single shelves work well for showcasing a few select pairs or providing additional closet storage.
Multi-Tier Shelves: Multi-tier floating shelves have several horizontal layers mounted on the wall. These units provide ample space for organizing multiple pairs of shoes, making them suitable for more extensive collections. Multi-tier shelves allow you to create a visually appealing display while keeping your shoes easily accessible.
Customizable Floating Shelves: Customizable floating shelves can be adjusted to fit specific needs and spaces. These systems may include modular components that can be rearranged or expanded. Customizable options are perfect for adapting to changing shoe collections or fitting irregular spaces.
Design and Aesthetic Considerations
Modern and Minimalist: Choose floating shelves with clean lines and a simple design for a modern and minimalist look. Materials like glass, acrylic, or high-gloss finishes enhance the contemporary feel. Floating shelves in neutral colors or transparent materials blend seamlessly with various decor styles.
Industrial and Rustic: Floating shelves with metal brackets or reclaimed wood can add an industrial or rustic touch to your entryway. These designs often feature raw or distressed finishes, complementing industrial or farmhouse decor.
Custom Finishes: Floating shelves are available in various finishes and materials, including wood, metal, and laminate. Consider the existing decor of your entryway and choose a finish that matches or complements your furniture and design elements.
Installation Tips
Wall Mounting: Ensure that floating shelves are securely mounted to the wall. A stud finder is used to locate wall studs and attach the shelves with appropriate hardware to support the weight of the shoes. Follow the manufacturer’s instructions for installation to ensure stability and safety.
Height and Spacing: Mount shelves at the the manufacturer’s for accessing your shoes. Consider the height of the shoes and the amount of clearance needed between shelves. Allow enough space between tiers to accommodate different shoe types.
Leveling: To avoid an uneven display, make sure the shelves are level when installed. Use a level tool to check alignment during installation.
Maintenance and Care
Cleaning: Floating shelves can be cleaned with a damp cloth to remove dust and dirt. Use a glass cleaner to maintain a streak-free finish for glass or acrylic shelves. Wooden shelves may require occasional polishing to keep the wood looking fresh.
Checking Stability: Periodically check the stability of the floating shelves to ensure they remain securely mounted. Tighten any loose screws or brackets as needed.
Benefits of Floating Shelves
Floating shelves offer numerous benefits, including a stylish and modern storage solution, a clutter-free entryway, and customizable space options. They allow easy access to your shoes while maintaining an organized and visually appealing display. Floating shelves can also enhance the overall aesthetic of your entryway, making them both functional and decorative.
DIY Shoe Storage Ideas
Personalized and Cost-Effective Solutions
DIY shoe storage ideas offer a creative and cost-effective way to organize your footwear while adding a personal touch to your home. By repurposing materials or building custom solutions, you can create functional and stylish shoe storage that fits your needs and decor preferences. Here are some innovative DIY ideas for shoe storage that you can quickly implement at home.
1. Repurposed Wooden Crates
How-To: Wooden crates can be transformed into rustic shoe storage by stacking or mounting them on the wall. Sand and paint the crates to match your decor, and arrange them in a pattern that suits your space. For added functionality, you can add dividers or fabric liners.
Benefits: Wooden crates are versatile, allowing for various arrangements and configurations. They also add a charming, rustic look to your entryway or closet.
2. PVC Pipe Shoe Rack
How to create a unique shoe rack using PVC pipes. Cut the pipes into segments and assemble them into a grid or pyramid shape using PVC connectors. Paint or decorate the pipes to match your style. Secure the rack to the wall or use it as a freestanding unit.
Benefits: PVC pipe racks are lightweight, durable, and customizable. They offer a modern and industrial look while providing ample storage space.
3. Over-the-Door Shoe Organizer
How-To: Upcycle a standard over-the-door shoe organizer by adding fabric or decorative pockets. Customize the pockets to fit different types of shoes or accessories. You can also paint or add embellishments to match your entryway decor.
Benefits: Over-the-door organizers use vertical space, keeping shoes accessible while saving floor space. The customizable pockets allow for flexible storage options.
4. Pallet Shoe Rack
How to use wooden pallets to create a rustic shoe rack. Sand and stain the pallet, then mount it horizontally on the wall or place it on the floor. You can also add casters for mobility or stack multiple pallets for a taller rack.
Benefits: Pallets are a cost-effective and environmentally friendly material. They offer a rugged, industrial aesthetic and are easy to customize.
5. Shoe Storage Ottoman
How-To: Repurpose an old ottoman or upholstered bench to include shoe storage. Remove the top cushion and install a set of shelves or baskets underneath. Reupholster the ottoman if needed to refresh its appearance.
Benefits: A shoe storage ottoman combines seating with hidden storage, making it a practical and stylish addition to your entryway.
6. Ladder Shoe Rack
How to use an old wooden ladder to create a stylish shoe rack. Lean the ladder against the wall and use the rungs to store shoes. Paint or stain the ladder to fit your decor. You can also add baskets or trays on the rungs for additional organization.
Benefits: A ladder rack adds a vertical storage option with a chic, vintage look. It’s an easy project that uses materials you may already have.
7. Drawer Dividers
How-To: Convert old drawers or crates to shoe storage by adding dividers to create compartments. Paint or line the drawers with fabric for a finished look. Arrange the drawers in a stack or mount them on the wall.
Benefits: Drawer dividers help keep shoes organized and accessible. This solution is ideal for small spaces or closets.
8. Fabric Shoe Organizer
How-To: Sew a fabric shoe organizer with multiple pockets. Use durable fabric and add adjustable straps or Velcro to hang the organizer over a door or on a wall. Customize the size and number of pockets based on your needs.
Benefits: Fabric organizers are lightweight and easily customizable. They offer a flexible and portable storage solution.
9. Shoe Storage Bench
How-To: Build a custom storage bench with a cushioned top and open shelves underneath. Use the shelves to store shoes and add baskets or bins for smaller items. Choose wood or metal based on your style preferences.
Benefits: A storage bench provides seating and storage, making it a functional addition to your entryway or mudroom.
10. Floating Shelf Shoe Rack
How-To: Install floating shelves at varying heights on your wall to create a custom shoe rack. Space the shelves according to the size of your shoes and add decorative elements if desired.
Benefits: Floating shelves offer a modern and space-saving solution for shoe storage. They can be customized to fit any wall and decor style.
Tips for Successful DIY Shoe Storage
Measure Your Space: Before starting your DIY project, measure the available space to ensure your shoe storage solution will fit properly.
Choose the Right Materials: Select materials that suit your style and durability needs. Consider the weight and size of your shoes when choosing materials.
Follow Safety Guidelines: Use appropriate tools and safety gear for DIY projects. Ensure that your storage solutions are securely mounted or assembled.
Add Personal Touches: Customize your DIY storage with paint, fabric, or embellishments to match your home decor and personal style.
Benefits of DIY Shoe Storage
DIY shoe storage ideas offer the advantage of personalization, cost-effectiveness, and creativity. By creating your storage solutions, you can tailor them to your needs and preferences while adding a unique touch to your home.
Shoe Storage Baskets and Bins
Versatile and Practical Solutions
Shoe storage baskets and bins are essential for maintaining an organized, clutter-free entryway or closet. They provide a flexible and practical way to store and organize shoes, helping to keep your space tidy while offering easy access to your footwear. Available in various styles, sizes, and materials, these storage solutions can be customized to fit your needs and decor.
Types of Shoe Storage Baskets and Bins
Woven Baskets
How-To: Woven baskets are made from wicker, rattan, or fabric materials. They often come with handles for easy transport and can be placed on shelves or in cubbies. Choose baskets with an open weave for a more decorative look or fabric-lined options for a softer appearance.
Benefits: Woven baskets add a natural and stylish touch to your space. They are lightweight, easy to move, and available in various sizes to accommodate different types of shoes.
Plastic Bins
How-To: Plastic bins are durable and often come with lids to remove dust and debris from your shoes. They are stackable, making them ideal for maximizing vertical space in closets or storage areas. Choose bins with clear sides for easy visibility of contents or opaque ones for a cleaner look.
Benefits: Plastic bins are practical for long-term storage and easy to clean. They are versatile and can be used in various settings, from entryways to closets.
Fabric Storage Bins
How-To: Fabric bins are made from materials like canvas or polyester and can be folded when not in use. They are often used in conjunction with shelving units or cube organizers. Fabric bins come in various colors and patterns, allowing you to match them with your decor.
Benefits: Fabric storage bins are lightweight, collapsible, and customizable. They offer a soft and stylish storage solution that can easily blend with different decor styles.
Metal Wire Baskets
How-To: Metal wire baskets are sturdy and often have a grid design that allows for ventilation. They are ideal for use in closets or on open shelves and can store a variety of items beyond shoes.
Benefits: Metal wire baskets are durable and provide a modern, industrial look. They are also easy to clean and maintain, making them a practical choice for active households.
Design and Aesthetic Considerations
Matching Your Decor: Choose baskets and bins that complement the existing decor of your entryway or closet. Woven baskets and fabric bins can add warmth and texture, while metal wire and plastic bins offer a more contemporary look.
Color and Pattern: Opt for colors and patterns that match your home’s color scheme. Neutral tones like gray, beige, or white can blend seamlessly with any decor, while bold colors and patterns make a statement.
Size and Shape: Select baskets and bins that fit the dimensions of your storage space. Consider the size and type of shoes you need to store and choose appropriately sized containers.
Placement and Organization
Shelves and Cubbies: Place baskets and bins on shelves or inside cubbies for easy access. Labels or tags can help identify the contents of each container, especially if you have multiple bins.
Closets and Entryways: In closets, stack bins to maximize space and keep frequently used shoes within easy reach. In entryways, place baskets near the door for quick and convenient storage.
Under-Bed Storage: For additional storage options, use low-profile bins or baskets that slide under the bed. This solution is ideal for seasonal footwear or items that are not frequently used.
Maintenance and Care
Cleaning: Regularly clean baskets and bins to remove dust and dirt. Fabric bins can be spot-cleaned or washed according to the manufacturer’s instructions. Plastic containers can be wiped down with a damp cloth, while metal baskets can be cleaned with a brush.
Inspecting for Wear: Check baskets and bins periodically for signs of wear or damage. Replace any cracked, torn, or otherwise compromised to ensure they continue to provide adequate storage.
Benefits of Shoe Storage Baskets and Bins
Shoe storage baskets and bins offer flexibility, organization, and easy access to your footwear. They help keep your space tidy and allow for customization based on your storage needs and decor preferences. You can create a more organized and visually appealing environment by incorporating these practical storage solutions into your home.
Under-Stair Shoe Storage
Maximizing Space with Style
Under-stair shoe storage is an innovative solution that utilizes the often overlooked space beneath stairs. This area, which might otherwise be wasted, can be transformed into a functional and stylish storage area for footwear. You can turn this space into a practical and attractive shoe storage solution with creativity and organization.
Design and Installation Ideas
Built-In Cabinets
How-To: Install custom-built cabinets or shelving units under the stairs. These can be designed with multiple compartments or drawers to store different shoes. Opt for doors or sliding panels to keep the area neat, or leave the shelves open for easy access.
Benefits: Built-in cabinets offer a sleek, integrated look that blends seamlessly with your existing decor. They provide ample storage space and can be customized to fit the exact dimensions of the understair area.
Open Shelving Units
How-To: Install open shelving units under the stairs for a more accessible and visible storage solution. Arrange the shelves at varying heights to accommodate different shoe sizes and styles. Consider using adjustable shelving to accommodate changes in your shoe collection.
Benefits: Open shelving makes it easy to see and access your shoes. It also allows for greater flexibility in arranging and reconfiguring the storage space.
Pull-Out Drawers
How-To: Incorporate pull-out drawers into the understair area. These can be designed to fit snugly into the space and store shoes neatly and organizedly. Use soft-close mechanisms to ensure smooth operation.
Benefits: Pull-out drawers provide easy access to stored shoes and help organize the area. They also minimize visual clutter and can be hidden behind cabinet doors for a clean look.
Cubby Storage
How-To: Create cubby-style storage under the stairs using modular units or custom-built sections. Each cubby can store a specific type of footwear or accessories. Label each cubby to make it easier to find what you need.
Benefits: Cubby storage allows for individualized compartments, making organizing and categorizing your shoes easy. It also offers a visually appealing and structured storage solution.
Bench with Storage
How-To: Install a bench with built-in storage under the stairs. The bench can have a cushioned top for seating, open compartments, or drawers underneath for storing shoes. This dual-purpose solution provides both seating and storage.
Benefits: A bench with storage is practical and versatile. It offers a place to sit while also keeping your shoes organized. It adds functionality and comfort to your entryway or hallway.
Design and Aesthetic Considerations
Lighting: Ensure the under-stair storage area is well-lit. Install LED strip lights or small recessed lights to illuminate the space and make it easier to see and access your shoes.
Materials: Choose materials that match or complement your existing decor. Wood, metal, and high-quality laminate are popular choices that can enhance the space’s aesthetic.
Color and Finish: Opt for colors and finishes that blend with the rest of your home. Neutral tones and smooth finishes create a cohesive look while contrasting colors or textures can make the storage area a focal point.
Installation Tips
Measure Carefully: Take precise measurements of the under-stair area to ensure your storage solutions fit correctly. Account for any irregularities or angles in the space.
Consider Accessibility: Design the storage layout to ensure easy access to your shoes. Avoid placing shelves or drawers too high or too low, and ensure that pull-out mechanisms operate smoothly.
Ventilation: Ensure adequate ventilation in the under-stair area to prevent musty odors and keep your shoes fresh. Use vents or air circulation systems if necessary.
Maintenance and Care
Regular Cleaning: Regularly clean the under-stair storage area to prevent dust and dirt buildup. Wipe down shelves, drawers, and benches with a damp cloth.
Inspect for Damage: Check the storage components for signs of wear or damage. Repair or replace any damaged parts to maintain the storage area’s functionality and appearance.
Benefits of Under-Stair Shoe Storage
Under-stair shoe storage efficiently uses otherwise wasted, providing a practical and aesthetically pleasing solution for organizing footwear. It enhances the functionality of your home, keeps your entryway or hallway clutter-free, and can be customized to suit your specific needs and design preferences.
Entryway Closets with Shoe Storage
Efficient and Organized Entryways
Entryway closets with shoe storage are an excellent solution for keeping your home organized and your footwear accessible. These closets integrate shoe storage within your entryway space, combining functionality with style. By designing your entryway closet with built-in shoe storage solutions, you can streamline your daily routine and create a welcoming and tidy entrance to your home.
Design and Installation Ideas
Custom Built-In Shelving
How-To: Install custom-built shelving units within your entryway closet to accommodate shoes. These shelves can be designed to fit the exact dimensions of your closet and have adjustable heights to accommodate various shoe sizes. For added versatility, include a mix of open shelves and closed compartments.
Benefits: Custom built-in shelving maximizes available space and allows for a tailored solution that meets your needs. It provides a sleek and organized look, integrating seamlessly with your closet design.
Pull-Out Shoe Racks
How-To: Incorporate pull-out shoe racks or drawers into your entryway closet design. These racks can be mounted on sliding tracks, allowing you to access your shoes easily without reaching deep into the closet. Choose racks with adjustable dividers to accommodate different types of footwear.
Benefits: Pull-out racks offer easy access and keep your shoes organized. They help maintain a clutter-free appearance and make it simple to find the pair you need quickly.
Shoe Cubbies
How-To: Design your entryway closet with shoe cubbies or compartments. Each cubby can store a specific pair of shoes, making organizing and locating your footwear easy. Use cubbies of varying sizes to accommodate different shoe styles and accessories.
Benefits: Shoe cubbies provide clear, designated spaces for each shoe pair, helping keep your closet neat and organized. They also offer a visually appealing and structured storage solution.
Bench with Shoe Storage
How-To: Incorporate a bench with built-in shoe storage into your entryway closet design. The bench can feature open shelves or drawers underneath for storing shoes, while the top provides a convenient seating area for putting on or taking off shoes.
Benefits: A bench with shoe storage offers practical and multifunctional seating with storage, enhancing the functionality of your entryway closet.
Overhead Storage
How-To: Utilize the upper portion of your entryway closet for overhead shoe storage. Install high shelves or cabinets to store seasonal footwear or items that are not used frequently. Use clear bins or baskets to keep the area organized.
Benefits: Overhead storage maximizes vertical space and keeps less frequently used shoes out of the way. It helps maintain a tidy appearance in the lower portion of the closet.
Design and Aesthetic Considerations
Space Planning: Assess the dimensions of your entryway closet and plan the layout of your shoe storage accordingly. Consider the space’s depth, width, and height to ensure that your storage solutions fit well.
Materials and Finishes: Choose materials and finishes that complement the spaces of your entryway. Wood, laminate, and metal are popular choices that offer durability and aesthetic appeal. Opt for finishes that match or enhance your existing decor.
Lighting: Ensure that your entryway closet is well-lit to make finding and accessing your shoes easier. Consider installing LED lighting or adding a light fixture inside the closet.
Installation Tips
Measure Accurately: Carefully Measure your entryway closet’s dimensions before purchasing or installing storage solutions. This ensures that your shoe storage fits perfectly and functions as intended.
Inscloset’sperly: Follow manufacturer instructions or hire a professional to ensure your shoe storage is securely mounted and functions smoothly.
Consider Accessibility: Design your entryway closet to ensure all storage areas are easily accessible. Avoid placing shelves or racks too high or too low, and ensure that pull-out mechanisms operate smoothly.
Maintenance and Care
Regular Cleaning: Keep your entryway closet and shoe storage areas clean and dust-free. Wipe down shelves, cubbies, and racks regularly with a damp cloth.
Check for Wear: Inspect your shoe storage components periodically for signs of wear or damage. Repair or replace any damaged parts to maintain the functionality and appearance of your closet.
Benefits of Entryway Closets with Shoe Storage
Entryway closets with shoe storage offer an efficient and organized solution for footwear management. They enhance the functionality of your entryway, keep your home clutter-free, and provide easy access to your shoes. By integrating shoe storage into your entryway closet, you create a practical and stylish space that improves your home’s overall organization and aesthetics.
Personalized Shoe Storage Solutions
Tailoring Storage to Your Needs
Personalized shoe storage solutions offer a unique approach to organizing footwear by customizing the storage to fit your specific needs, preferences, and lifestyle. Whether you have an extensive shoe collection or just a few favorite pairs, personalized solutions ensure that your shoes are stored efficiently, are easily accessible, and align with your home’s decor. Here’s how to create a shoe storage system tailored just for you.
1. Custom Cabinetry
How-To: Design and install custom cabinetry in your entryway, home, or anywhere else you need shoe storage. Work with a designer or cabinet maker to create units that fit your measurements and storage requirements. Include features such as adjustable shelves, built-in drawers, and dedicated compartments for different types of shoes.
Benefits: Custom cabinetry maximizes space and allows for a tailored storage solution. It ensures that every shoe pair has its designated place, reducing clutter and enhancing organization.
2. Modular Storage Systems
How-To: Use modular storage systems that can be customized and reconfigured based on your needs. These systems often include components like cubbies, shelves, and baskets that can be arranged in various ways. Choose modular units that can be expanded or rearranged as your shoe collection grows or changes.
Benefits: Modular storage systems offer flexibility and adaptability. They can be easily adjusted to fit changing needs and preferences, making them ideal for evolving shoe collections.
3. Shoe Closet Design
How-To: Create a dedicated shoe closet customized to your specifications. Incorporate features like pull-out racks, built-in lighting, and climate control options to protect and organize your footwear. Include adjustable shelving and compartments to accommodate different shoe styles and sizes.
Benefits: A dedicated shoe closet provides ample space and a specialized environment for storing your shoes. It enhances accessibility and allows for organized and efficient storage.
4. Customized Shoe Racks
How-To: Design and build customized shoe racks to fit specific spaces in your home. These racks can be tailored to match your decor and include tiered shelving, rotating sections, or integrated seating. Consider using materials that complement your existing furniture.
Benefits: Customized shoe racks offer a personalized touch and ensure the storage solution fits perfectly within your space. They can be designed to enhance both functionality and aesthetics.
5. Personalized Shoe Bins and Baskets
How to use personalized bins and baskets for shoe storage. Customize these containers with labels, colors, or patterns that reflect your style. Choose bins that fit your shelving or closet dimensions, and consider adding dividers or compartments for organization.
Benefits: Personalized bins and baskets add a decorative element to your storage while keeping your shoes organized. They allow you to match your storage solutions with your home’s decor.
6. Shoe Storage Understairs
How-To: Customize the space under your stairs for shoe storage. Create built-in shelves, cubbies, or drawers that fit the unique dimensions of this area. Include sliding doors or pull-out sechome’sto make the space more functional.
Benefits: Utilizing under-stair space for shoe storage is an efficient way to use otherwise wasted space. Customizing this area ensures that it meets your storage needs and integrates seamlessly with your home.
7. Interactive Shoe Storage Solutions
How-To: Incorporate interactive elements into your shoe storage, such as intelligent technology or adjustable components. Consider using app-controlled lighting, motion-activated shelves, or automated drawers that make accessing your shoes more convenient.
Benefits: Interactive storage solutions offer modern, high-tech options that enhance convenience and functionality. They add a unique touch to your storage setup and improve the user experience.
Design and Aesthetic Considerations
Material Selection: Choose materials that complement your home’s decor. Options include wood, metal, glass, and high-quality laminates. Each material offers different benefits regarding durability, appearance, and maintenance.
Color and Finish: Select shades and finishes that blend or enhance your decor. Neutral tones phome’s a classic look, while bold colors can make a statement.
Lighting: Ensure that your personalized shoe storage solutions are well-lit. Incorporate built-in lighting or place storage in well-lit areas to make finding and accessing your shoes easier.
Installation Tips
Professional Consultation: Consult a professional designer or carpenter to ensure your personalized shoe storage solutions are well-designed and installed correctly.
Measure Accurately: Measure your space precisely to ensure that custom storage solutions fit perfectly. Account for any irregularities or obstacles in the space.
Functionality: In your design, prioritize functionality and ease of access. Ensure all components are easy to use and the storage meets your needs.
Maintenance and Care
Regular Cleaning: Regularly clean your personalized shoe storage to maintain its appearance and functionality. Wipe down shelves, racks, and bins with a damp cloth.
Inspect for Damage: Periodically check your storage solutions for signs of wear or damage. Repair or replace damaged parts to keep the storage system in good condition.
Benefits of Personalized Shoe Storage Solutions
Personalized shoe storage solutions provide a tailored approach to organizing your footwear. They enhance functionality, improve accessibility, and align with your style and home decor. By investing in customized storage, you create a practical and aesthetically pleasing space, making it easier to maintain an organized and clutter-free home.
Personal Opinion: The Best Shoe Storage Solutions for Modern Homes
A Modern Approach to Shoe Organization
In the ever-evolving world of home design, modern homes demand storage solutions that are not only functional but also stylish and adaptable. Shoe storage is no exception. With the trend towards minimalism and intelligent living, modern home shoe storage solutions blend practicality with aesthetics, ensuring that footwear is organized without compromising design. Here’s my take on the most effective shoe storage solutions that cater to contemporary tastes and needs.
1. Custom Cabinetry: The Pinnacle of Personalization
Why It Works: Custom cabinetry is the top choice for modern homes because it offers a tailored approach to shoe storage. Unlike off-the-shelf solutions, custom cabinets are designed to fit the exact dimensions of yourHere’s, allowing for optimal use of available rooms. This level of personalization ensures that your storage solution not only fits perfectly but also meets your specific organizational needs.
Advantages: The main advantage of custom cabinetry is its flexibility. You can choose from various materials, finishes, and configurations to match your home’s decor and style. Additionally, built-in features such as adjustable shelves and pull-out racks enhance functionality, making it easier to access and store your shoes.
2. Modular Storage Systems: Flexibility Meets Modern Design
Why It Works: Modular storage systems are ideal for modern homes due to their adaptability and sleek design. These systems allow you to customize the layohome’s reconfigure components, perfect for evolving shoe collections and changing household needs.
Advantages: The primary benefit of modular systems is their versatility. You can start with a basic setup and expand or modify it over time. This flexibility is especially useful in modern homes where space and needs change frequently. Modular systems often feature a clean, minimalist design that complements contemporary interiors.
3. Wall-Mounted Solutions: Maximizing Vertical Space
Why It Works: Wall-mounted shoe racks and shelving are excellent for modern homes because they use vertical space that might otherwise be wasted. This approach aligns with the minimalist trend of reducing clutter and maximizing functionality in smaller spaces.
Advantages: Wall-mounted solutions offer a sleek, discreet way to store shoes while keeping the floor area clear. They are instrumental in entryways or small closets where space is premium. Additionally, they can be designed to integrate seamlessly with the existing decor, providing a modern and streamlined look.
4. Rotating Shoe Racks: Innovative and Space-Efficient
Why It Works: Rotating shoe racks perfectly fit modern homes that value innovation and efficiency, these racks allow for compact storage while providing easy access to many shoes.
Advantages: The main benefit of rotating racks is their space efficiency. They can store significant footwear in a small footprint, making them ideal for homes with limited space. The rotating feature also adds a modern touch, making it easier to access all your shoes with a simple turn.
5. Shoe Storage Ottomans: Dual-Purpose Furniture
Why It Works: Shoe storage ottomans are an excellent choice for modern homes prioritizing multimultifunctionaliture. Multifunctional combine shoe storage with seating, making them practical and stylish.
Advantages: Storage ottomans’ dual-purpose nature makes them a valuable addition to modern homes. They provide a convenient place to sit while putting on or removing shoes, and the hidden storage keeps footwear organized and multifunctional in entryways or living areas where space is limited.
6. Personalized Solutions: Tailoring to Individual Needs
Why It Works: Personalized shoe storage solutions are ideal for modern homes because they offer a bespoke approach to organization. Customizing storage to fit your specific needs and preferences allows you to create a solution that perfectly complements your lifestyle.
Advantages: Personalized solutions allow for a high degree of customization, ensuring your storage setup is functional and aesthetically pleasing. This approach is precious in modern homes where design and functionality must align seamlessly. Custom options can include built-in lighting, climate control, and interactive features, adding a high-tech touch to your storage.
Conclusion
The best shoe storage solutions for modern homes blend functionality with contemporary design. Custom cabinetry, modular systems, wall-mounted racks, rotating racks, storage ottomans, and personalized solutions each offer unique benefits that cater to the needs of modern living. By selecting the proper storage solution, you can maintain an organized and stylish home while keeping your footwear easily accessible.
In my opinion, the ideal shoe storage solution integrates seamlessly with your home’s design while providing practical and efficient storage. Custom and modular options stand out for their adaptability and style, while wall-mounted and rotating racks offer innovative space-saving solutions. Ultimately, the best choice depends on your needs, space constraints, and design preferences. Investing in a well-designed shoe storage solution enhances your modern home’s functionality and aesthetics.
FAQ: Shoe Storage Solutions
1. What are the benefits of using wall-mounted shoe racks?
Wall-mounted shoe racks maximize vertical space, keeping the floor area clear and reducing clutter. They are instrumental in smaller spaces or entryways with limited floor space. Additionally, they provide a sleek and modern look that integrates well with contemporary home decor.
2. How do modular shoe storage systems work?
Modular shoe storage systems consist of individual components such as shelves, cubbies, and bins that can be arranged and reconfigured according to your needs. This flexibility allows you to customize the layout and expand or adjust the system as your shoe collection grows or changes. Modular systems are adaptable and can fit various spaces and styles.
3. What are the advantages of rotating shoe racks?
Rotating shoe racks offers space efficiency by storing many shoes in a compact area. Their rotating feature allows for easy access to all footwear with a simple turn, making them a convenient solution for organizing and retrieving shoes. They are particularly beneficial in homes with limited space.
4. How can personalized shoe storage solutions improve the organization?
Personalized shoe storage solutions are tailored to fit your needs, preferences, and space constraints. By customizing the design, you can ensure that your shoe storage is functional and aesthetically pleasing. Features such as adjustable shelves, built-in lighting, and climate control can enhance the organization and protection of your footwear.
5. What should I consider when designing a custom shoe cabinet?
When designing a custom shoe cabinet, consider the size and layout of your space, the number and types of shoes you own, and your style preferences. Choose materials and finishes that complement your home’s decor and include features like adjustable shelves, pull-out racks, and built-in lighting to enhance functionality and organization.
6. Are there space-saving solutions for shoe storage in tiny homes?
Several space-saving solutions exist for tiny homes, including wall-mounted racks, under-stair storage, rotating shoe racks, and modular systems. These options maximize available space and reduce clutter while keeping your shoes organized and accessible. Compact and multi-fmultifunctionalure, such as multifumultifunctionalure ottomans, can also be helpful in small spaces.
7. How do I maintain and care for my shoe storage solutions?
To maintain and carehome’sour shoe storage solutions, regularly clean the surfaces with a damp cloth, check for any signs of wear or damage, and make necessary repairs. For materials like wood or metal, follow specific cleaning and maintenance instructions to preserve their appearance and functionality. Ensure all components function properly and adjust any movmultifunctionaleded.
8. What are the benefits of using shoe storage ottomans?
Shoe storage ottomans provide a dual-purpose solution by combining seating with hidden shoe storage. This makes them a practical choice for entryways or living areas where space is limited. They offer a convenient place to sit while putting on or removing shoes, and the hidden compartments keep footwear organized and out of sight.
9. Can DIY shoe storage solutions be as effective as store-bought options?
Yes, DIY shoe storage solutions can be highly effective and customizable. You can tailor your storage solutions to fit your specific space and style preferences by creating your storage solutions. DIY options can be cost-effective and offer a unique touch that complements your home’s decor. However, ensure that DIY solutions are built securely and functionally to avoid issues.
10. How do I choose the best shoe storage solution for my home?
Choosing the best shoe storage solution depends on factors such as the size of your space, the number of shoes you have, and your design preferences. Consider options that maximize space, offer easy access, and complement your home’s decor. Custom and modular solutions provide flexibility and personalization, while wall-mounted and rotating racks offer innovative and space-saving features. Evaluate your needs and select a solution that balances functionality with style.
Conclusion
Optimhome’sShoe Storage for Modern Living
Efficient shoe storage is more than just a matter of organization; it’s a critical element of creating a functional and aesthetically pleasing living space. Choosing the proper shoe storage solutions can make a significant difference in modern homes, where design and practicality must seamlessly blend. The options we’ve explored, from custom cabinetry and mohome’ssystems to wall-mounted racks and innovative rotating racks, offer various ways to tailor your shoe storage to fit your specific needs and style.
Key Takeaways:
Custom Cabinetry provides a bespoke approach, allowing you to optimize space and create a storage solution that perfectly matches your home’s design and organizational needs.
Modular Systems: Offer fleit’slity and adaptability, making them ideal for evolving shoe collections and changing household requirements.
Wall-Mounted Racks: Utilize vertical space efficiently, helping to keep floors clear and reducing clutter in smaller areas.
Rotatingwe’ves: Combine space-saving with easy access, making them perfect for homes with limited floor space.
Storage Ottomans: Provide a dual-purpose solution, combining seating with hidden storage to maximize functionality in tight spaces.
Personalized Solutions: Ensure that your storage is practical, complements your home’s decor, and meets your needs.
In Summary:
The best shoe storage solution for your modern home will depend on your unique space, style, and requirements. Whether you opt for a high-tech, customizable system or a sleek, minimalist design, the key is to find a solution that enhances your home’s functionality and aesthetic appeal. Investing in thoughtful, well-designed shoe storage will create a more organized, efficient, and stylish living environment.
By considering these options and evaluating your specific needs, you can select the perfect shoe storage solution that keeps your footwear neatly organized and enhances the overall ambiance of your home. In the home’s world of modern design, the right choice will ensure that your home remains a harmonious blend of practicality and elegance.